
Before you start
Project Reclaimer is a game of its own, running on the Reclaimer Engine with its own menus. It plays from your installed copy of Halo: The Master Chief Collection (MCC). You don't start MCC or Steam to play.
| You need | Windows | macOS | Linux |
|---|---|---|---|
| System | Windows 10 or 11, 64-bit | macOS 11 or later, Apple silicon | x86-64 or ARM64, with glibc 2.36 or later: Debian 12, Ubuntu 24.04, or newer. Wayland or X11 |
| Processor | 64-bit, with SSE4.2: Intel Core from 2008, AMD from 2011, or newer | Apple silicon | x86-64 with SSE4.2 (Intel Core from 2008, AMD from 2011, or newer), or ARM64 |
| Graphics | A driver with Direct3D 11 (feature level 11_0) | Metal, which macOS has built in | A Vulkan 1.3 driver |
| Sound | Nothing extra | Nothing extra | ALSA's library (libasound2); PipeWire and PulseAudio play through their ALSA plug-ins |
| Disk | About 1 GB free to start with. See below. | ||
- Your own copy of MCC with both Halo 3 Campaign and Halo 3 Multiplayer installed, as Steam installs them.
- On Linux, MCC is a Windows game that Steam installs through Proton. The game finds it in your Steam libraries, native Steam's and Flatpak's alike, and in
~/Games. - On a Mac, Steam can't install MCC. Copy the whole
Halo The Master Chief Collectionfolder from a PC where Steam installed it to~/Games, or anywhere else and show the game where it is. - Optional: Halo 3: ODST installed in MCC too, for ODST's campaign and Firefight, and Halo: Reach, Halo: Combat Evolved and Halo 2 for theirs. Without them, nothing else changes.
- Disk space: the caches the first start builds take about 100 MB. A Forge game with objects from other maps adds up to about 0.5 GB for that map, and Chinese, Japanese or Korean text adds up to 210 MB. You can move the caches to another drive.
Everyone you play with needs their own copy of the game too. Project Reclaimer contains no game files and no game code: it works only from your own MCC.
The main menu's scenery and Forge's dropships, walker and campaign AI come from Halo 3's campaign, so every player has the same Forge objects and can join any game that uses them. To install what's missing in Steam: under Halo: The Master Chief Collection → Properties → DLC, enable Halo 3 (and Halo 3: ODST, Halo: Reach, Halo: Combat Evolved or Halo 2, if you want them). Start MCC once, select Halo 3 Campaign and Multiplayer in its installation settings and let the downloads finish. If they're already installed, use Properties → Installed Files → Verify integrity of game files.
Install and update
Get the package for your system from the download page and check its SHA-256 checksum. The Reclaimer Kit, the customization editor and the remote console are downloads of their own, so get only the ones you want. The game can go anywhere you can write to, but not inside MCC's folder. To run a server, see Host a server.
Windows
- Put it in a folderPut
project-reclaimer-client-version.exein a folder of its own, such asC:\Games\ProjectReclaimer. - Start itDouble-click it. If Windows says it protected your PC, the download isn't code-signed: check its checksum, then choose More info → Run anyway.
macOS
- Unzip itUnzip
project-reclaimer-client-version-macos-aarch64.zip. It runs natively on Apple silicon Macs. - Move itMove
Project Reclaimer.appto Applications, or any folder, before you open it. - Open itApple hasn't checked Project Reclaimer, so macOS blocks the first start. Close the message, open System Settings → Privacy & Security (on macOS 12 or older, System Preferences → Security & Privacy), scroll down to the message about Project Reclaimer, choose Open Anyway and enter your password. Each app you download asks once, and updates don't ask again.
macOS asks once for the microphone, the first time you use voice chat, and for your Documents folder when you update from 0.9, so your files can be copied. It may also ask for the folder MCC is in. Without the microphone you can still listen.
Linux
- Unpack itUnpack
project-reclaimer-client-version-linux-x86_64.tar.gz, or-linux-aarch64on ARM64. - Start itRun
./project-reclaimerin its folder. - Add it to your applicationsOptional. From the same folder:
Shell
mkdir -p ~/.local/share/applications ~/.local/share/icons/hicolor/256x256/apps
sed "s|@INSTALL@|$PWD|" project-reclaimer.desktop > ~/.local/share/applications/project-reclaimer.desktop
cp project-reclaimer.png ~/.local/share/icons/hicolor/256x256/apps/
xdg-mime default project-reclaimer.desktop x-scheme-handler/reclaimer
The last line opens join links in the game; the game also registers them itself each time it starts. The README.txt in the folder has the same lines for the Reclaimer Kit and the customization editor.
Updates
The game updates itself. It looks for a new version when it starts and every six hours while it stays open. When there is one, the main menu shows UPDATE AVAILABLE.
- Choose UPDATEA window shows the release. LATER closes it, and RELEASE PAGE opens the release in your browser.
- Choose UPDATE & RESTARTThe game downloads the new version, checks it against the release's checksums, puts it in place of the one you're running and starts again.
- Your settings, profile, maps and mods stay as they are.
- The program keeps its name and place, so shortcuts, the Dock and your firewall's permission keep working. Credits and the main menu show the version you're running.
- The first start after an update prepares the engine again, once (see First start). The asset library is kept: it's built again only for maps that changed.
- Everyone in a game needs exactly the same version. Update when the menu offers it, and servers you play on need updating too.
Coming from 0.9
An installation of 0.9 offers 0.10 as an update, like any other. It's a big one: Project Reclaimer no longer runs inside MCC. The program is the game now, on a new engine, with new menus and new networking.
- Your files are copied. The first start copies your player folder from
Documents\My Games\Project Reclaimerto the new player folder, checks the copy, and says FILES COPIED once. The originals stay where they were, untouched. If the copy can't be made, for example because a file can't be read or the disk has no room, the game starts with a new profile and says OLD FILES NOT COPIED. It doesn't try again, so copy the files over by hand while the game is closed. - What comes along: your settings, identity and player ID, armor and emblem, game modes, saved Forge maps, playlists, server configurations, mods, finished missions and your rank.
- Saved maps and game modes are converted to 0.10's format, once, under the same names. The originals are backed up first, to
Backups/Before 0.10in your player folder, as 0.9 can't read the new ones, and the menus say MAPS AND MODES UPDATED. - What doesn't: saved films, and a mission's saved checkpoint. Finished missions are kept: choose the mission again on the Campaign page.
- Everyone updates together. The network protocol is new, so 0.9 and 0.10 can't play together, and a 0.9 server can't be joined from 0.10.
- Wine, CrossOver and Proton are no longer supported. On a Mac or Linux, 0.9 ran as a Windows program, so its update brings the Windows build, which tells you where the native build is (WINDOWS VERSION UNDER WINE). Install the native package as above: its first start finds your files, in a Proton prefix too, and copies them.
- Going back: 0.9 keeps using its own folder, with the profile and settings it had. From the copy on, the two save their settings apart.
When MCC updates
The first start keeps a copy of the two files from MCC the engine is translated from, in your player folder. When a Steam update changes them, the game goes on from its copy, so an MCC update doesn't stop you playing and you don't have to wait for a new release.
There is one exception. If your first start comes after an MCC update changed those files, there is no copy to go on from, and the game says which file is another build. That takes a Project Reclaimer release made for MCC's new files. Keep your player folder when you move to another PC and you keep the copy too.
First start
Start the game. It opens fullscreen at your display's own resolution: borderless on Windows, and in exclusive fullscreen on macOS and Linux. To play in a window instead, set Display mode to Windowed (or, on macOS and Linux, Borderless fullscreen) in Settings → Graphics. On Windows, Alt+Enter switches between a window and borderless.
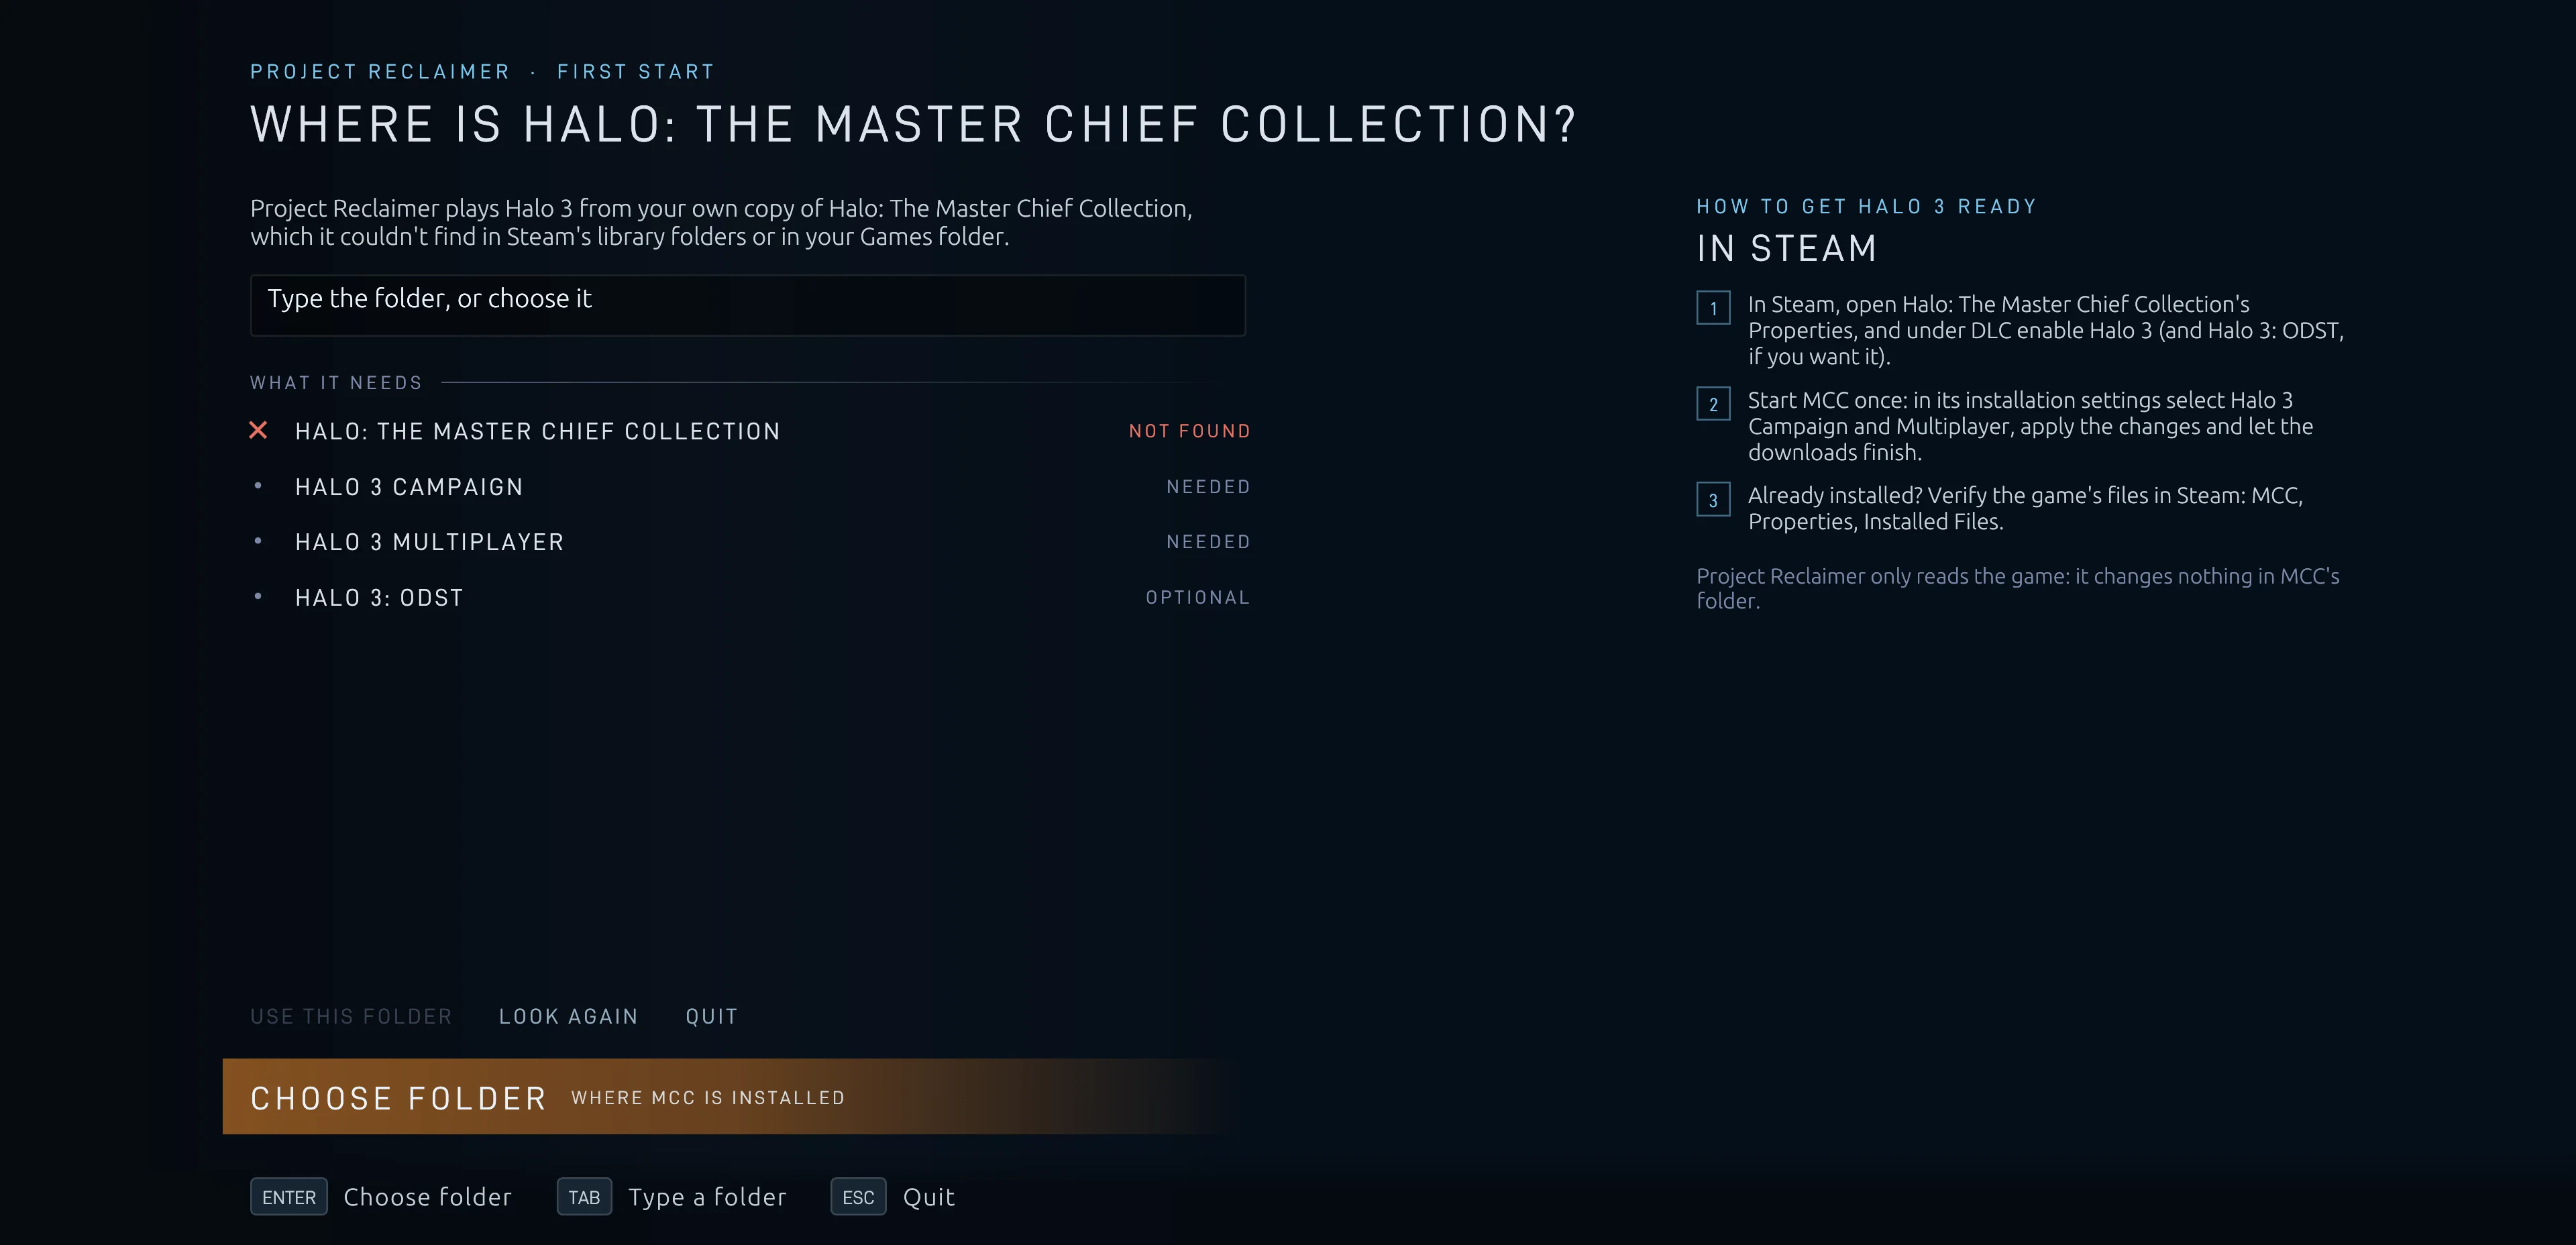
- Finding MCCThe game looks through your Steam libraries, then
~/Gameson macOS and Linux. If it can't find MCC, it asks: WHERE IS HALO: THE MASTER CHIEF COLLECTION? Type the folder under GAME FOLDER or use CHOOSE FOLDER; it's usuallysteamapps/common/Halo The Master Chief Collection. A checklist answers as you go, naming anything missing, and START appears once the folder holds Halo 3. LOOK AGAIN searches once more. The game only reads MCC's folder and changes nothing in it. Settings → Folders changes the folder later. - Preparing Halo 3The screen reads PREPARING HALO 3 FOR YOUR COMPUTER while the game translates the engine from your own copy of MCC into code for your machine. You don't need a compiler or any other tools. It takes a few seconds on a fast computer, and about 10 to 20 seconds on an ordinary four-core PC. The result is kept in the cache, so it happens once, and once more after each update of the game.
- Building the asset libraryThe loading screen reads BUILDING ASSET LIBRARY, and says what it's preparing, while the game collects the Forge objects of every game you have installed and of every mod, and gets the main menu's scene ready. It also makes the game's text fonts from MCC's. With several games installed, a new installation's first start takes a few minutes here. Later starts and updates reuse what was built, and only a map that changed is collected again.
Your community profile
The game makes your profile the first time it starts, with a random two-word name in the old Xbox Live styles, such as “Crimson Jackal” or “xXIronFoxXx”, a service tag to match, and random armor colors and an emblem. Change any of it whenever you like (see Customize and the dice). Your profile is a nickname and a cryptographic key on your own computer. There is no account, email or password.
- Nicknames can be up to 15 characters: letters, numbers, spaces, hyphens and underscores. Servers refuse names made of invisible filler characters.
- Nicknames aren't unique. Servers recognize you by your player ID, which comes from your key. Find it under Settings → Online services → Player ID.
- To change your nickname, open Customize, choose Identity and type under PLAYER NAME. Your player ID stays the same.
- A profile still named Player gets a two-word name once, and you're told. Your player ID, stats and look stay the same, and if you pick Player again afterwards, you keep it.
Your key is in profile.json in your player folder. Keep a copy somewhere safe and treat it like a password: with it you keep your player ID on another computer, and without it you get a new ID, and a server that made you an admin will need the new one. A profile from 0.9 on Windows stays locked to its PC until you rename it there once.
Customize your look
Choose Customize in the main menu, in a lobby or from the Game Menu. Your character stands in the scene, drawn by the game itself, and everything you can change runs down the column on the left. There is nothing to save: what you equip is kept as you choose it (SAVED AS YOU CHOOSE) and applies the next time you join a game, where everyone sees it.
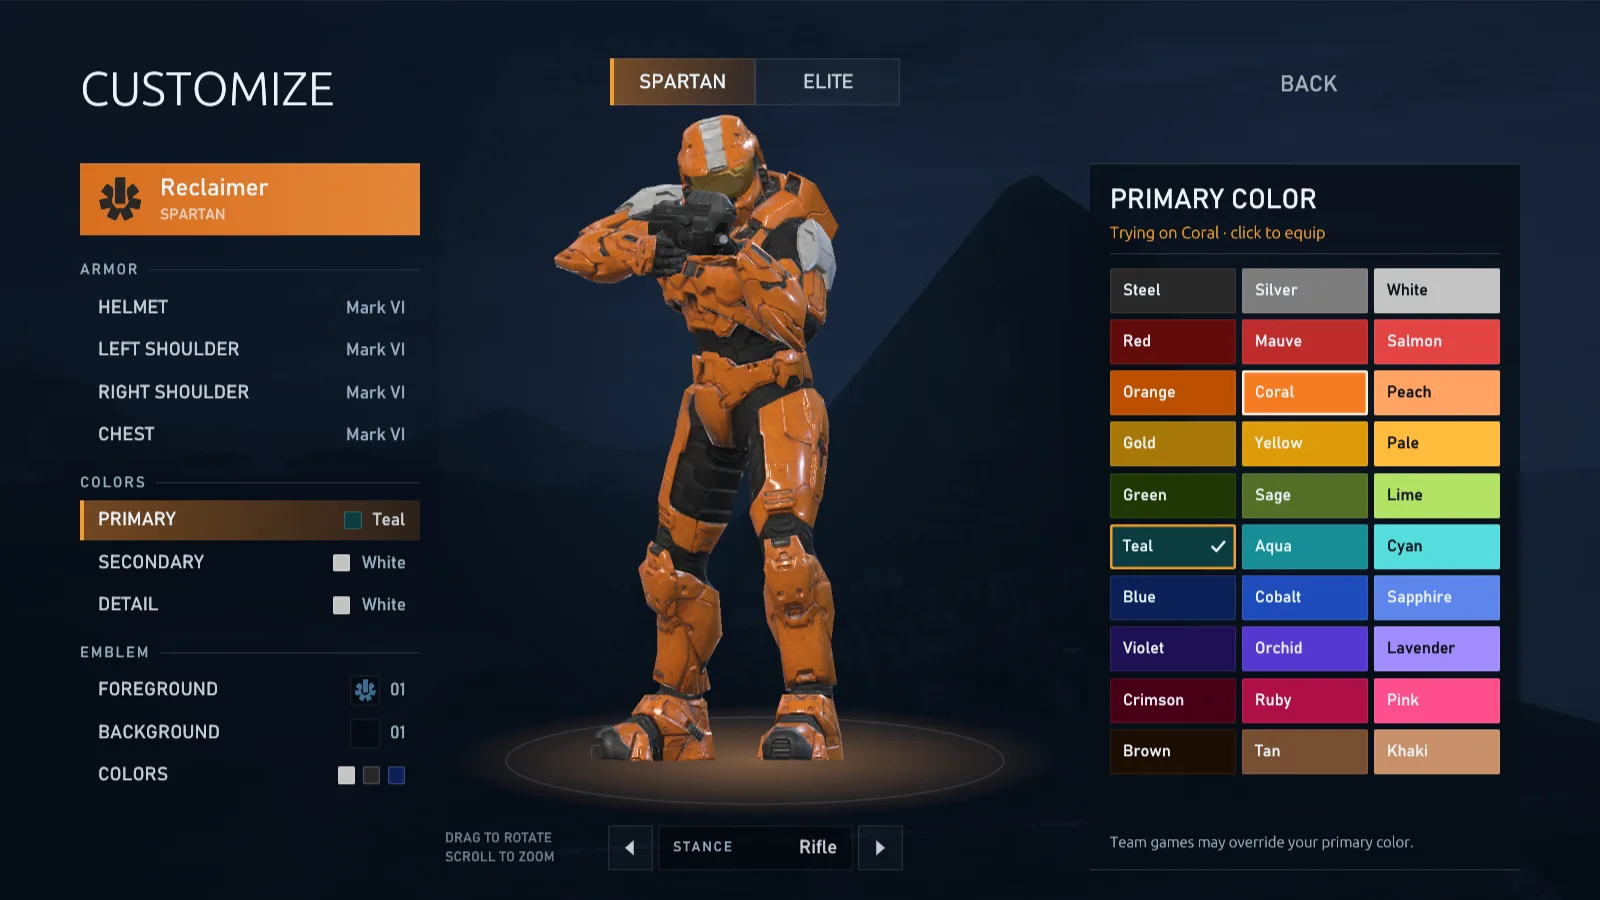
- Armor: Helmet, Left shoulder, Right shoulder, Chest and Helmet fire.
- Colors: Primary, Secondary, Detail, Visor and Armor lights.
- Emblem: Foreground, Background and their Colors, with INVERT and HIDE SECONDARY for the emblem's shapes.
- Identity: your PLAYER NAME, your SERVICE TAG (up to three letters or digits) and your character's VOICE. Each character keeps its own voice.
- Stance: how your character stands in the preview, with a weapon, dual wielding, crouched or taunting, in the game's own idle animations. The arrows under your character step through them too. Only your preview uses it.
- Pick a row and its choices open on the right. Point at a choice to try it on: your character shows it straight away. Click it, or press Enter, to equip it.
- Any color: on a color row, switch from PALETTE to CUSTOM for any color at all. Use the color field, the HUE, SATURATION and BRIGHTNESS sliders, or type a HEX CODE such as
#1E90FF. In team games your team's color replaces your primary and secondary colors, and your detail color stays your own. The emblem's colors take a custom color too. - Visor and armor lights: these take a palette or custom color, and DEFAULT gives the armor back its own. Team colors never replace them, and they stay on bodies after death.
- The camera follows what you're choosing: it closes in on the helmet, turns to show a shoulder and frames the chest. Drag to turn your character, or push the controller's right stick, scroll to zoom, and RESET VIEW brings the camera back.
- Spartan or Elite: Character holds Halo 3's own Spartan and Elite, and lists a character mod's characters the same way. Each keeps its own armor, colors, stance and voice.
- Appearance: the line above your character names the appearance you play as, with CHANGE. See character mods and your ODST trooper.
- With the keyboard or a controller, the arrow keys move through the rows and the choices, Enter or A steps into the choices, and Esc or B steps back out.
- Chat while you change: opened from a lobby, Customize shows the lobby's chat, and T, Y and U open the chat entry there.
- Your Service Record: your card at the top right of the main menu opens Customize. Press the same card again in Customize to see your Service Record; back returns to Customize.
Roll a look: a dice button sits beside the headings. Left-click it for a roll, and click again for another; right-click undoes the last roll, back to the one before. On a controller, Y rolls and X undoes.
- Identity: a whole new look: armor, armor colors (the visor and armor lights too), emblem and emblem colors. On the Halo 3: ODST appearance it rolls which of Alpha-Nine you are, with the helmet on or off; on a customization mod's appearance, it rolls the emblem and its colors, and the mod's armor and colors stay as you picked them.
- An armor row: all four armor pieces. A color row: all five colors, the visor and lights from the same palette.
- Foreground or Background: a new emblem design, keeping its colors. The emblem's Colors: its three colors.
- Your name: the dice beside PLAYER NAME rolls a two-word name with a matching service tag, such as “CJ7”; right-click goes back to the one before.
- The dice only picks armor you have unlocked, and the look dice never change your name or service tag. Helmet fire you have unlocked rolls with the armor and the whole look; locked flames are never touched.
Helmet fire: Helmet fire under Armor shows normal and blue fire, with the colors you haven't unlocked marked (Locked). Pick a color you have unlocked, or Off. Fire colors are unlocks the stats service grants to a player ID, and the host of every game checks yours: a color you haven't unlocked shows as no fire to everyone else, and nobody is removed from a game over their customization. If unlocks can't be verified, valid cached results apply until they expire; without one, every color is available. Your fire also shows on your character in player details, stays on your body after you die, and follows your choice in solo campaign with Custom load order. It never shows in your own first-person view or on a player wearing active camouflage, Elites have none, and every other armor choice stays free to pick.
Nameplates: a player's name shows one plate at the end of its row, in the lobby, on the scoreboard, in player details and in the carnage report. It is their staff plate (Developer or Moderator), else their role on the server (Admin, Mod or VIP), else the host's crown, else the first custom plate they hold and leave checked. Nameplate in Customize has a checkbox for each plate you hold, such as Show staff plate and Show my server role. The host's crown can't be hidden, and nobody can hide another player's plate. Settings → Game Options → Show players' input icons, off to start with, adds a controller or a keyboard-and-mouse icon right after every player's name, your own included.
Characters from character mods
A mod can add characters to play as, each with its own body, armor, colors and physics. They play with every weapon, vehicle and animation of the map they're in. Get character mods like any other mod, from a folder or the Steam Workshop.
- Your appearances: Appearance, above your character in Customize, lists your appearances as a priority list: in a game you play as the highest one the server offers, and the ones under it are fallbacks. Halo 3's own Spartan and Elite are called Halo 3 there and are on every Halo 3 server, so appearances below it only come into play on servers with no Halo 3 characters. Drag them to reorder (with a controller, hold A and use the D-pad), switch a mod off to neither play nor see it, and open one to pick its character, armor and colors.
- Your mods: Settings → Mods → CHARACTER MODS lists every installed character mod, with FOLDER and DELETE. A mod you turn off stays installed, and a server that uses it can still use it when you join.
- Joining: a server's character mods are its cosmetic mods: its card has VIEW COSMETIC, and the join window lists them as USE, NOT USE or REQUIRED, with Remember my decision for this server. The server shares the characters with players who don't have the mod. Players using characters you turn down look like Halo 3's own Spartan or Elite to you, though shots still hit their real shape.
- Hosting: the CUSTOMIZATION section of Host Settings picks the character mods your games include. Players must accept them stops joining players from turning them down, No Halo 3 characters puts every player in one of those characters, and with ODST installed Halo 3: ODST troopers lets players who put ODST above Halo 3 play their trooper. For dedicated servers, see character mods in the hosting guide.
- Game options: each player trait set has Camera (third or first person), Character set and Character, and the team settings give each team a character set; Halo 3's own characters are called Halo 3 among the sets. Random draws again for every life.
- Third person: characters made for third person use a third-person camera on foot where the server allows it (see third person), and weapons zoom in third person too.
- Campaign: set CHARACTERS to Custom load order to play solo or co-op missions as your own character, a mod's included. In co-op the host picks the character mods under CUSTOMIZATION MODS and every player uses those. A mission built with them takes a moment to make, and the lobby waits on GETTING THE MAP READY while it does. A player whose mission still comes out different, for example because their Halo 3 multiplayer maps are another version, leaves before it plays, with a message saying why.
Make a customization mod: the customization editor comes with the game: customization-editor in the game's folder on Windows and Linux, and inside Project Reclaimer.app on macOS. On every system it's also a download of its own, listed under Modding tools on the download page. Open the mod's folder and pick each player character's armor, colors and camera bones; the editor writes the mod's customization.json, and Build packs makes the character packs servers send to players.
Join a game
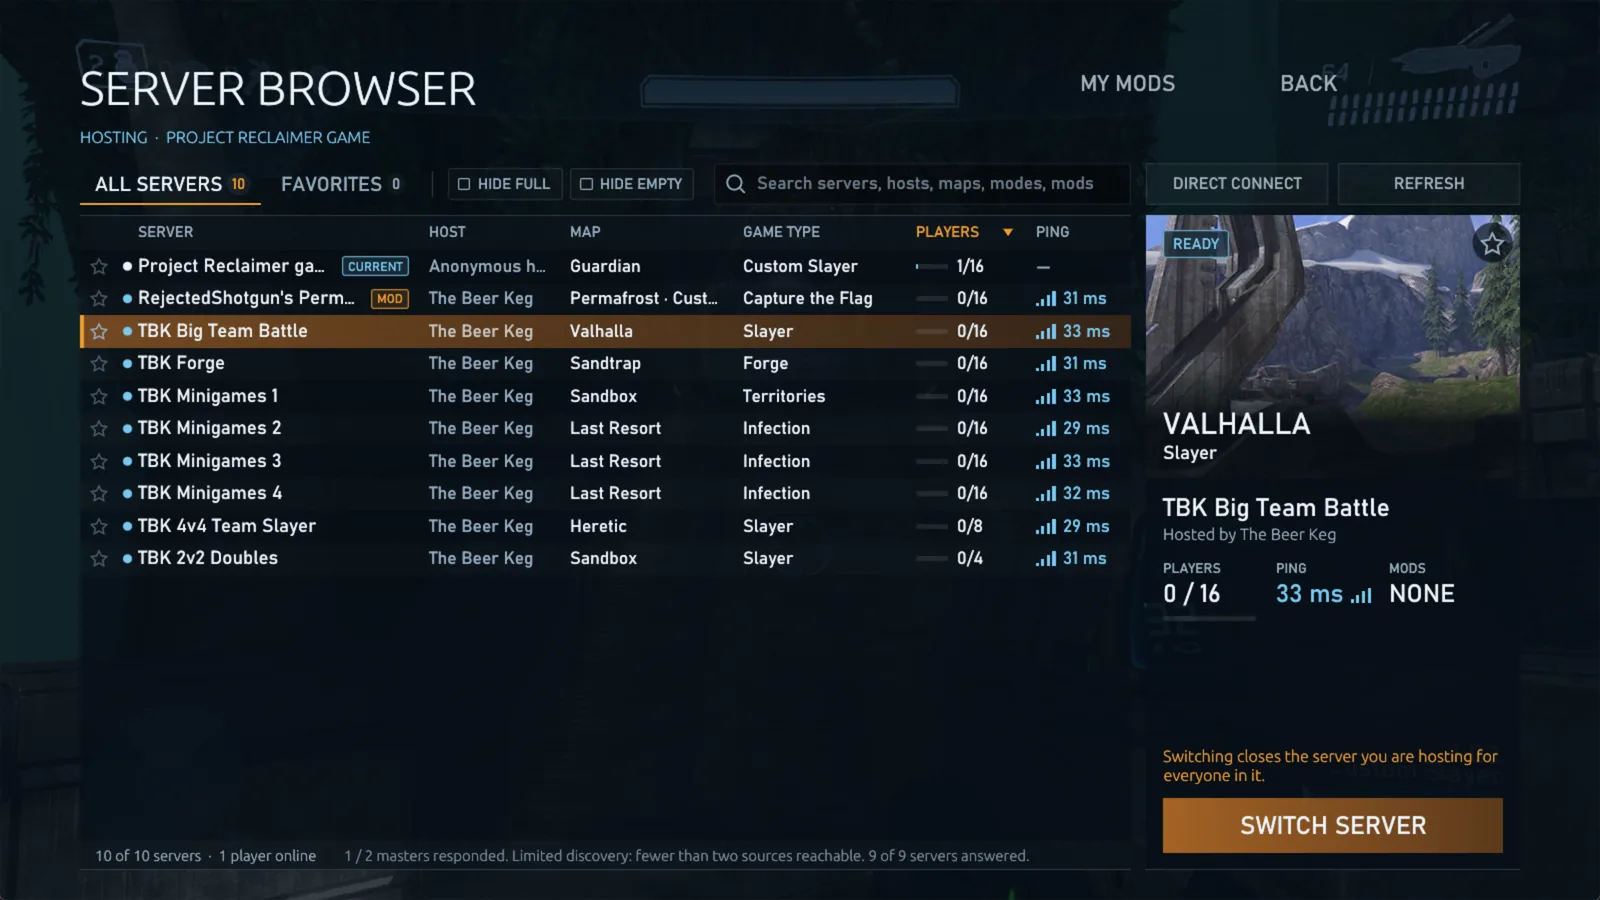
Choose Server Browser in the main menu. It finds community servers on its own, through the project's public master servers and the other masters it learns about, then asks each server what it's playing. So the game, players and ping you see are live, and the list refreshes every time you open it, or with REFRESH.
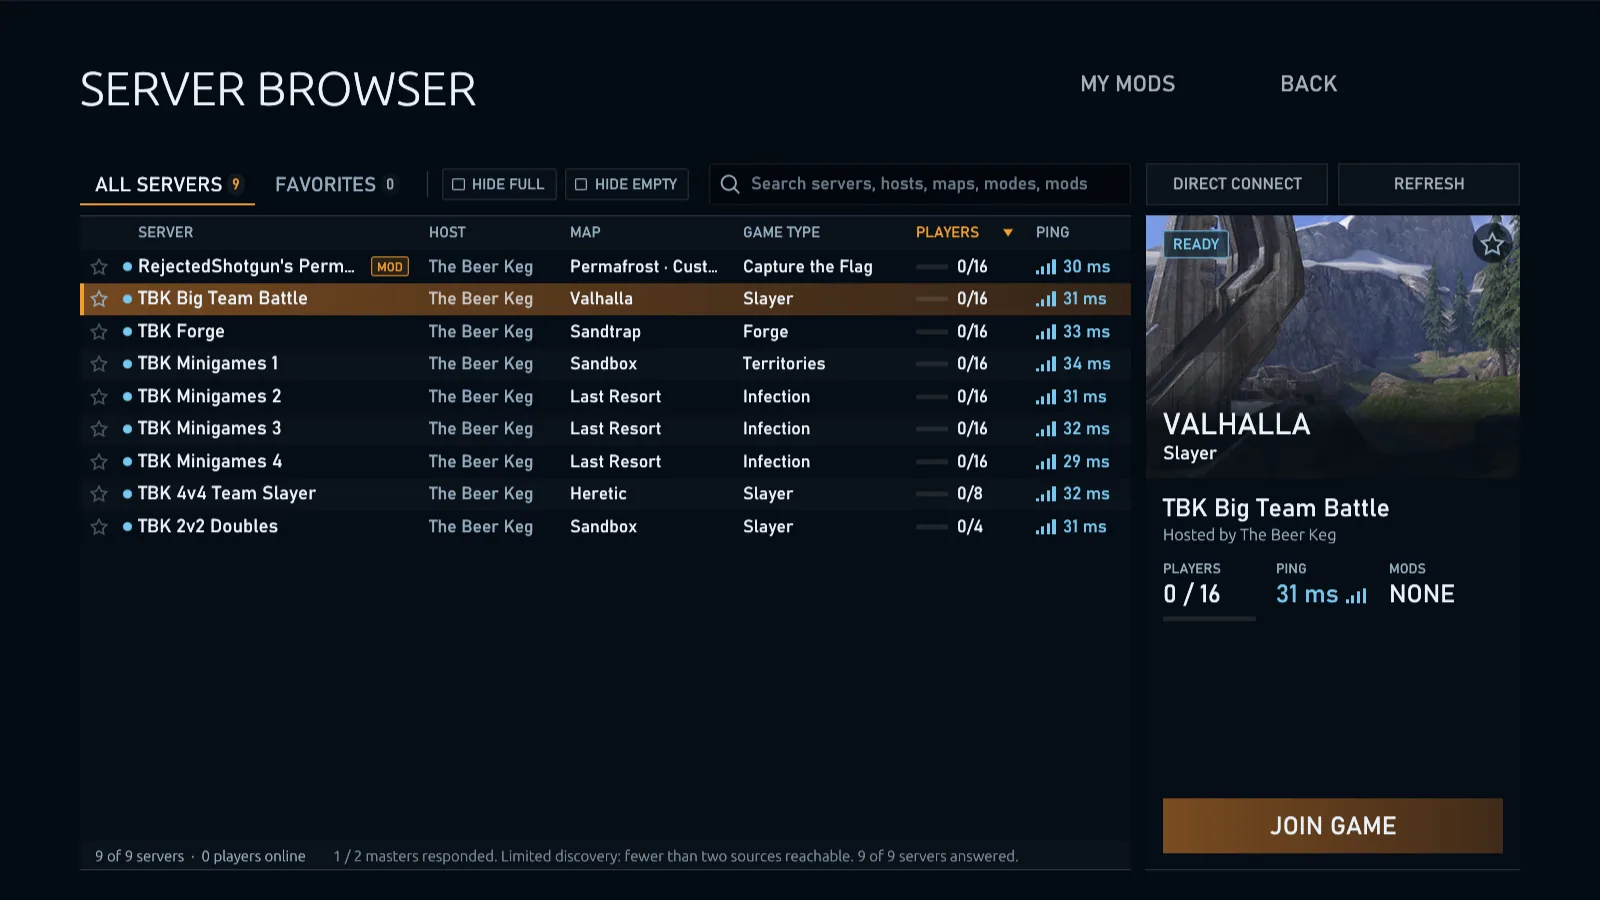
Each server takes one line: a status dot and its name, then the map, game type, players, ping and the server's version. Map and Game type name the map variant and game variant the server is playing, such as a Forge map's own name. An icon before the game type shows the kind of game: a reticle for multiplayer, a hammer for Forge and a ring for campaign. Click a column title to sort by it, and again to reverse.
- Icons after the name: a cube for the mods a server uses, colored by whether you have them; a padlock for a private server; a screen for a game on this PC; and a ringed dot for the server you're playing on. Point at an icon to see what it means.
- Players shows a player icon and the count. The icon is blue while anyone is playing, orange when the server is almost full and red when it's full. A dedicated server's fighting bots count among its players.
- Select a server to see its card beside the list: the map's art, the server's whole name, its host, players, ping, the mods it needs and what's left to download, whether it blocks VPNs, and why it can't be joined if it can't. JOIN GAME is at the bottom of the card, VIEW PLAYERS lists everyone on the server, and VIEW MODS and VIEW COSMETIC list its mods. The selected server's player count stays up to date as players join and leave, without refreshing the list.
- Double-click a server to join it straight away. With the keyboard or a controller, the arrow keys move from server to server and Enter joins the selected one.
- Version: a server lets in only players on exactly its own version. A server on another version shows it in red, is marked OTHER VERSION and can't be joined, and its card says which side needs to update.
- Filters along the top of the list: ALL, MULTIPLAYER, FORGE or CAMPAIGN show one kind of game, with how many servers each has. HIDE FULL and HIDE EMPTY leave out servers with no open slot or nobody playing.
- Filters opens the rest: HIDE PRIVATE SERVERS, HIDE OTHER VERSIONS, servers with or without mods, servers that block VPNs or allow them, and servers under a ping of 60, 110 or 180 ms. CLEAR ALL FILTERS turns them off.
- Search finds servers by name, host, map, game type, mod or player name, so you can type a friend's name to find the server they're on.
- Ping shows signal bars and the milliseconds: green under 110 ms, gold under 180 ms and red beyond. The Tab scoreboard shows ping the same way.
- Why a server can't be joined: FULL, ROOM FOR 2 (say) when your split-screen group doesn't fit, PING LIMIT when your ping is over the host's limit, IN MISSION for a co-op lobby that takes players only between missions, NEEDS ODST for a game of ODST you don't have, and UNAVAILABLE when it didn't answer this refresh.
- Rows appear as servers answer. When the master servers answer but no server does, the list shows an example of what went wrong, and
client.logrecords each server that failed and why. - Servers behind a router: when a listed server doesn't answer directly, your game asks the master servers to introduce it, and the two open a way through their routers for the list, joining and mod downloads alike. The game itself still goes straight between you and the server. Some routers, strict firewalls and shared mobile or ISP connections still block it.
- Games and dedicated servers on your own computer are listed too, even when your router doesn't pass its own internet address back into your home network.
- Star a server to add it to FAVORITES. Favorites are asked directly at every refresh, so they show up even when no master lists them.
- RECENTS, beside ALL SERVERS and FAVORITES, lists the last 30 servers you joined that answer now, the latest first, however you joined them. They're asked directly too, like favorites, and a row's right-click menu removes one.
- Hide a server you never want to see from its row's right-click menu, or with the eye beside its card's star. It moves to HIDDEN, where the same eye shows it again.
- Games on your network: the browser finds games hosted with Network on LAN, and dedicated servers, on every network adapter of your PC, virtual LANs such as Radmin, ZeroTier and Hamachi included. A server on your network says so on its card.
When the server browser stays empty
The browser retries with fewer simultaneous queries when most servers time out, and remembers the working limit. To choose it yourself, open Settings → Online services and set Server query batch size under SERVER DISCOVERY. Automatic clears a remembered limit and lets the browser adapt again.
The browser also keeps a list of the community's master servers that answer, and finds servers through them while the main ones are down. See master servers.
Add a master server (optional)
Masters pass on the other masters they know, so you rarely need to add one. If a community gives you its address:
- Open Settings → Online servicesFind the Master servers list.
- Add the addressOn a line of its own, for example
http://play.example.com:49175or anhttps://address. - Apply and refreshGo back to the Server Browser.
How masters work together, and how to run one for your community: see Master servers.
Direct connect
If a friend gives you an address such as 203.0.113.4:11774, choose DIRECT CONNECT in the Server Browser, enter it and choose CONNECT. This also works for hidden servers that no master lists.
Private servers
A server or lobby with a password shows PRIVATE in the Server Browser. Joining it asks for the password, whether you join from the list, by Direct Connect or with a join link. A wrong password can be tried again or cancelled. Ask the host for the password.
While joining
A join from the menus shows the stage it has reached, with CANCEL to stop it. It's given up only when nothing has moved for 30 seconds. Getting the server's map ready on your PC counts as progress for as long as it takes, checking a mod map included, so a slow PC isn't cut off for being slow.
A server whose game has already started has you get its map ready first, in the lobby, which shows how far along that is (GETTING THE MAP READY). The game waits as long as it keeps getting ready, however big the map or slow the disk.
A multiplayer game begins as soon as the first machine has loaded it. Players whose PC is still loading aren't waited for and aren't removed: they stay connected, wait in the lobby with the map's progress, and come straight into the running game once it's ready, without leaving the server and joining again. Co-op missions and Firefight still start with every player.
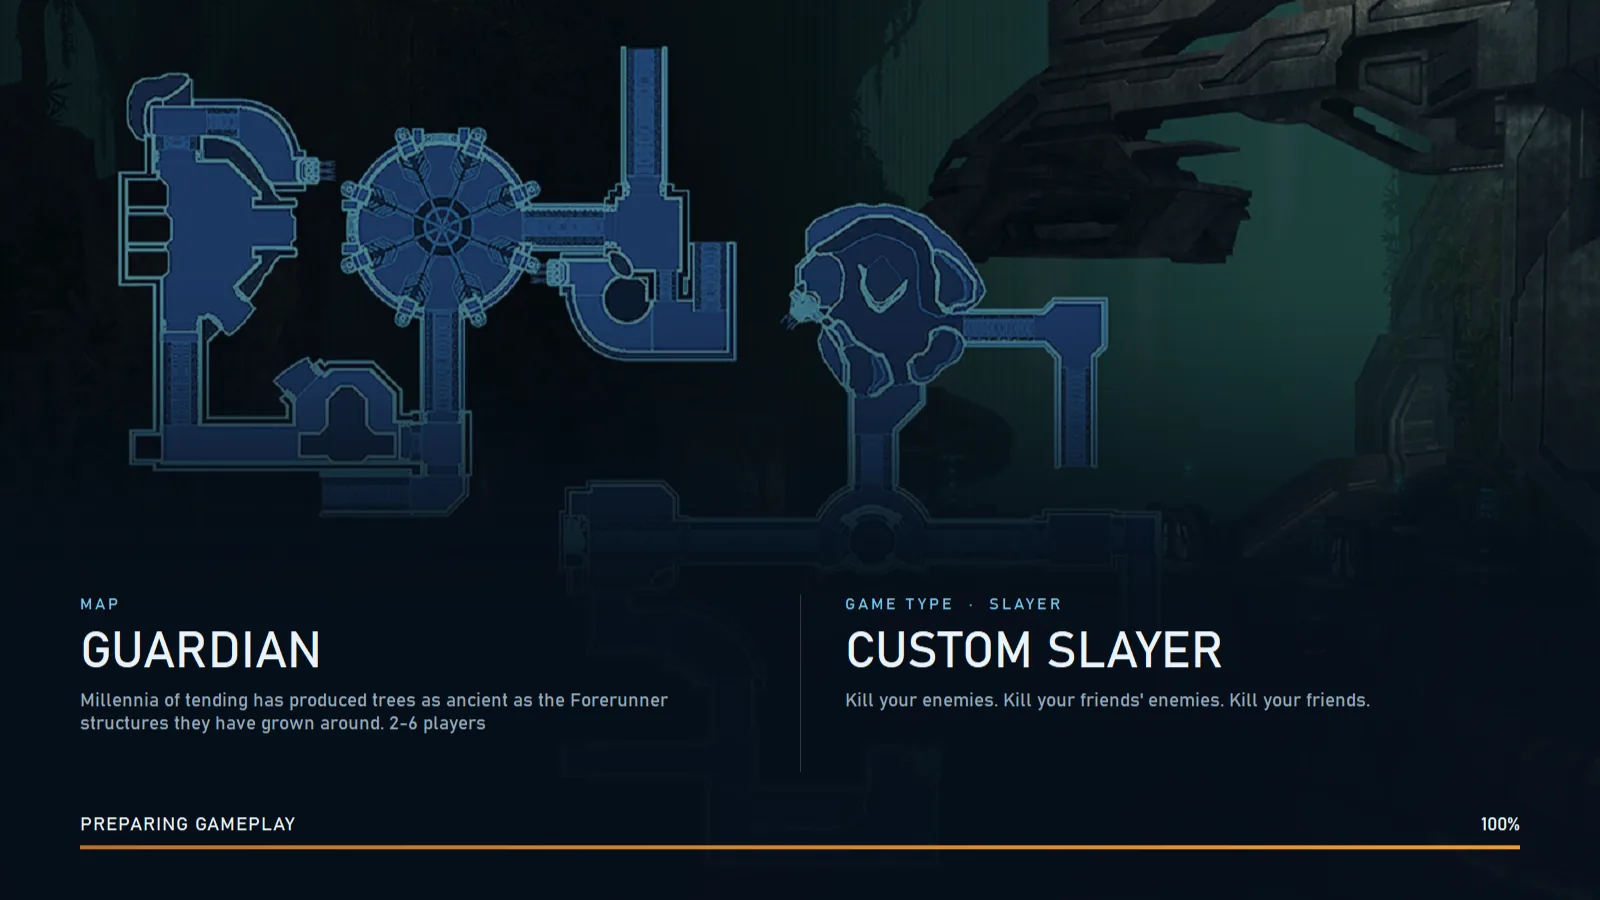
The loading screen shows the map and the game type side by side, with what each is about and who made them, over a progress bar. You can keep chatting while it loads, and a line you're still typing when the game starts stays open. Once you're in, Esc opens the Game Menu, headed with the server's name, with RESUME GAME, SERVER BROWSER and LEAVE SERVER. Leaving takes you back to the main menu, ready to join another game.
Switch servers
You don't have to leave a game to look for another. Press Esc and choose SERVER BROWSER: the list opens over the running game, with your current server marked CURRENT SERVER. Select another server and choose SWITCH SERVER. You leave your game and join the new server. If it uses mods you don't have, they download first while you keep playing.
- If you're hosting, switching closes your game for everyone in it; the browser warns you first.
- In a Forge game of your own, switching leaves Forge: save your map first to keep it.
Join from Discord
While the Discord app runs on your computer, your Discord status shows that you're playing Project Reclaimer, with the game type, map, server and player count, and a link to this site. On a public server, others also get a Join game button: it opens this site's join page, which starts Project Reclaimer and joins your server, or offers the download to people who don't have it yet.
- The status also shows when you watch a film in the Theater, and what you're playing in Halo 3: ODST.
- Discord shows the buttons to others only, so you won't see them on your own status.
- Hidden servers and servers you joined by address never get a Join game button, so their address stays private.
- If Project Reclaimer is already running, a join link switches it to that server. If you're hosting, or alone in Forge, it asks you first (JOIN THIS SERVER?).
- Turn the status or its button off in Settings → Communication, under DISCORD: Show my game on Discord and Join button.
Host a game
You can host a game for friends straight from the game, without setting up a dedicated server.
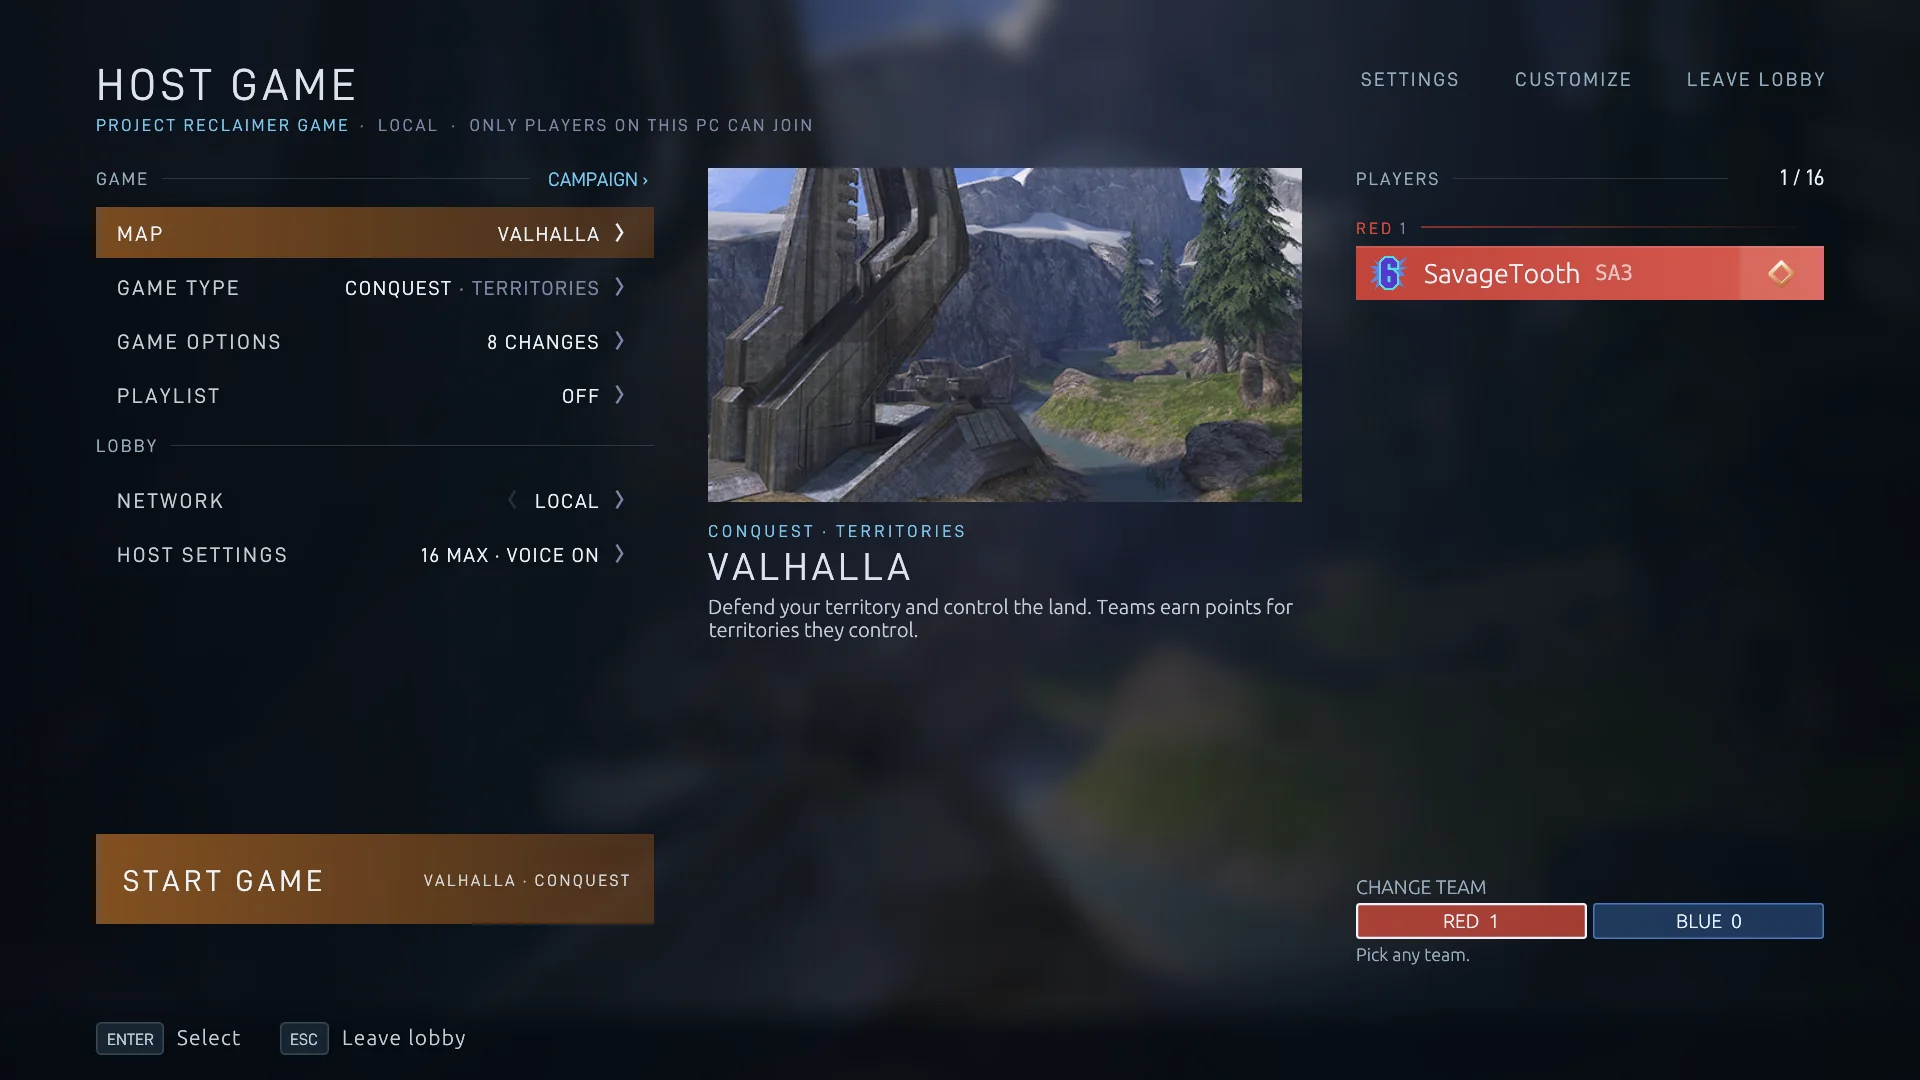
- Choose Host GameThis creates a lobby you control: the setup rows and START GAME in the column on the left, the map, game type and lobby chat beside them, and the players on the right, with the count against the limit.
- Pick a map and a game typeChoose Map or Game Type: every map shows as a card with its picture, every game type with its emblem. Click one to see what it is and its variants, then choose a variant or USE; a double-click uses it straight away. Search finds maps and variants by name. The Map picker has Multiplayer and Campaign tabs, RECENT MAPS and RECENT GAMES bring back what you played lately, and the Game Type picker has a card for Forge and one for Megalo, the scripted game modes such as Gun Game, Flood Infection and Conquest. Right-click a saved map variant to edit its name and description.
- Set the rulesGame Options changes any rule, such as score to win, starting weapons or player traits. It opens as Settings does, with a find field and the sections CHANGES (everything you changed, in one list), the game type's RULES, MATCH, MAP & EQUIPMENT, TRAITS and WORLD & FORGE. SAVE AS VARIANT keeps your changes as a game variant, and RESET ALL takes them back. A starting weapon set to Random gives players a new one every time they spawn.
- Choose who can joinStep Network with its arrows: Local (the default) is limited to players on this computer; LAN opens the game to players on your network; Online lists your game publicly. Host Settings holds everything else, explains each row and previews how your server looks to other players. Choose APPLY CHANGES to use your changes.
- Start the gameChoose START GAME. Everyone in the lobby gets a three-second countdown, and choosing it again cancels. Players who join see the same lobby, with WAITING FOR THE HOST where START GAME would be.
To stop a game early, for example to change the map, press Esc (or Start on a controller) and choose END GAME. Everyone goes back to the lobby together and nobody is disconnected. It works in custom games, Forge and co-op campaign.
The lobby's CUSTOMIZE, SETTINGS, LAST GAME REPORT and LEAVE LOBBY are in the quiet line under the setup. CAMPAIGN beside the Game heading turns the lobby into a co-op lobby, and the Playlist row hands the choice of games to a vote.
Host Settings
Sandbox chooses Map's own, Halo 3 or Halo: Reach. Reach's sandbox replaces Halo 3 and ODST maps' weapons and vehicles with Reach's nearest equivalents; Halo 3's does the reverse on Reach maps. The game type's starting weapons and stock object names in a mode follow the choice too. Equipment, armor abilities and grenades stay the map's own. It has no effect on CE or Halo 2 maps. Everyone joining needs the chosen game's files. On a server use sandbox = "reach" or sandbox = "halo3"; from the command line, --sandbox reach or --sandbox halo3. Megalo tag paths keep the particular weapon they name.
Starting weapon sources: in Game Options, choose a game or mod under Primary weapon source or Secondary weapon source, then choose one of its weapons. A source with at least two choices also offers Random: every spawn draws again from that source, leaving out turrets and other heavy weapons, and the secondary is different from the primary. A mod's content-only map can supply weapons without appearing in the playable map list.
| Section | Rows |
|---|---|
| Server | Server name; Host name, shown under it, your nickname unless you type another, such as your community's; Server password; Max players (1 to 128, 16 to start with, you and any split-screen players included; see 128-player games); Max ping; Classic networking; Tick rate; Anti-cheat |
| Campaign | In a co-op lobby: Wait for slow players; Join missions in progress; Co-op networking; Votes to skip cinematics |
| Teams | Friendly fire; Default variants' respawn points; Round outlasts leavers; Team changing |
| Camera | Camera |
| HUD | Map HUD: every player sees the map's own HUD, whatever character they play. Off, each character brings its own |
| Forge objects | In a Forge lobby: which games and mods give the Forge menu its objects, and what players who join need for them |
| Chat | Voice chat; Global voice, Team voice and Proximity voice; Text chat |
| Mods | Share mod files and Upload limit |
| Customization | Players must accept them, No Halo 3 characters, Halo 3: ODST troopers and your character mods |
| Game modes | Other games' characters, which lets game modes offer characters of the other games you have as classes, and Halo: Reach Spartans and Elites. Players who join then need those games |
| Network | Network (Local, LAN or Online); online, Hidden server; Online setup; Advanced connection, which shows the Public address, the game port and Automatic port forwarding |
Going online
- LAN: with Network on LAN, players on your network find the game in their Server Browser and join it there. Nothing is listed online and your router is left alone. Hosts answer the browser on UDP 44329 as well as the game port, so allow both through your computer's firewall.
- Online hosting tries to open your router's port automatically (UPnP, then PCP). If your router doesn't support that, forward UDP 11774 to your computer, or set another port under Advanced connection. It's the only port your game needs: players join on it and the Server Browser asks it what you're playing. Online setup says how it went, and RETRY ONLINE SETUP tries again once your router or firewall is sorted.
- When a player can't reach your listed game directly, the master servers introduce them and the two sides open a way through their routers, so players can often join without a forwarded port. Some routers, strict firewalls and shared mobile or ISP connections still block it, so UPnP or a forwarded port remains the surest way to host. Hidden games don't use it. See hosts behind routers.
- The lobby shows your server's address under its name, with COPY. Friends can use it with DIRECT CONNECT.
- You can host more than one game on one computer. An Online game whose port another game already holds takes the next free one when your router maps it automatically; Online setup shows the port it uses.
- Your game reports to the public master servers, so it shows up in everyone's Server Browser without them adding anything.
- A Hidden server reports nowhere and is never listed; players can only join with Direct Connect. A game that was listed before you hid it drops off the list within three minutes.
- A Server password makes everyone who joins enter it, and the Server Browser marks your game PRIVATE. Players already in the game stay; clear the password to open it again.
- When the host leaves during a game, another player's game can take over: the loading screen reads SELECTING NEW HOST... until the new host takes the game, then CONNECTING TO NEW HOST... until play goes on. With nobody to take over, players go back to the main menu with a message. For a server that stays up, see hosting a dedicated server.
Classic networking
Multiplayer games you host send each player the players and objects they can see and are near first, and far ones as often as their movement needs, which keeps big games and far vehicles smooth. Host Settings → Classic networking plays them with Halo 3's own networking instead. The players in your lobby take your change at once, and changed during a game, it applies from the next one. Co-op games use their own networking either way.
Tick rate
Host Settings → Tick rate sets how many times a second your PC plays a multiplayer game. 60 Hz is the game's own rate. 30 Hz halves the game's simulation, for a PC short of power, though drawing your view costs the same. Everyone who joins stays at 60 and your view stays as smooth, but the game reacts in steps of 33 ms instead of 17, for you and for them. Co-op and Firefight use Co-op networking instead, and a change counts from the next game.
Wait for slow players
Multiplayer games never wait for a slow player and never remove one: the game begins without them and they come in when their PC is ready. Co-op is different, as a mission starts with everyone. When you change the mission, or one ends and the next loads, every player's game gets it ready first and everyone waits. Host Settings → Wait for slow players, in a co-op lobby, sets how long: 30 seconds to start with (15 to 120 seconds, or As long as it takes). A player whose game still isn't ready after that stops holding the others up, and their game joins again by itself as soon as it is. Nobody is removed. Dedicated servers do the same for co-op games with their load timeout.
Maps and game types from others
Host Game lists the files in the Maps and Game Modes folders of your player folder beside the installed maps and game types: the Forge maps and game types you save, and files other players give you, such as Halo 3 map variants (.mvar) in Maps, and game variants (.bin) and Megalo scripts (.rmeg) in Game Modes. OPEN FOLDER in the Map or Game Type picker opens the folder; after adding files, choose REFRESH.
- Compressed map variants, such as the
legacy_maps in community map packs, load too. A file that can't be loaded says why, such as "Damaged compressed variant data": some files in those packs were damaged when they were renamed, and MCC can't read them either. - ElDewrito's Forge maps (
sandbox.map) and game variants (variant.slayerand the like) go in either folder and convert themselves the next time the game starts or you choose REFRESH. See ElDewrito maps. - Matchmaking variants: Host Game also lists the map and game variants of Halo 3's matchmaking playlists that come with MCC, marked Matchmaking: hundreds of community Forge maps such as Chimera and Cryptic Fate (pick their base map, such as Sandbox or Foundry, under Map) and the matchmaking game types under Game Type. Halo 3's built-in variants show under their own names and descriptions, such as Team Slayer and Mosh Pit, and variants with the same rules list once.
- Your MCC saves: on Windows, the
.mvarmaps and.bingame types you saved in MCC itself, or downloaded from its file share, are listed too, marked MCC, with no need to copy them. Elsewhere, copy them into your Maps and Game Modes folders.
Sprint
A host can let everyone sprint: Game Options → WORLD & FORGE → Sprint is off to start with (Halo 3's own movement), unlimited, or on a stamina meter. Sprint speed sets how fast a full sprint runs (110 to 200% of a player's speed, 150% to start with), and Stamina duration how long a full meter lasts (1 to 30 seconds, 5 to start with). The same section sets Player size (25 to 300%), Exposure and Atmospheric fog.
- To sprint, hold Left Shift while running forward. On a controller, click the left stick while pushing it forward; clicking it while standing still or walking slowly crouches. Running out of stamina ends a controller sprint until you click the stick again. Firing, melee, grenades, equipment and crouching stop a sprint.
- The sprint meter shows for the whole game, low in the middle of your view in your HUD's own colors, and fades to faint while it's full. It hides while you drive or ride a vehicle and while you edit as the Forge monitor.
- Sprinting players lower their weapon, in first person and for everyone watching. Your arms and weapon sway with your stride, and your view stays steady. Sprint sway sets how much.
- Playlists set sprint for each game with the SPRINT choice in the playlist editor; see custom playlists.
Game type rules
Game Options has a RULES section for the selected game type, with a scripted mode's own options first, then the objective settings Halo 3's own custom games offer. Changes travel with the lobby, saved game types and playlist entries, and ElDewrito game types you import keep them.
- King of the Hill: Hill movement moves the hill every 10, 15 or 30 seconds, or every 1 to 5 minutes, or never; Hill order picks the next hill at random or follows the map's sequence. Opaque hill draws a solid hill boundary.
- Capture the Flag: flag type (multi flag, one flag or neutral flag), home flag waypoint, flag at home to score and respawn on capture.
- Oddball: automatic ball pickup and the ball carrier effect.
- Infection: safe havens (off, in sequence or random), respawn when the safe haven moves, and who is infected next. The initial infected count lists the 25% and 50% choices as well as player counts.
- VIP and Juggernaut: how the VIP or Juggernaut is chosen, destination zones with their movement and order, single VIP and ending the round on the VIP's death, allies against the Juggernaut and the delay before a new Juggernaut gets their traits.
- Territories: one-sided territories, locking territories on capture, and respawn on capture.
- Assault: bomb type (multi bomb, one bomb or neutral bomb), the enemy bomb waypoint, respawn on detonation and resetting the bomb when it's disarmed.
Change teams
In a team game, the lobby shows each player in their team's color, with CHANGE TEAM buttons under the players: click a team to join it. The same buttons are in the Game Menu (Esc) during a game. A button you can't use says why when you point at it.
- During a round you confirm the switch first, and it happens when you next respawn, after the usual respawn time: changing teams never gives you a free respawn or gets you out of a fight. Choosing your own team again takes the switch back. The last player on a team can't leave it during a round.
- Who may switch is the game type's Team changing option (Game Options → MATCH: Disabled, Enabled or Balancing only). Balancing only lets players join only a team with fewer players than their own. Host Settings → Team changing can make it stricter for your game (Game type decides, Balanced only or Off); dedicated servers allow only balancing moves unless their host changes it.
- The host, and a dedicated server's admins, move anyone from their player card with MOVE TO, at once, also during a round.
- The host decides every switch, so nobody can pick a team the game doesn't allow. Teams are locked while a game starts and between rounds, and a player waits 2 seconds between changes in the lobby and 10 seconds in a game.
Friendly fire
Turn off Host Settings → Friendly fire and choose APPLY CHANGES so players can't hurt their teammates in multiplayer or their partners in co-op campaign. It takes effect from the next game or mission. Hurting yourself, enemies, AI and free-for-all games keep their normal rules. On, the default, follows the game type's own Friendly fire option. Dedicated servers have the same setting; see friendly fire on a server.
Default variants' respawn points: this row adds the extra respawn points and respawn zones of Bungie's matchmaking default variants to Halo 3's maps played without a saved map: Narrows and High Ground get more respawn points, Orbital its Slayer respawn zones. Nothing else on the map changes, and saved maps and mod maps always play as they are.
Round outlasts leavers: off, as in Halo 3, a game ends at once when a player leaves and too few contenders are left. Turn it on and the others play on until the time or score limit.
Camera
Host Settings → Camera decides how players see their own character on foot in your multiplayer games: First person only (the default), Players choose, where each player switches with their Switch camera key, or Third person only. It applies at once. See third person.
Kicks, bans and anti-cheat
You run your own game the way a dedicated server's admins run theirs, in multiplayer and co-op campaign lobbies. Hosts and admins can't be vote-kicked or booted for betrayals, and betrayal protection covers split-screen players sharing their connection.
- Kick or ban a player: tap Tab to pin the scoreboard, open their row's menu button and use KICK or BAN, or open their details in the lobby.
/kick <name> [reason]and/ban <name> [reason]work in chat too. A ban asks for a second click (CONFIRM). - What it covers: a kick keeps the player out for 10 minutes, and further kicks within a day for 30, 60 and then 120 minutes. Kicks and bans cover the player ID, the IP address and, on Windows, the PC, so a new profile or address doesn't get around them; players who share a PC share its bans too.
- Your bans last: they're kept in
host-bans.jsonin your player folder and apply whenever you host again. Delete a player's entries there to lift a ban. - Player votes: with votes on, the other players get VOTE KICK in the same place (see player votes).
- Anti-cheat: Host Settings → Anti-cheat is on to start with. It rejects game data a normal game never sends, the way cheats kill or damage other players, logs each rejection and kicks the player who sent it. A shot that names a target away from the shooter's aim, which a laggy game can send, is corrected by the host, and counts against the player only when it names a player or a vehicle and the same player sends several within a few seconds. For a game type with unusual physics or scripts, turn it off and choose APPLY CHANGES; a playlist can turn it off for single games instead, with the ANTI-CHEAT switch on a game.
- Max ping: Host Settings → Max ping (50 to 500 ms, or No limit, the default) removes players whose ping to your game is higher as they join, and tells them their ping and your limit. It's checked once, so a lag spike later never removes anyone. Players on your own computer are never limited.
128-player games
Halo 3 was built for 16 players. A multiplayer game on the Reclaimer Engine holds up to 128: two teams of 64, or a free-for-all for all 128, in Forge too. Everyone is a real player in the same game. The engine page has the other limits.
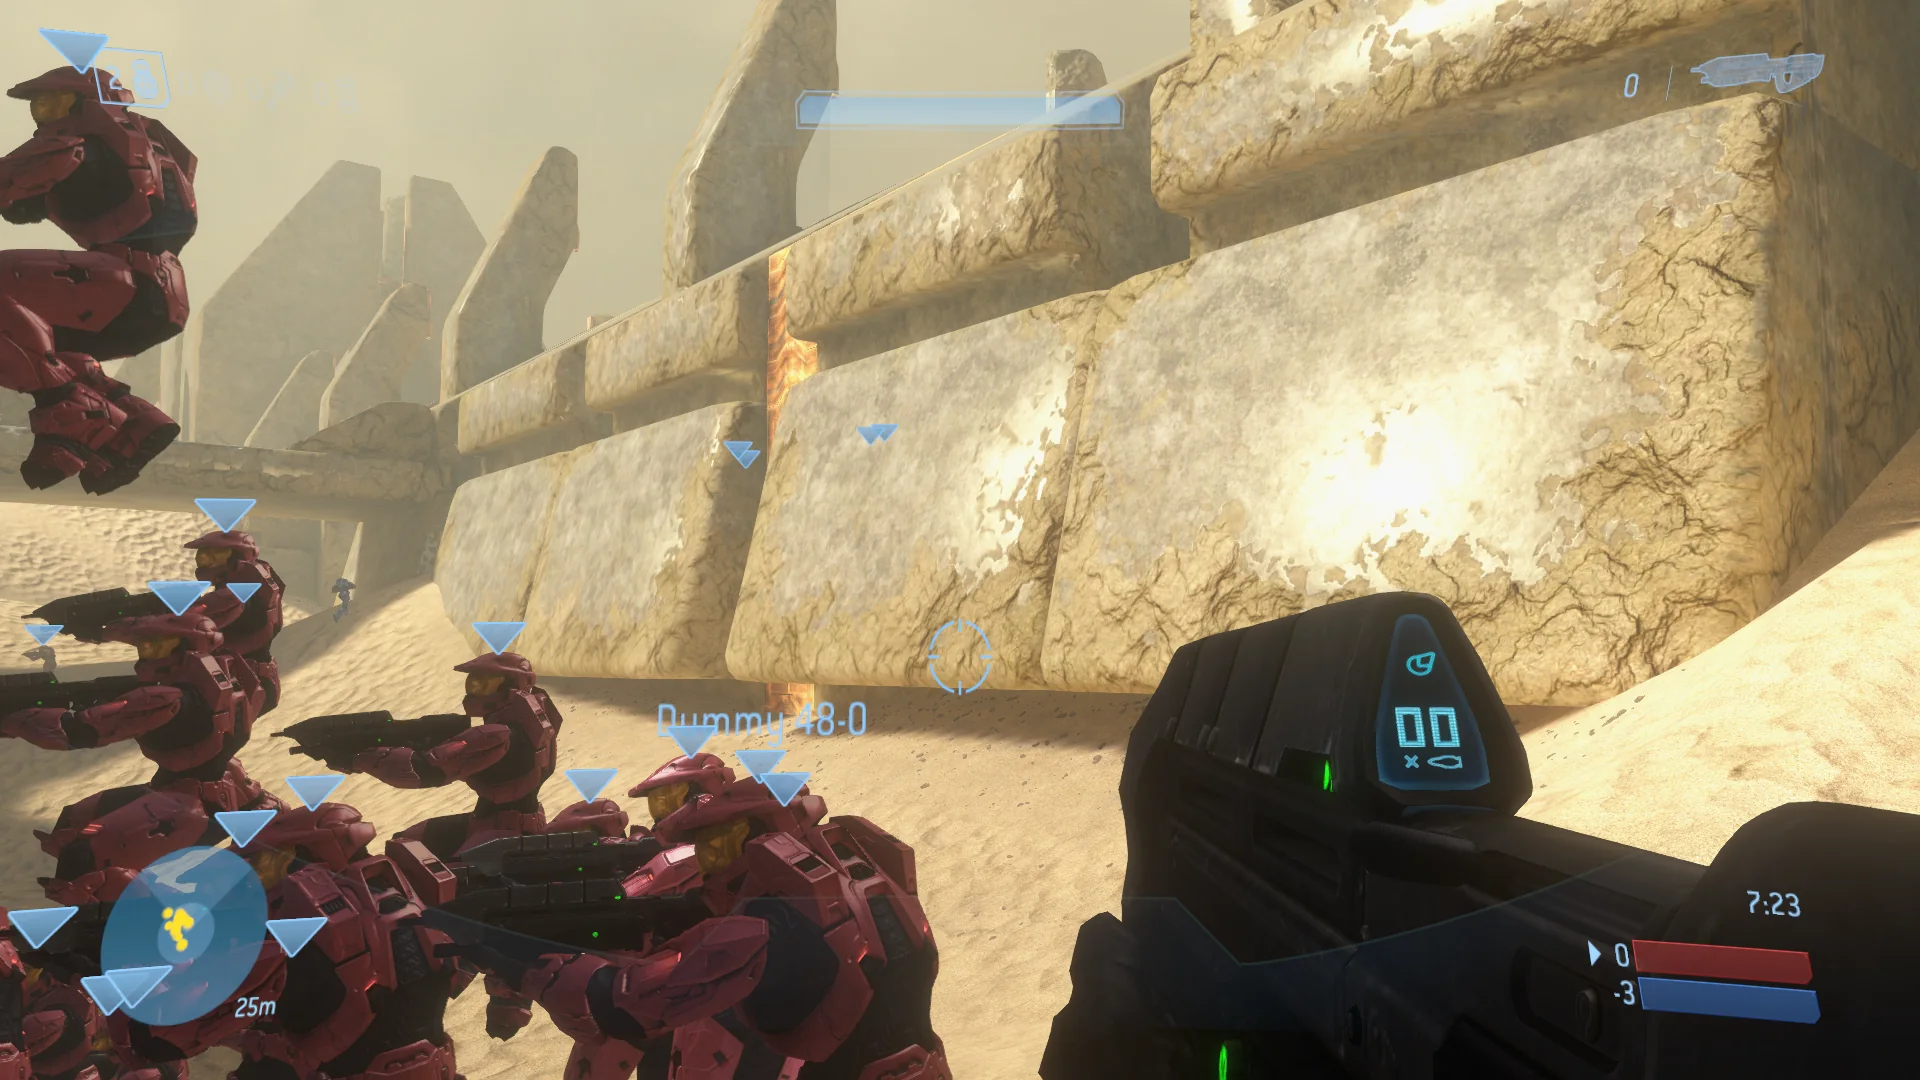
- Raise the limitIn your Host Game lobby, open Host Settings, set Max players to as many as 128 and choose APPLY CHANGES. You and any split-screen players on your computer count toward it.
- Go onlineSet Network to Online. Players find your game in the Server Browser, which shows how many it holds. A big game sends more to every player than a small one does, so host it on a fast, steady connection, or run a dedicated server for up to 127.
- Pick a gameA big map suits a big game. Team games take two teams of 64; a free-for-all gives every player a team of their own.
- Every player has a row. The Tab scoreboard uses up to two full-size columns, each team with an equal share of the board and its own scrolling rows. Scroll with the wheel over a team or drag its scrollbar. The lobby's player list, the in-game roster and the carnage report scroll too.
- Everything counts all 128: chat, voice, player votes, muting, kicks and bans, ranks and stats.
- Everything still shows in crowded games: the engine has far more room than Halo 3 for what players share, such as vehicles, weapons, grenades and a map's moving parts, and for effects, so a big fight's muzzle flashes and explosions don't stop a map's own lights and effects from appearing.
- Slower PCs keep the tick rate. In a game of more than 16 players that you joined, players, vehicles and weapons too far away to make out, or outside your view, update their animation less often on your PC; looking through a scope brings it back. A PC that still falls behind first updates other players and vehicles 30 times a second, then 10, starting with those you can't see or that are tiny on your screen. Only when that isn't enough does it stop simulating players and vehicles off your screen and follow the host's word for them: empty parked vehicles first. A player you can clearly see is still updated at least 30 times a second with their animations, nothing on your screen stops being simulated, and anything close enough to touch you is always simulated in full. Beyond that, the frame rate dips instead. A frame-rate limit's wait for the next frame never counts as falling behind. Show tick and culling details shows how many your PC simulates. Games you host, servers, campaign, Forge and games of 16 players or fewer are unchanged.
- To turn either off, set
"distant_poses": falseor"followed_objects": falseunder"networking"inNative/engine-settings.jsonin your player folder. - Everyone needs the same version. Players and servers on different versions can't play together, and the join error says which side needs to update.
- Objective game types such as Infection, King of the Hill, Territories and VIP are ready for 128 players but have had little play past 16, so tell us what you find. Halo: Reach's game types keep running in games of up to 128 players.
- Campaign co-op holds 16, whatever Max players says.
Campaign
Choose Campaign in the main menu to play Halo 3's missions from your installed game, alone or in co-op, as the Master Chief and the Arbiter or as your own Spartan or Elite. Campaign mods, Halo 3: ODST's campaign and Reach's, Combat Evolved's and Halo 2's play on the same page: Q and E (LB and RB) switch between campaigns, and a click on the campaign's name lists them all, in release order: Halo: CE, Halo 2, Halo 3, Halo 3: ODST, then Halo: Reach, each with its mods' campaigns under it.
Solo
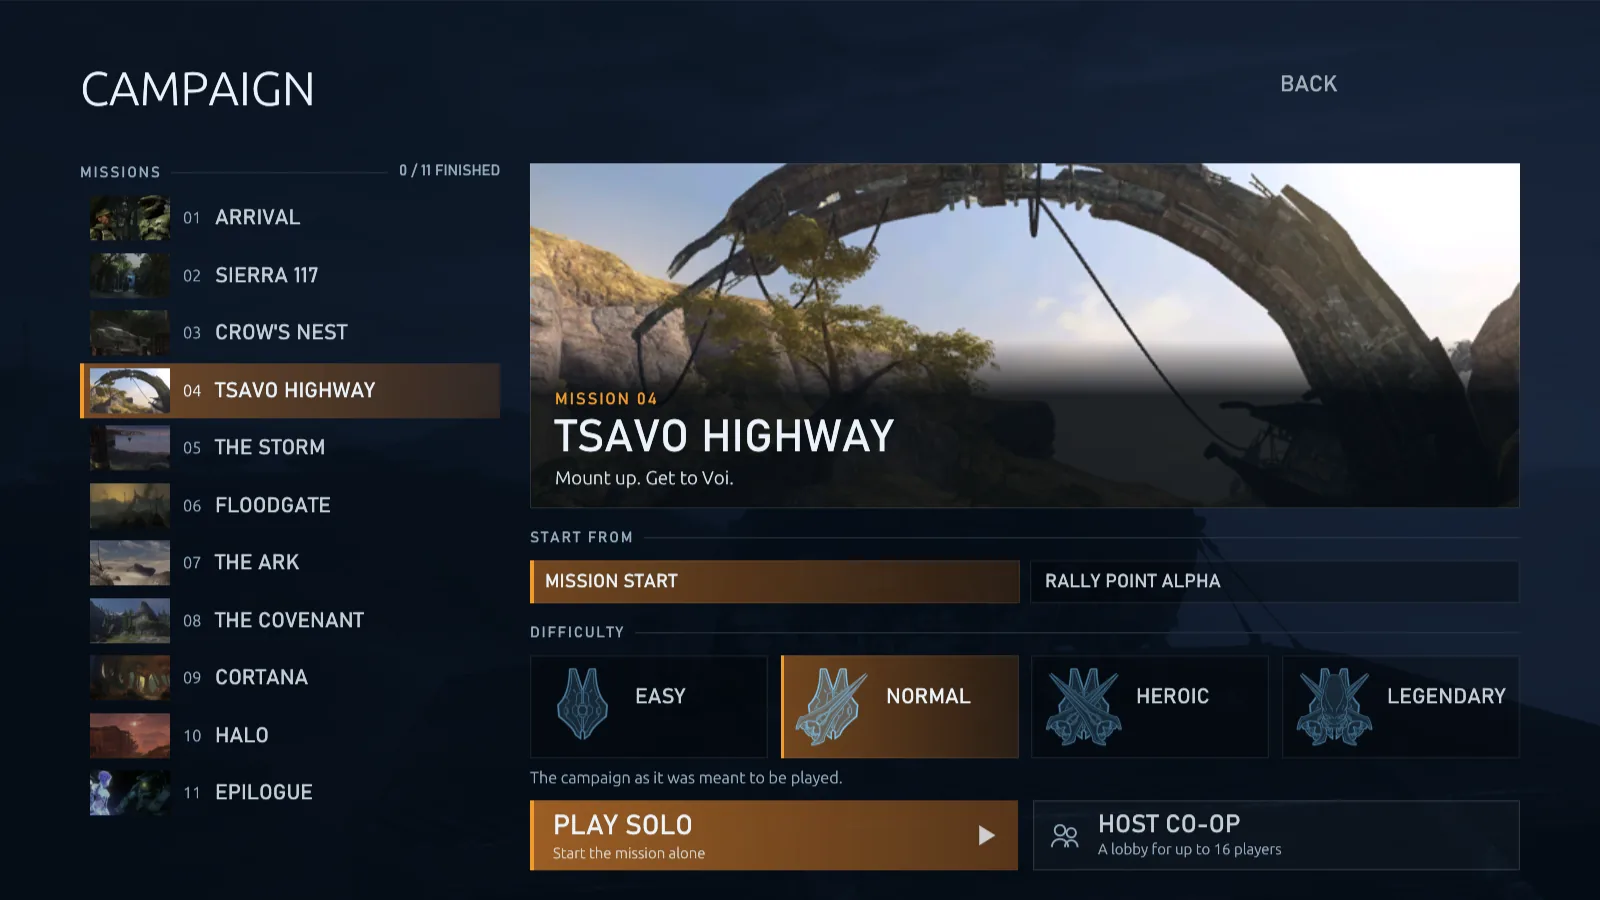
- Pick a missionThe missions go down the column, each finished one with the emblem of the hardest difficulty you finished it on. Pick a difficulty on the right: Easy, Normal, Heroic or Legendary.
- Set it upSTART FROM shows where the mission starts and how many starts it has (2 / 7): its arrows step through them, and a click lists them all, with what each one is. CHARACTERS picks who you play as: the campaign's own cast, the cast in your armor and colors, or your own character. MODIFIERS changes the enemies, the skulls and sprint.
- Choose PLAYWith PLAY set to SOLO, the mission loads like any game.
- Keys: ↑ and ↓ move through the missions, → goes to the setup, up and down walk its rows, and left and right change the row you're on.
- Your progress is saved. The game keeps your last checkpoint, so RESUME and the mission's name, over PLAY, pick up where you left off, even after you close the game, with the characters you chose. Finished missions are remembered per difficulty.
- Missions follow on. When you finish a mission, the next one loads straight away. After a campaign's last mission, CAMPAIGN COMPLETE shows before the main menu.
- Esc pauses a solo mission. The Game Menu has REVERT TO CHECKPOINT, RESTART MISSION and QUIT MISSION.
- Skip a cinematic with Space, or A on a controller, wherever Halo 3 lets you.
- More seats: players can ride in the transport Warthog's three rear seats and the Scorpion's four side seats, with either choice of characters, in campaign and in multiplayer.
Characters
CHARACTERS, on the Campaign and Firefight pages and in their co-op lobbies, has three choices. A new page starts on the first, and in co-op the host chooses for everyone.
- Original characters: the campaign as it was, with the mission's own cast, armor and colors.
- Customized game look: each player keeps their role in the mission and wears the armor and colors they picked on that game's Customize page. On Halo 2's missions the Master Chief wears the colors you picked for Halo 2's Spartan, Halo: Reach keeps Noble Six, and ODST keeps the story's trooper with your helmet choice.
- Custom load order: you play as your own character: the Spartan or Elite you made in Customize, or a character mod's character, taken from the highest appearance in your list that the game offers. On Halo 2's missions you play your own Spartan or Elite with Halo 2's weapons and vehicles, and a Spartan can play the Arbiter's missions too. Only this choice offers customization mods.
The choice stays with the mission through co-op, saved games and films.
Co-op
- Open a lobbyOn the Campaign page, step PLAY to CO-OP and choose it, with the mission and difficulty you want. This opens a campaign lobby.
- Let players inSet Network to Online to list the lobby publicly, or to LAN for players on your network. Players join it from the Server Browser like any game, or by Direct Connect.
- Set up and startIn the lobby, change the Mission, Start From, Difficulty, Characters and Modifiers, then choose START GAME.
- A co-op lobby takes up to 16 players, with up to four in split screen on each computer; split-screen players count toward the 16. The missions look after every player, not just the first four: when a mission brings stragglers forward, everyone comes along. With Original characters, players past the fourth follow the story's four.
- Co-op networking: Host Settings → Co-op networking has three modes. Lockstep 60 (MCC), the default, plays as Halo 3 does, at MCC's 60 ticks a second: every game runs the whole mission and waits for every player's input. Lockstep 30 (Xbox 360) does the same at the Xbox 360's 30. Host-authoritative, experimental, has your game run the mission and its enemies while each player's game moves their own character at once, as in multiplayer, so a slow connection no longer slows everyone. The players in your lobby take your choice at once and players who join play it too; changed during a mission, it applies from the next one.
- With Custom load order, everyone in the game plays as their own character, and everyone sees each other's armor and colors.
- Co-op missions start from the mission start or a rally point: only you have your saved checkpoint, so it's for solo play.
- Between multiplayer and the campaign: choosing CAMPAIGN in a multiplayer Host Game lobby and picking a mission makes it a co-op lobby, and START GAME starts the mission. The host can go back with MULTIPLAYER next to the mission, also in a lobby that opened as co-op, and Host Game opens in multiplayer again afterwards.
- No more stray grenades from your partners: the host can turn off Friendly fire so co-op partners can't hurt each other. Damage to or from AI, friendly Marines included, is unchanged.
- Join a mission in progress: players can join while the lobby is playing. Everyone already playing keeps playing, with no pause and no return to a checkpoint. Only the newcomer waits, on their own loading screen (JOINING THE GAME IN PROGRESS), and someone who joins during a cutscene waits until it ends (JOINING AFTER THE CUTSCENE). A join that can't catch up goes back to the menu with a notice. To keep a mission to the players who started it, the host turns off Host Settings → Join missions in progress: players can then join only between missions, the Server Browser marks the lobby IN MISSION, and a player who drops out mid-mission waits for the lobby too.
- Leaving doesn't interrupt anyone: when a player leaves, the others play on where they are, and a player who leaves can rejoin straight away, as themselves.
- If the host leaves, the player with the newest checkpoint takes over at that checkpoint, enemies and scripts included, and the others follow. Before any player holds a checkpoint, the game ends with “The host left the game”.
- Skipping a cinematic is a vote: each player presses skip (Space, or A), the corner shows the count, such as SKIP 1/2, and the cinematic is skipped once enough players have voted. Host Settings → Votes to skip cinematics sets the share it takes, from 20% to 100% and 33% to start with, rounded up to a whole player. Players who leave or haven't spawned don't hold the vote up, and a game of one player skips on the press.
- Slow players: when the mission changes, everyone waits while each player's game gets it ready. Wait for slow players sets for how long.
- The host can revert to the last checkpoint or restart the mission for everyone from the Game Menu. Reverting after someone joined brings the new players along.
- Everyone who finishes a mission has it recorded as finished, and the next mission starts for the whole lobby.
- Campaign games don't count toward your multiplayer rank or stats.
Campaign servers: dedicated servers can run co-op campaign too, with no player as host. Find them in the Server Browser, under its CAMPAIGN filter, or join one by Direct Connect, as you would a co-op lobby. The server sets the campaign, mission, difficulty, characters and modifiers: Halo 3's, Halo 3: ODST's, Halo: Reach's, Halo: CE's or Halo 2's, or a mod's campaign, which players with the mod installed join as any co-op server. On ODST's and Reach's campaigns a server can let players play as their own characters too. It starts once enough players are in, goes on to the next mission by itself (on ODST's, back to Mombasa Streets after a flashback, as the game does from the menus), and after the last one starts again from its first. Players can join a mission under way and catch up with the server's game. A server's checkpoints aren't saved for you to resume, and a server that restarts begins its mission again. To run one, see campaign co-op in the hosting guide.
Campaign modifiers
Choose MODIFIERS on the Campaign page or in a co-op lobby. It opens a page laid out like Game Options, with a find field, sections down the column and what each one does on the right. RESET ALL puts everything back, and BACK goes back to the mission.
- SCORING: points and medals for kills, with the time and the multiplier on screen, as Halo 3's campaign scoring. Team adds every player's points together, and Free for all keeps each player's own.
- ENEMIES: Enemy health (shields included) and Enemy damage each take a multiplier from 0.25× to 10×, on top of the difficulty you chose. Health per extra player and Damage per extra player add 0 to 100% for every player after the first, split-screen players included, so a full lobby can face tougher enemies than a pair. The page shows what you get with 4 players.
- PLAYERS: Everyone in third person shows every player their own character from behind, and Players choose their camera lets each switch with their Switch camera key. Sprint lets every player sprint by holding Sprint while running forward, as in multiplayer: Sprint speed runs from 110% to 200% of a player's speed (150% to start with), and Stamina duration from 1 to 30 seconds (5 to start with) or Unlimited.
- GOLD SKULLS: Iron, Black Eye, Tough Luck, Catch, Fog, Famine, Thunderstorm, Tilt and Mythic. SILVER SKULLS: Assassin, Blind, Cowbell, Grunt Birthday Party and IWHBYD. Each says what it does. Blind hides the sprint meter too.
- CHARACTERS: with Custom load order chosen, the customization mods whose characters players may play as in the missions, and No Halo 3 characters; with ODST installed, Halo 3: ODST troopers. CUSTOMIZATION MODS on the Campaign page opens the same section.
- MODIFIERS on the Campaign page reads Custom while you play with anything but the defaults.
- Modifiers stay with the mission through checkpoints, RESUME and the next mission. In co-op everyone plays with the host's.
- Halo 3: ODST's campaign has this page too, with ODST's own fourteen skulls.
Campaign mods
Campaigns made with MCC's mod tools play on the same Campaign page, both mods that change Halo 3's missions and mods with missions of their own. Subscribe to one on the Steam Workshop, or put its folder, the one with CampaignInfo.json, in the Mods folder of your player folder.
- One list of campaigns. Click the campaign's name at the top of the column for a window of the games you have installed, in release order, each with the mods made for it under it, its art, how many missions it has and how many you've finished. Q and E step through them.
- Its own missions and progress. A mod's missions, pictures, starts and your progress through it are its own, kept apart from Halo 3's, and a finished mission goes on to the mod's next one.
- Co-op: players who join your lobby without the mod get it the way they get a multiplayer mod: through the Steam Workshop, or from you when Host Settings → Share mod files is on. They download the whole campaign once, so the lobby can go on to the next mission. While players are in your lobby it keeps to that campaign.
- Mods turned off in Settings → Mods aren't listed. Several campaign mods that change the same Halo 3 missions can be installed side by side.
- Custom load order doesn't work on every mod's missions: some can't take the multiplayer characters, and load with the campaign's own characters instead.
Halo 3: ODST
Halo 3: ODST's campaign and Firefight play on the same engine as Halo 3, alone or in co-op with up to 16 players, from ODST's own files in MCC. Leaving brings you back to the page you came from.
- What you need: Halo 3: ODST installed in MCC, beside Halo 3. It's optional: without it, nothing changes and the main menu has no Firefight. To install it, enable it in Steam under Halo: The Master Chief Collection → Properties → DLC and let its download finish. A Mac copy of MCC needs its
halo3odstfolder too. - ODST has what Halo 3's games have: skulls, sprint and story characters in the campaign, Firefight options, films in the Theater, co-op lobbies that switch between Halo 3 and ODST, proximity voice, the vote keys, lower weapon, your HUD and weapon position settings, and the Server Browser from the Game Menu.
- ODST's mods play too: a mod's maps join the missions or Firefight maps, and a mod's own campaign or Firefight is listed under ODST's in the games window.
ODST's campaign
- Open the Campaign pagePress E, or click the campaign's name and choose Halo 3: ODST. Its eleven missions, from Prepare to Drop to the Epilogue, go down the column, each with the emblem of the hardest difficulty you have finished it on.
- Pick a missionChoose the difficulty, and where it starts under START FROM, as on Halo 3's page.
- Set the modifiersMODIFIERS opens the same Campaign modifiers page as Halo 3's: enemy health and damage, scaled per player, ODST's fourteen skulls, and Sprint with its speed and stamina.
- Choose the charactersCHARACTERS has the same three choices as Halo 3's page. Original characters are the mission's own: the Rookie in the city, Buck, Dutch, Mickey or Romeo in their flashbacks. Customized game look keeps the story's trooper with your helmet choice, and with Custom load order everyone plays as the trooper they chose in Customize.
- Choose PLAYSet to SOLO, or CO-OP for a co-op lobby.
The game keeps your last checkpoint from a solo game, and RESUME picks up from there. Only solo games keep a checkpoint to continue from.
Firefight
With ODST installed, the main menu has Firefight, a page of its own. Its ten maps go down the column: Crater, Crater (Night), Lost Platoon, Rally Point, Rally (Night), Security Zone, Alpha Site, Windward, Chasm Ten and Last Exit. Pick a map, a GAME TYPE from every Firefight game type MCC has, and a difficulty, then PLAY to hold out alone, or set it to CO-OP for a lobby of up to 16.
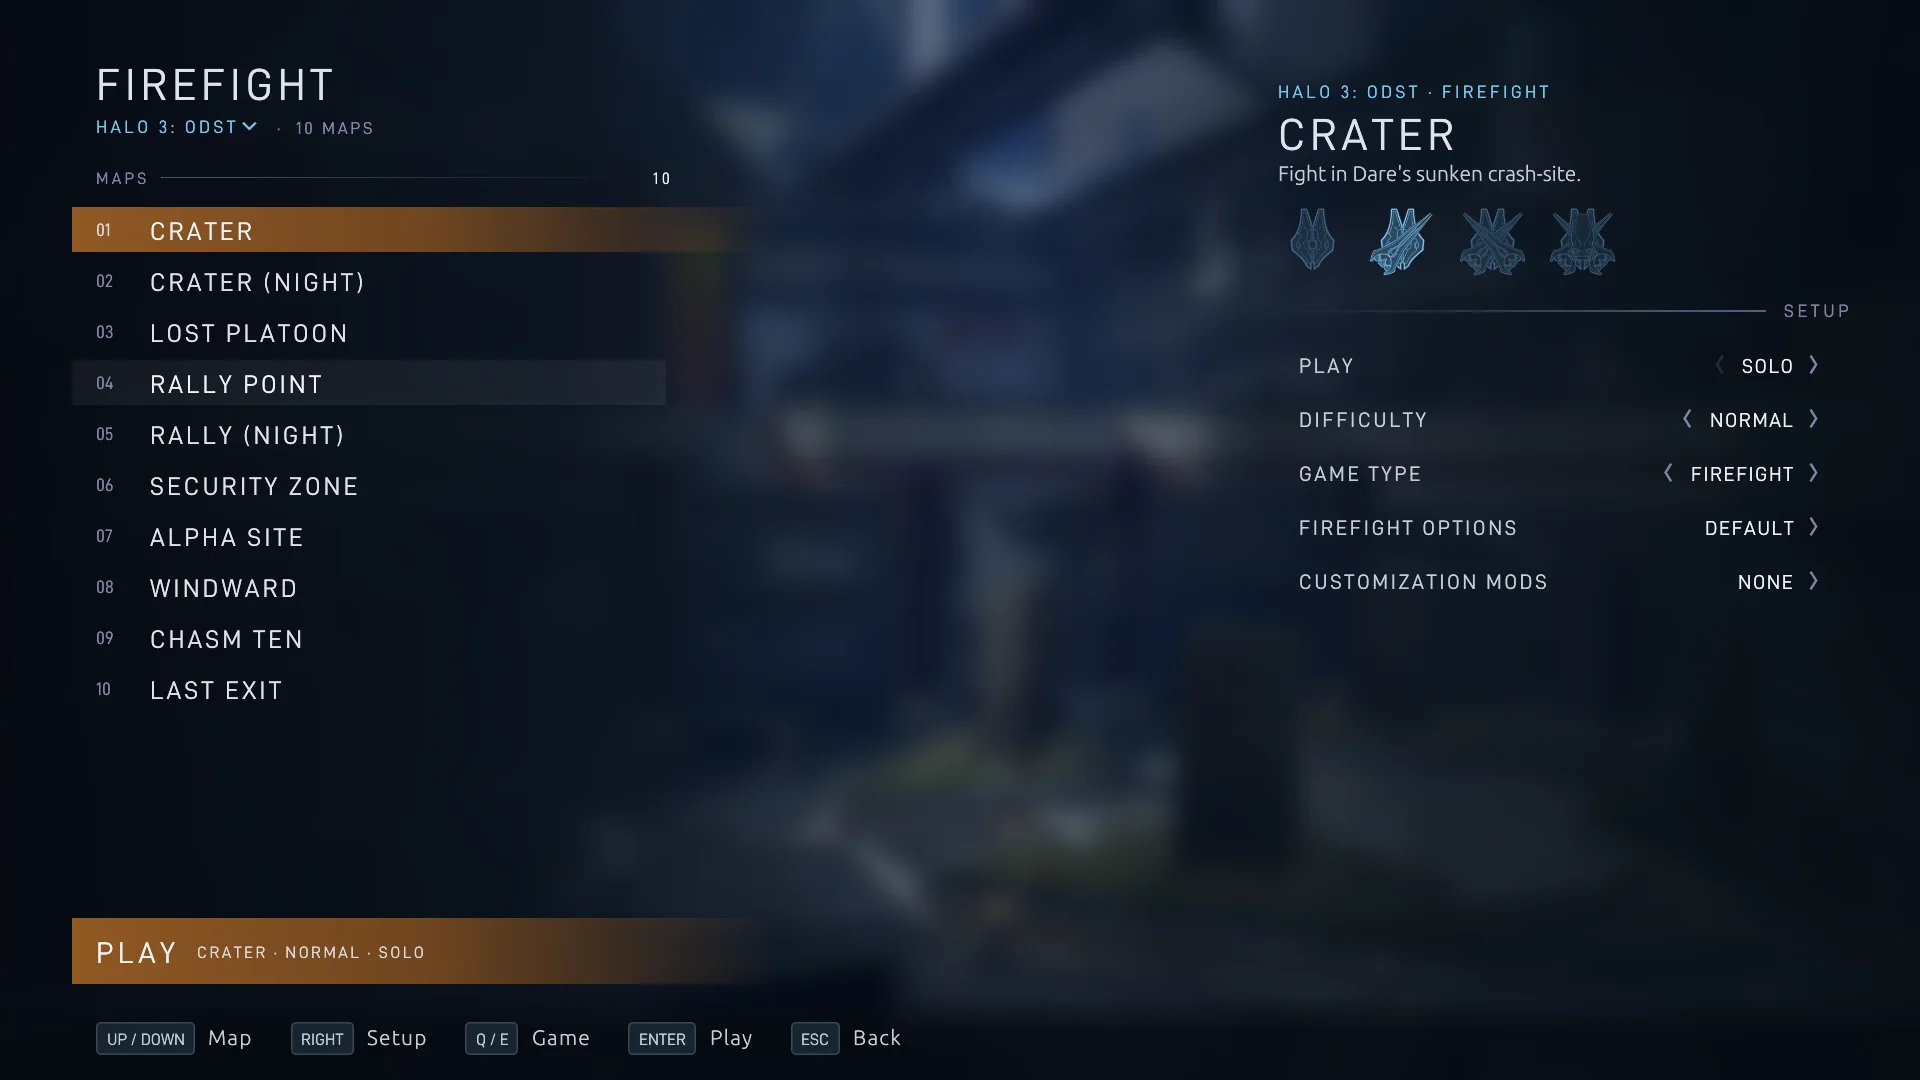
Firefight options: FIREFIGHT OPTIONS opens the same kind of page as the campaign's modifiers, over the game type's own settings: SPRINT; GAME, for the team's lives, the most lives it may hold, the time limit and the camera; SKULLS, with small tabs for when each is on (the whole game, each round, each set, or the bonus rounds); PLAYER TRAITS for every player's shields, damage, weapons, speed and more; and CHARACTERS. A co-op lobby uses them for all its players, and the game remembers them for next time.
Playing
- VISR, the PDA and waypoints: Flashlight is VISR (4, or D-pad up), VISR database opens the PDA with the map, your objectives, the clues you found and the audio logs, which play from it (Tab, or Back), and Waypoint markers shows or hides your markers (↑ or ↓, or D-pad down). Esc closes the PDA.
- Game Menu: Esc (or Start) opens the same Game Menu as Halo 3's: RESUME GAME, REVERT TO CHECKPOINT, the restart, SETTINGS, SERVER BROWSER, or going back to the main menu.
- When it ends: a finished mission goes straight on to the next, as in Halo 3's campaign.
- Cinematics that ODST lets you skip are skipped with Space or A. In co-op, skipping is a vote.
- Rules: the campaign modifiers apply to ODST's missions, and the host's Friendly fire setting to its campaign and Firefight.
- Chat and voice: text chat works in the lobby and in play (T), the top-left corner shows who is talking, a talking player shows the speaker icon beside the name over their head, and proximity voice and chat (N, U) reach the players near you. F5 and F6 answer a vote. Discord shows what you're playing.
- Films: ODST's missions and Firefight games are recorded for the Theater.
- Not there yet: films of ODST's games can't be saved as videos.
Co-op
- Open a lobbyStep PLAY to CO-OP and choose it, on the Campaign page with ODST's campaign showing, or on the Firefight page. The lobby opens at once, and it is Halo 3's lobby: the players with their emblems and ranks, the server, the map's card and the chat.
- Set up the gamePick the Mission, Start From, Modifiers, Characters and Difficulty, or for Firefight the Map, Game Type, Options and Difficulty, with the same pages as the Campaign and Firefight pages. Players see each change as it's made.
- Let players inStep Network between Local, LAN and Online, as in Halo 3's lobby. Host Settings sets the server name, password, player limit, Max ping, Join missions in progress, Co-op networking, Votes to skip cinematics, voice and text chat, and the connection.
- Choose START GAMEOther players see WAITING FOR THE HOST. The host can cancel the countdown by choosing it again, and the lobby's choices can't change while the game starts.
- Switch games in place: a co-op lobby switches between Halo 3 and ODST, and between ODST's campaign and Firefight, with its players kept. On the lobby's mission page, the campaign list has Halo 3: ODST's campaign and its Firefight beside Halo 3's campaigns. An ODST lobby that came from a multiplayer lobby has MULTIPLAYER on its heading to go back. A lobby with players in it keeps to the game they joined for, though an ODST lobby can always step between its campaign and Firefight.
- Back to a lobby together: the host has END GAME in the Game Menu. It ends the game for a new lobby of the same game, and the players still in it follow by themselves. A passed vote to end the game does the same.
- Customize in the lobby: the lobby has CUSTOMIZE beside SETTINGS, to change your trooper while you wait.
- Up to 16 players, as in Halo 3's campaign, split-screen players counted. A computer whose players don't all fit is told so.
- Finding it: the lobby shows in the Server Browser with the map's art and the host's and players' names, and a server password applies to ODST's games too. Listed games show on Discord with Join.
- Join in progress: players can join a game under way, unless the host turned off Join missions in progress. In a campaign mission they catch up while everyone keeps playing; in Firefight they spawn at once, without costing the team a life.
- Scores: every player keeps a score, all sixteen of them, and each sees their own in the HUD.
- Players: a player's card opens the same details window as in Halo 3's lobby, where the host can mute, kick or ban them.
- If the host leaves, it goes as in Halo 3's co-op: the player with the newest checkpoint, or in Firefight the newest snapshot of the game, takes over, and with none, everyone goes back to the menu with a note that says why.
- Without ODST: the Server Browser shows NEEDS ODST on ODST's games, and the server's card says how to enable it.
- Dedicated servers can host ODST's campaign and Firefight too, with no player as host: see ODST servers in the hosting guide.
Your ODST trooper
With ODST installed, Appearance in Customize lists Halo 3: ODST beside Halo 3: open it to choose your trooper.
- Character: which trooper you are: the Rookie, Buck, Dutch, Mickey, Romeo, Captain Dare, Sergeant Johnson, Bug Splattered Buck or Injured Romeo.
- Helmet: on or off. The Rookie always keeps his helmet on, and Johnson never wears one. ODST's armor takes no player colors, so there are none to choose.
- You play as that trooper in ODST's campaign and Firefight, and everyone else in the game sees it. In Halo 3's games you stay your Spartan or Elite, unless a host offers Halo 3: ODST troopers and you put ODST above Halo 3. Split-screen players choose their own.
- On the stage: your trooper stands where your Spartan or Elite does, in their own armor, gear and colors, with or without the helmet. Drag to turn them and scroll to zoom.
Split screen in ODST
The players from Settings → Split screen play in ODST too, solo and in co-op: with their own controller or keyboard and mouse settings, and their names in every lobby. With three or four players each sees the whole HUD. Two players share the display as chosen there: one above the other, with or without side bars, or side by side. Each split-screen player's Start opens the Game Menu, and their controller rumbles.
Your settings in ODST
ODST plays with your key bindings, controller buttons, look sensitivity and dead zones, inverted look, toggle crouch, field of view (the weapon's too, when you unlock it), crosshair position, size and scaling, subtitles, the Advanced graphics settings, Hide helmet visor, the weapon position offsets, the Lower weapon key and the game volume. ODST's own controls are listed under HALO 3: ODST in Settings → Keyboard & Mouse and Settings → Controller, starting on ODST's own keys and buttons. Bloom in ODST has a slider of its own in Advanced graphics.
Halo: Reach, Combat Evolved and Halo 2
Halo: Reach, Halo: Combat Evolved and Halo 2 play on the same engine as Halo 3, from their own files in MCC, in the same menus. They're earlier along than Halo 3 and ODST: expect missing pieces, and tell us on Discord what you find. Status by game.
- What you need: each game installed in MCC, beside Halo 3. Each is optional: without it, nothing of it shows. To install one, enable it in Steam under Halo: The Master Chief Collection → Properties → DLC and let its download finish. A Mac copy of MCC needs its folder too:
haloreach,halo1orhalo2. - Campaign: each game's missions are a campaign of their own on the Campaign page, alone or in co-op: Q and E step to them. Reach's Firefight maps join the main menu's Firefight page, each with its game types. Combat Evolved's campaign plays from the first mission to the last, as its own Master Chief. Reach's AI fights and every mission's opening plays, but some of its missions' scripts are still missing. Halo 2's campaign is earlier along: its AI fights and its missions' scripts play, with pieces still missing. Its missions take all three CHARACTERS choices, your own Spartan or Elite included.
- Multiplayer: Host Game's map picker has each game's multiplayer maps. Reach's maps play Halo 3's game types, and the GAME TYPE picker has a Halo: Reach card with its 418 game variants, which play on any map. Combat Evolved's and Halo 2's maps play their own game types. In Reach's game types you choose your loadout before your first spawn and each time you respawn, with the weapons and armor ability it brings; at a round's start nobody spawns until the loadout camera's time has passed, 10 seconds unless the game type says otherwise, as in Halo: Reach. On Halo 3's and ODST's maps, a Reach game type's loadouts bring their Reach weapons where Reach is installed and the host offers other games' content; armor abilities are left out there.
- Ladders on Halo: CE's maps climb as in Halo: CE: push forward and look up to climb, look down to go down, let go of the stick to hold on, and pull back to step off.
- Their own rules: a game plays by the rules of the game its map comes from: Reach's armor abilities, health and HUD on Reach's maps, and Combat Evolved's and Halo 2's health, weapons and HUD on theirs. The host can choose another game's rules in Game Options.
- Your look: Customize has Reach's Spartan and Elite, piece by piece in Reach's armor, and Combat Evolved's and Halo 2's colors on pages of their own, which those games' maps show.
- Forge: Forge is offered on every game's maps, each with its own objects, and the host can add the other games' objects, and mods' Forge objects, to any map, Halo: CE's and Halo 2's included. Choose each game's sources. With a game's objects on, its AI soldiers are in Forge's AI spawners too, on any map; players who join need that game installed. Every area of every mission of the three games is a campaign canvas to build on too.
- Flying: Ascend (VTOL) and Descend (VTOL) fly Reach's Falcon as they do the Hornet, and Altitude lock holds its height. See vehicle controls.
- Game modes: UNSC vs Covenant: Reach plays Reach's own troopers and Covenant on Reach's maps, and custom modes can use other games' characters where the host allows them (Host Settings → GAME MODES).
- Joining: everyone in a game needs the games it uses. The Server Browser marks a server that needs one you don't have, NEEDS REACH, NEEDS HALO: CE or NEEDS HALO 2, and a player without it is told as they join.
- Mods: MCC's mods for these games play too, their campaigns and their maps.
Split screen
Up to three friends can play on your computer, each with a controller or a keyboard and mouse of their own. Every game splits the screen, whether you host it or join a server, and each player gets their own view and HUD. Online, everyone at your computer joins the server together.
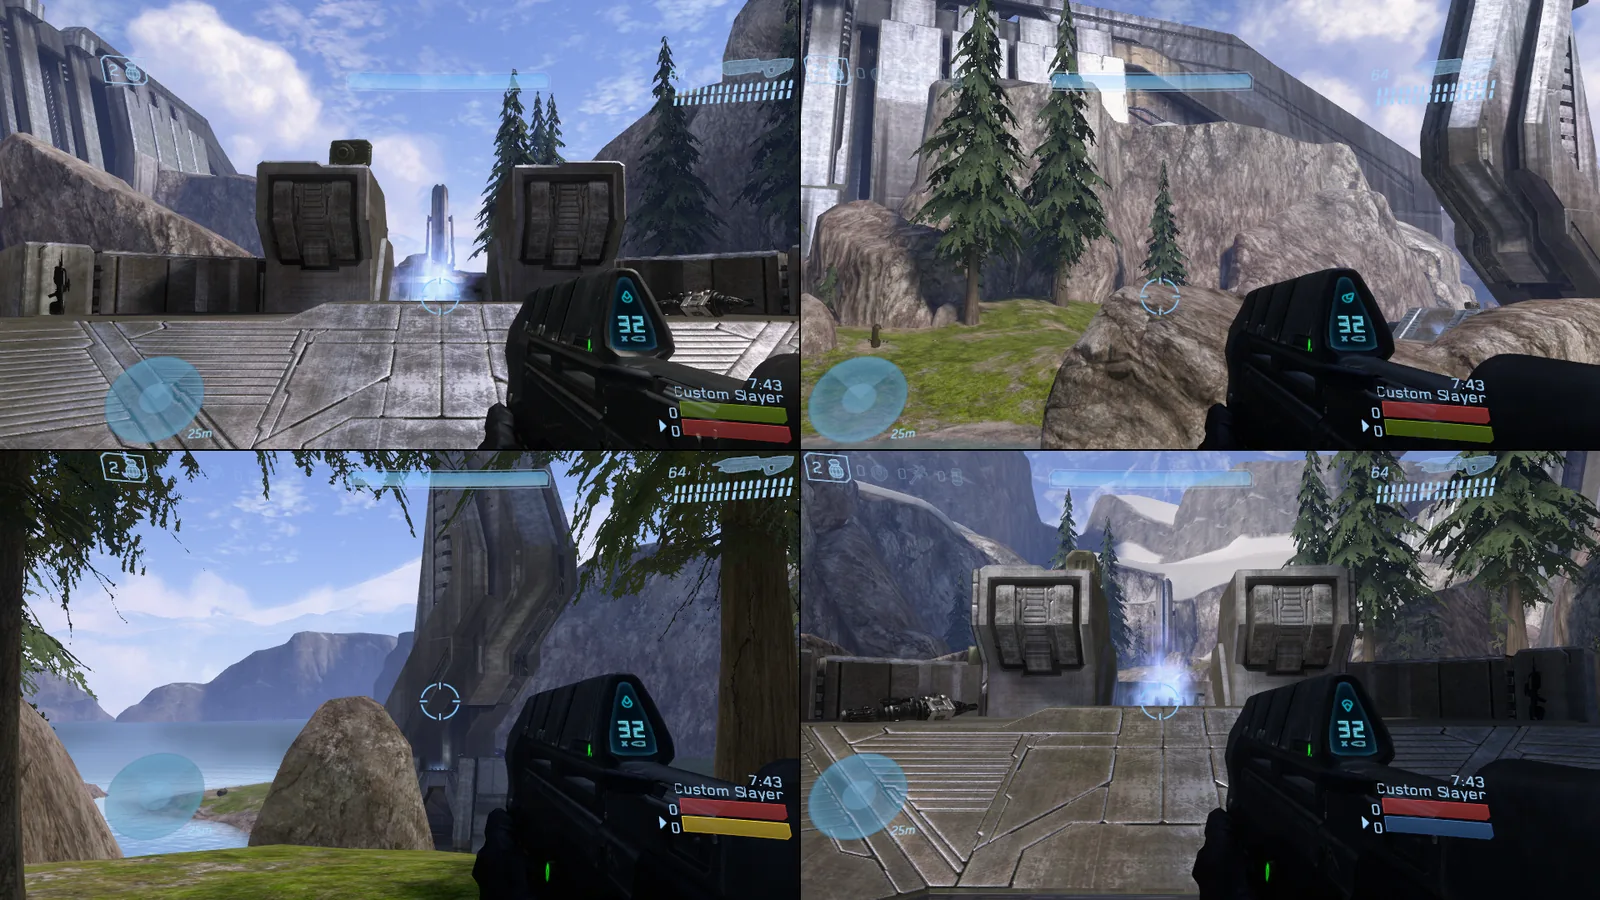
- Open Settings → Split screenFrom the main menu. Players are arranged there before a game, not in a lobby.
- Add a playerChoose ADD A PLAYER, then a saved player from this computer, or New player… for one with its own name and player ID. A new player's name starts as player 1's name and their number, already selected so typing replaces it, with a dice beside it for a two-word name, and they start with random armor colors and an emblem. Each keeps their name, ID and armor for next time.
- Claim a controller or keyboardThe new player presses a button on their controller, or a key on their keyboard and then a click of their mouse. ASSIGN on a player's row does it again later, and REMOVE takes them out.
- PlayHost a game or join one as usual. Everyone at the computer joins together.
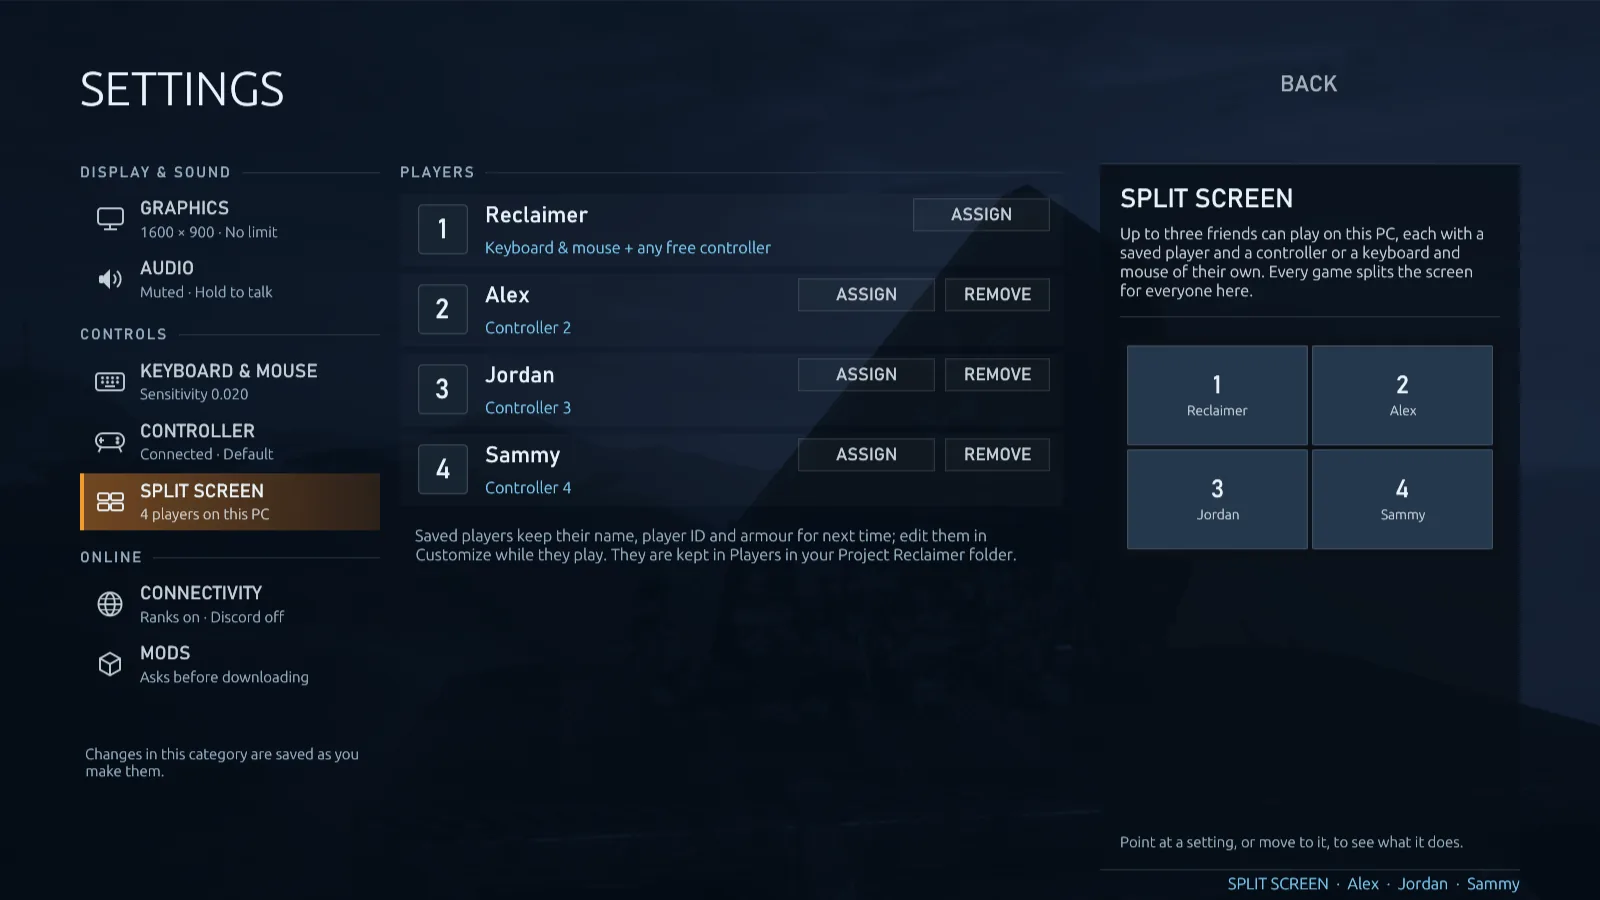
- You are Player 1, with every keyboard and mouse nobody else has and, until you pick one, any controller nobody else has. ASSIGN on your row, then a key or mouse click, leaves you on the keyboard and mouse alone.
- Seats follow controllers. A game starts with one player, and controllers nobody claimed stay with Player 1. The players seated in the menus carry into a game you host, each with their own appearance and nameplate. A game window in the background takes no controllers and adds no players.
- Two players share the screen Top and bottom or Side by side: choose under SCREEN → Two players. Side by side, each view is as tall as the display and its crosshair stays in the middle of the view, where your shots go. With three, the first is on top and the others side by side below; four take a quarter each. Both choices take effect at once, even during a game.
- Every view fills its whole part of the display, and the HUDs keep Halo 3's own proportions. SCREEN → Side bars brings back Halo 3's black bars beside two players above each other and the top three-player view. It's off to start with.
- Halo 3 draws split screen with less detail than one player gets: no shadows or decals, simpler water and fewer lights. To give every view the detail of one player, choose a level in the split-screen part of Settings → Advanced graphics.
- A friend's keyboard and mouse play only for them. Every player uses the main profile's controller and keyboard-and-mouse settings until they get their own.
- While friends are seated, Customize has a player row, so their armor, emblem, name and service tag can be changed there too. It opens for whoever's controller opened it.
- The chat line, the pinned scoreboard and the Forge menu belong to Player 1. Who plays lasts until the game closes.
- A server's Max players counts split-screen players too. The Server Browser only lets your group join a server with a place for each of you, and shows ROOM FOR 2 (say) when there isn't.
- Split screen works in Halo 3: ODST too, solo and in co-op; see split screen in ODST.
Each player's own controls and profile
- Menus with every controller. Out of a game, players 2 to 4 work the menus with their own controllers like player 1. Customize switches to whoever's controller steers it next, so each player edits their own look.
- Own controller settings. In Settings → Controller, Settings of picks a player, or the page follows whoever's controller steers it. Turn on Own settings to change that player's look speed, sticks, dead zones, vibration and buttons, starting from the main profile's, then choose APPLY CHANGES.
- Own keyboard and mouse settings. Settings → Keyboard & Mouse does the same for a player on their own keyboard and mouse: their mouse sensitivity, acceleration and smoothing, invert look and flight, toggle crouch and keys. The field of view and crosshair position stay shared.
- Tell players apart. Every player card shows their emblem on their armor color, their service tag and the start of their player ID, so two players with one name are easy to tell apart.
- Saved players. SAVED PLAYERS lists everyone who has played on this computer and when they last played. Sort by orders them, and every name choice, by name, last played, newest or oldest. DELETE moves a saved player to the Recycle Bin (the Trash on macOS and Linux), so you can restore them from there; remove a seated player first.
- Choose who is player 1. Step through player 1's name (◀ ▶) to play as a saved player. The game asks, then restarts as them, with their name, player ID, armor and own settings, and everyone else stays seated. The choice is kept for the next start; step back to the main profile the same way.
Mods
Mods add custom multiplayer maps, their objects to Forge, campaigns and characters. Servers list the mods their games use: when you join one with mods you don't have, the game downloads them, checks them and joins. Mods from the Steam Workshop come through Steam, and a server whose host shares its mods sends them itself. There's nothing to find or install first.
Servers with mods
In the Server Browser, a server whose games use mods has a cube icon after its name, followed by how many when there are several. Its color says whether you have them:
| Cube | Meaning |
|---|---|
| Blue | You have them all. |
| Gold | The ones you're missing can be downloaded, through Steam Workshop or from the server. Join and they download first. A mod you turned off shows this way too. |
| Red | You're missing one with no download source: it isn't on the Workshop and the server doesn't share it. You can't join until you get it. |
Point at the cube for a summary. Select a server and its card lists its mods with what's left to download; VIEW MODS shows them in full. Search finds servers by mod name too, and Filters can show only servers with mods or only those without.
Download and join
- Choose DOWNLOAD & JOINWhen you're missing a mod, JOIN GAME reads DOWNLOAD & JOIN and opens REQUIRED MODS: each mod's preview image, its maps, and exactly how much it needs to download, such as "312 MB (150 MB already on this PC)".
- DownloadChoose DOWNLOAD & JOIN. Each mod shows its progress, and the window the total, speed and time left. CANCEL or Esc stops; an unfinished file picks up where it left off next time.
- PlayOnce every file is in place and checked, the game joins the server by itself. There's no restart.
- Every download asks first, Steam Workshop's included: nothing downloads until you choose DOWNLOAD & JOIN, when you join by address too, with Direct Connect or a join link.
- What you already have: the window checks the mods that server needs first, so a join never waits on a check of every mod on your PC, and it says where an installed mod came from. Point at one for its folder and how to remove it.
- A server's own files always ask first. A mod that didn't come from Steam Workshop never downloads from a server without your yes, for that download: the window asks, with DOWNLOAD FROM SERVER & JOIN and CANCEL. Remember my decision for this server doesn't answer it.
- Each file is checked against the server's list of fingerprints (SHA-256) before it's used. A damaged file is thrown away and downloaded again next time.
- A mod is downloaded once, however many servers use it. Files already on your computer, from another download, your Mods folder or Steam's Workshop folder, are copied instead of downloaded.
- Maps come in checked chunks. Joining from the Server Browser, you take them from that server and up to three other listed servers that share the same mod, all at once. A cut-off download resumes with the chunks it already has.
- For a Forge map with objects from a mod, you download just those objects, usually a few MB.
- A map compiled with the Reclaimer Kit comes as a recipe of a few kilobytes, and your game makes the map from your own installed maps.
- Another version of a Workshop mod: when you have a server's Steam Workshop mod in another version than the server's, REQUIRED MODS compares the two. When the server's is newer, UPDATE & JOIN has Steam update your copy, then joins. When the server's is older, the window says so: Steam only installs a mod's newest version, so the server has to update. A version you downloaded from another server makes way: REPLACE & JOIN moves it to the Recycle Bin (the Trash on macOS and Linux) and downloads the server's.
- A download never replaces a different map with the same file name. If you have another version of a mod that isn't from the Workshop, its row says the map clashes with that mod on this PC: delete that version in Settings → Mods and join again.
- A session holds 23 custom maps. If the game can't add another while it runs, the window offers RESTART & JOIN: the game restarts and joins the same server once it's ready.
Through Steam Workshop
Most mods are Steam Workshop items, and a server says which item each of its mods comes from. With Settings → Mods → Prefer Steam Workshop on, as it is to start with, the game has Steam download those mods, then checks every file against the server's before it uses it. The host doesn't have to share anything for this.
- Steam has to be running, signed in with an account that owns MCC. If it isn't, the download window says Start Steam and sign in with an account that owns MCC to use Workshop. This goes for macOS and Linux too: the game asks your Steam client for the item even where MCC itself can't run.
- Steam downloads the whole Workshop item, which can be bigger than what the server uses, so it needs room in your Steam library too: the game checks the space first and stops its request when the item is too large. A mod you download this way also subscribes your Steam account to its item, so Steam keeps it up to date, and a matching mod already in Steam's library is used as it is, without a second copy.
- Before you join, every file the server needs is checked against the server's, also after Steam updated a mod. A missing or different file stops the join; if Steam is still changing files, join again once its update has finished.
- When the host shares its mods too, the server is the fallback: if Steam can't download an item, makes no progress, or has a different version of a file, that file comes from the server instead. Without sharing, the window says what went wrong.
- Turn Prefer Steam Workshop off to download mods only from servers that share them.
Mods are map files only: Project Reclaimer never runs program code from a mod. The engine wasn't built to distrust map files, though, so download mods only from servers you trust.
Install mods yourself
Mods you subscribe to on the Steam Workshop are listed automatically. To add one by hand, put its folder in the Mods folder of your player folder, one folder per mod, and choose REFRESH in Host Game. A mod's folder holds one of these:
- a package as MCC's mod tools publish it, with its
ModInfo.json; - a
.mapfile with its matching.mapinfo; - a multiplayer
.mapon its own, with theshared.mapit came with if it has one. It's listed under its file name:blam_mountain.mapas "Blam Mountain".
A package that adds a campaign shows on the Campaign page, not in Host Game, and ODST's mods show with ODST. Packages made for MCC's other games are skipped.
Workshop maps whose authors never gave them a map ID are listed too, and can be hosted, joined, shared and downloaded like any other mod map. Map variants saved in MCC on such a map are listed under it, and two mods' maps with the same name show their mod's name. A mod map shows its package's own symbols, such as the weapon pictures in pickup prompts, the buttons and the medals.
Manage your mods
Settings → Mods, or MY MODS in the Server Browser, lists every mod on your computer with its maps, its size and where it came from: the servers it was downloaded from, your Mods folder or Steam's Workshop folder.
- A mod whose maps are all content for other maps, never played on their own, is listed too, so you can turn it on as a source of Forge objects and weapons.
- The ON and OFF switch beside each mod turns it off without deleting it: its maps leave Host Game and its objects leave Forge, though saved maps that place them still play. Steam Workshop mods can be turned off too.
- Joining a server that needs a mod you turned off marks it Disabled on this PC, and ENABLE & JOIN turns it back on and joins. The game never turns a mod on by itself.
- DELETE moves a mod to the Recycle Bin (the Trash on macOS and Linux). A server that needs it again offers it again.
- A mod the current lobby or game uses can't be turned off or deleted. Workshop items are left to Steam: turn them off here, or unsubscribe in Steam.
- FOLDER opens a mod's folder, and OPEN MODS FOLDER in REQUIRED MODS the folder that holds them all.
Where downloaded mods go
Downloaded mods directory, under Settings → Mods and Settings → Folders, picks where new downloads are installed, from a server or through Steam Workshop:
- Reclaimer default:
Mods/Downloadedin your player folder. - MCC Workshop: a
Reclaimerfolder in MCC's Steam Workshop folder, beside Steam's own Workshop items. - Custom folder: any folder you can write to, chosen under Download folder.
The change applies at once, with no restart; a download already running finishes where it started. Mods you downloaded before stay where they are and keep working, and choosing a folder that already holds downloads, for example on a new computer, uses them. Steam still decides where it keeps its own copy of a Workshop item while it downloads.
The ASSET LIBRARY section of Settings → Mods says what Forge has collected: the games, how many mods give objects, and the size. The game collects every game's and every installed mod's objects behind the loading screen at its start, and a new mod's as it arrives. What it collected is kept across updates until a map changes, and turning a mod on or off changes Forge at once, so you rarely need REBUILD, which collects everything again. It isn't offered during a lobby or a game. Each mod's row says how its Forge objects stand.
Host a game with mods
Pick a mod map in Host Game like any other map, or a saved Forge map with objects from mod maps. Players who lack a Steam Workshop mod download it through Steam, with nothing for you to set up. To send mods from your computer as well, for mods that aren't on the Workshop, players without Steam and the Forge objects of mod maps, open Host Settings and turn on Share mod files, which is off to start with. Upload limit caps what all their downloads send together, 20 Mbit/s unless you change it, so your own game stays smooth.
- Mods players have no way to download are listed under PLAYERS NEED, with SHARE THEM.
- Sharing needs an Online lobby: downloads use the game's own port and its encrypted connection. Players on the same computer use your files directly.
- Only the files of the mods your current games use are shared, nothing else on your computer. A mod's own sound banks, and its
shared.soundsfile, go with its maps, so players hear the mod's sounds. - For a server that stays up, see mods on a dedicated server.
Lobby voting
When a lobby uses a playlist, its host doesn't pick the games. Before each game, the lobby shows a vote instead (VOTE FOR THE NEXT GAME):
- Three games (map and game type) and NONE OF THE ABOVE, with a countdown, 20 seconds unless the playlist sets another. The three are drawn at random from the playlist by weight, and the game just played sits out the next vote.
- Click a game to vote. You can change your vote until time runs out.
- The game with the most votes is played. If nobody votes, the first game offered starts. If NONE OF THE ABOVE wins, a new ballot opens with games that haven't been turned down yet.
- The host can end the vote early with END VOTE AND START.
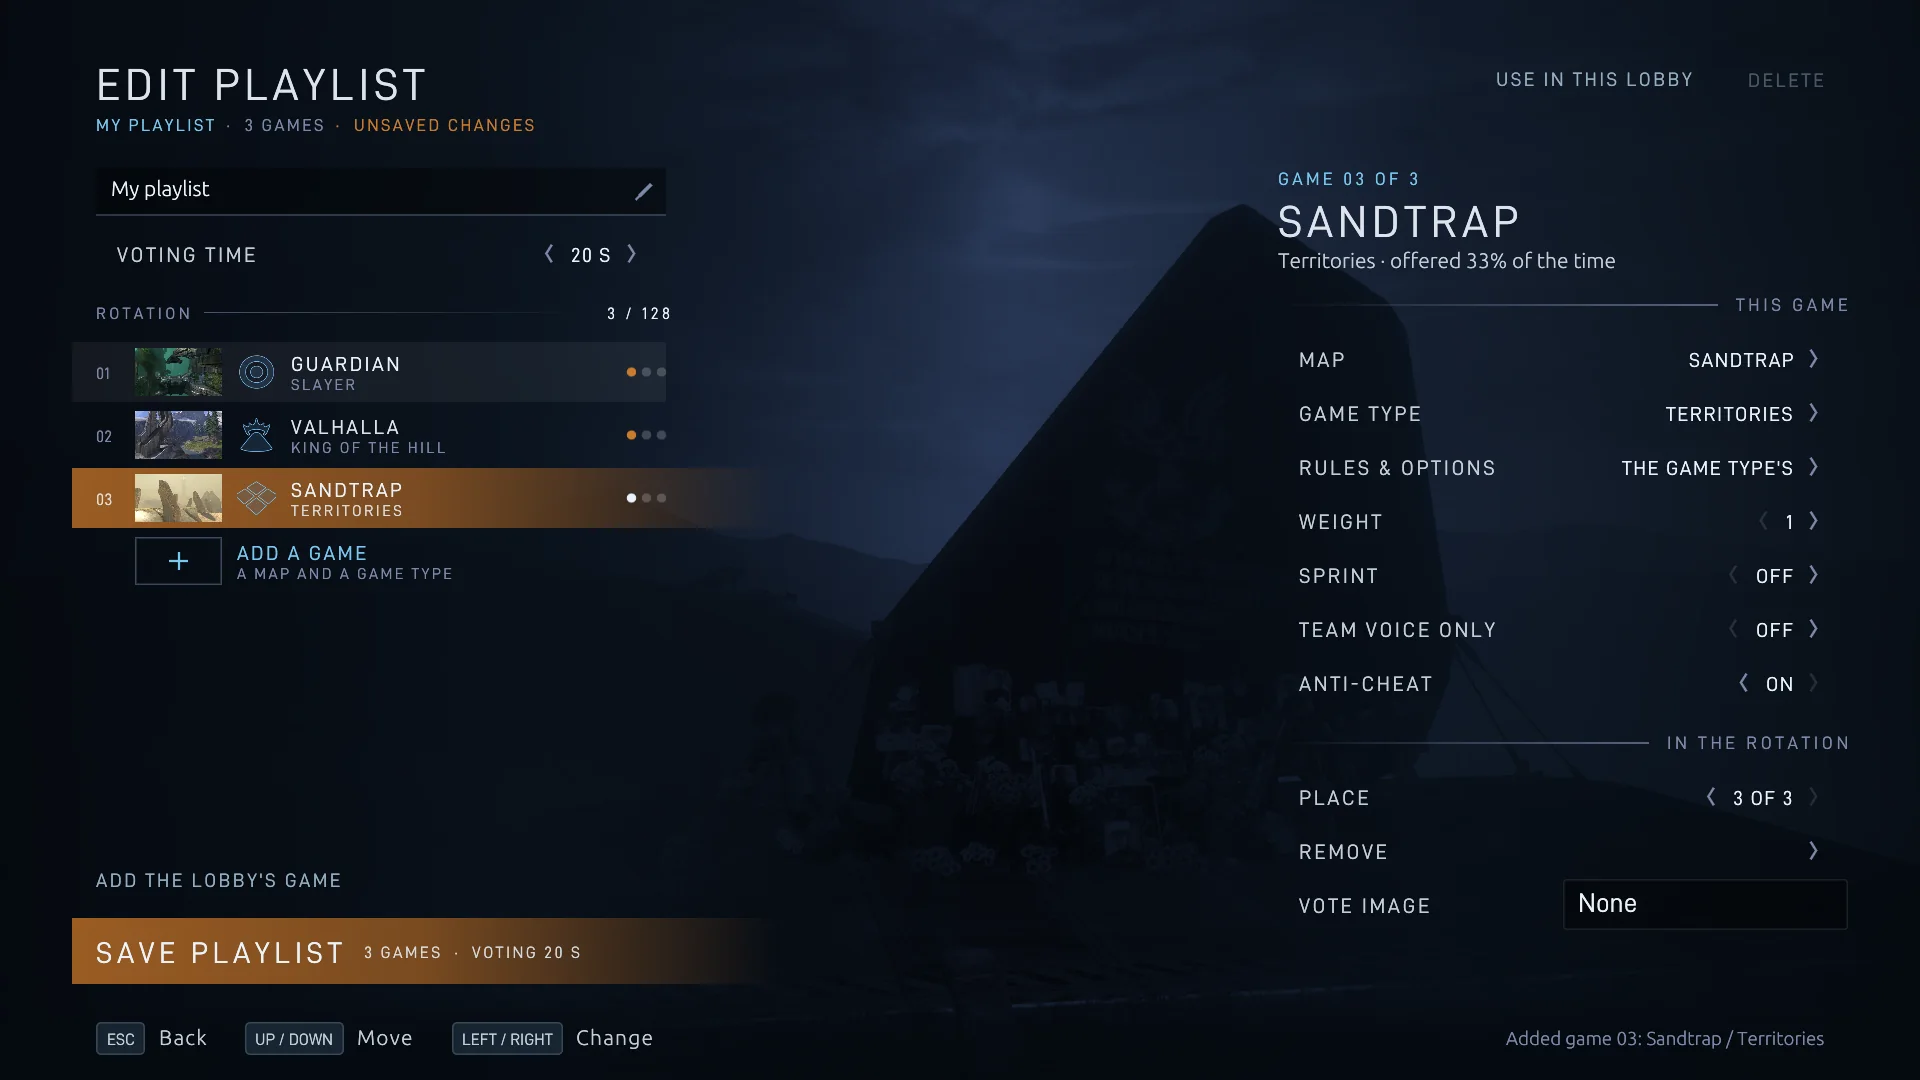
To host with a playlist yourself, choose the Playlist row in your Host Game lobby, then USE IN THIS LOBBY on a saved playlist, or NEW PLAYLIST to build one. In the editor, ADD A GAME finds maps and game types as you type. To make a game come up more often, select it and raise its WEIGHT (1 to 100, 1 to start with): a game with weight 2 comes up twice as often as one with weight 1. A game's SPRINT, TEAM VOICE ONLY and ANTI-CHEAT choices are there too. See custom playlists for more.
Controls
These are the keys to start with on a US keyboard; every one can be changed in Settings → Keyboard & Mouse, where each action takes two keys or mouse buttons. Click the game window to capture the mouse. On a Mac keyboard, hold Fn with the F keys unless you set them as standard function keys.
| Key | On foot and in combat |
|---|---|
| W A S D | Move. |
| Space | Jump. |
| Left Ctrl | Crouch (see toggle crouch). |
| Left Shift hold | Sprint while running forward, in games with sprint on. |
| Left mouse button | Fire. |
| Right mouse button | Zoom. Also Secondary fire, and Fire left weapon while dual wielding. |
| Q | Melee. |
| F | Throw a grenade; reload the left weapon while dual wielding. |
| G | Switch grenade. |
| R | Reload. |
| E | Action: pick up weapons, enter vehicles and use objects; reloads when there is nothing to use. |
| 1 | Switch weapon. |
| Z | Use equipment. |
| C hold | Dual wield: take a nearby weapon in your left hand. |
| 4 | Flashlight; VISR in ODST's games. |
| P | Switch camera between first and third person on foot, in games that let players choose (see third person). |
| X 2 3 H | Abilities 1 to 4, in game modes that give you one. |
| Key | Vehicles |
|---|---|
| Left Ctrl | Fly up in a Pelican or Phantom, or a vehicle trick. |
| Space / Left Ctrl | Ascend / descend in a Hornet, a Falcon or any other VTOL, modded ones included. |
| Left Alt | Altitude lock in a Falcon; press again, climb or descend to release it. |
| Space | Banshee trick: push the way to go, then press it to loop or roll. |
| Q | Banshee bomb. |
| Key | Interface, in any game |
|---|---|
| Esc | Game Menu, with the server's name: RESUME GAME, SETTINGS, CUSTOMIZE, SERVER BROWSER, FRIENDS, LEAVE SERVER (for a party member, LEAVE GAME and LEAVE PARTY), END GAME for the host alone, EXIT GAME, and in team games the CHANGE TEAM buttons. Leaving or exiting asks first and says what you'd lose: the game in progress, unsaved Forge changes, progress since the last checkpoint, or, when you host, the game for everyone in it. In menus, go back. |
| Tab hold | Scoreboard with every player's service tag, rank, score, kills, deaths, assists and ping, and the server's name. A player who is dead and waiting to respawn shows Halo 3's dead icon in place of their emblem. |
| Tab tap | Pin the scoreboard: frees the mouse to mute players, call votes or, for hosts and admins, kick and ban. Tap again to close. |
| T / Y / U | Chat to everyone / your team / living players near you (see chat). |
| V / B / N hold | Talk to everyone / your team / living players near you, or tap to start and stop with Talk mode set to Toggle (see voice chat). |
| F1 | Release the mouse cursor. |
| F2 / F3 | Halve / double mouse sensitivity (saved at once). |
| F5 / F6 | Vote yes / no on an open player vote. With no vote on screen, accept / decline the newest friend request or invite while its notice shows. |
| F7 / F9 | Step through the frame graph's views / record debug info. While a server's poll is on screen they pick its third and fifth answers instead. |
| Ctrl+C / X / V | Copy, cut and paste in any text box and the chat line (Cmd on a Mac). Passwords can be pasted but not copied. |
| ` X 2 | In Forge: switch between playing and editing, open the Forge menu's objects, and open the properties of the object you hold or aim at. See all Forge keys. |
Zoom in, Zoom out, Next grenade, Previous grenade, Lower weapon and Record frame times have no key until you choose one.
The scoreboard's PING column is each player's round trip to the host or server in milliseconds, with the Server Browser's signal bars. Split-screen players show the ping of the computer they play on, and a playing host shows 0 ms. A dash means there's no recent reading.
Player controls: on the pinned scoreboard, a player's speaker button mutes them, and the menu button beside it opens their side panel: their emblem, name, DETAILS, VOICE VOLUME, MUTE VOICE and any kick, ban or vote-kick actions you may use. Esc closes player details before the scoreboard. The title shows current players and capacity, such as 12 OF 16 PLAYERS.
More on the scoreboard: Settings → Game Options → Extra scoreboard columns, off to start with, adds each player's K/D and medals, with a gold mark beside the player in the lead. Every game uses this scoreboard, Combat Evolved's and Halo 2's maps and split screen included.
In Infection, the scoreboard lists SURVIVORS and INFECTED as two teams, each with its players' total score, and moves players across as they're infected.
Keyboard layouts: keys are bound by where they are on the keyboard rather than by the letter they type, so AZERTY, QWERTZ, Dvorak and other layouts play like a US keyboard. The keys on this page are a US keyboard's: on AZERTY you move with Z Q S D and use equipment with W, on QWERTZ equipment is Y. Settings → Keyboard & Mouse shows each key as your layout prints it. Chat and other typing follow your layout; Halo 3's own prompts, such as “Hold E to pick up”, still name the US key.
Zoom in and Zoom out: these bindings under COMBAT step a scoped weapon's zoom one level in or out per press, where Zoom cycles through the levels and back to none.
Game mode abilities: Settings → Keyboard & Mouse and Settings → Controller have a GAME MODE ABILITIES section with Ability 1 to Ability 4: X, 2, 3 and H on the keyboard, and D-pad right, left and down on a controller in the Default layout. Game modes made for them give classes abilities on these keys, such as active camouflage, deployable cover or a machine gun emplacement; in other modes they do nothing. A mode's description says which key does what. Making a mode? See abilities in the Megalo guide.
Dual wielding: hold Dual wield (C) near a weapon to take it in your left hand. Fire left weapon (the right mouse button) fires it and Reload left weapon (F) reloads it; those keys throw grenades and zoom again once you hold one weapon. Hold Action (E) to trade your weapon for the one on the ground.
Lower weapon: the Lower weapon binding, under COMBAT in Settings → Keyboard & Mouse and Settings → Controller, does Halo 3's lower-weapon button combo in one press. It has no key or button until you choose one and choose APPLY CHANGES. Press it to lower your weapon and again to raise it; firing, melee or throwing a grenade raises it too. Other players see your character carry the weapon lowered.
Vehicle controls: the VEHICLES section of Settings → Keyboard & Mouse names each action for what it does, and each one's description lists the vehicles it works on. Fly up / vehicle trick makes Pelicans, Phantoms and other flyers built like them climb. Banshee trick loops or rolls a Banshee. Ascend (VTOL) and Descend (VTOL) fly every VTOL of every game, the Hornet, the Falcon and modded ones: Space and Left Ctrl on the keyboard, A and LB on a controller. Altitude lock (Left Alt, or X) holds a Falcon's height.
Aim to climb (Hornet): on a controller the Hornet climbs and descends with the buttons, as in MCC. To have it follow your aim instead, climbing as you aim up and descending as you aim well down, turn on Settings → Controller → Aim to climb (Hornet). A Falcon keeps the buttons either way.
Flying characters: in game modes that put you in a flying body, such as a Sentinel, a Drone or an Engineer, jump climbs and crouch descends. A Drone takes wing when you hold jump and walks again once you bring it down.
Seated passengers: seated in a Pelican's troop bay, or in a passenger seat of any vehicle you see in first person, your view and aim turn, bank and climb with the vehicle, as if you were sitting in it. Drivers, turret gunners and the passengers of the Warthog, Mongoose, Scorpion and Hornet look around as usual.
With a controller
Controllers work as soon as your system sees them: Xbox controllers and others that offer XInput on Windows; Xbox, PlayStation, Switch Pro and MFi controllers on macOS; any gamepad with sticks that Linux offers as an input device. The game follows whichever you touched last: press a button or push a stick and the controller takes over; press a key or move the mouse and it hands back. Button prompts follow too. On a Steam Deck, the game tells you once when Steam is sending keyboard presses for the controller.
| Button | Action |
|---|---|
| A / B | Jump / melee |
| X / Y | Use equipment / switch weapons |
| RT / LT | Fire / throw a grenade, or fire the left weapon while dual wielding |
| RB / LB | Action and reload / switch grenades; LB held near a weapon dual wields it and reloads the left weapon |
| Left / right stick click | Crouch / zoom; the left stick clicked while running forward sprints, in games with sprint on |
| D-pad up | Flashlight; VISR in ODST's games |
| D-pad right / left / down | Abilities 1, 2 and 3 |
| A / LB in a VTOL | Ascend / descend; X is the Falcon's altitude lock |
| Back | Scoreboard while held; a tap pins it, like Tab, and the D-pad then moves through its controls |
| Start | Game Menu, like Esc |
- Your own layouts: change any button while one of MCC's layouts is in use and it becomes a layout of your own, Custom 1, Custom 2 and so on, saved and listed in Button layout. Rename it under Layout name, copy it with DUPLICATE or remove it with DELETE.
- Grenades on the D-pad: the universal layouts and Infinite choose grenades with the D-pad, so in those Ability 1 moves to D-pad down, and Abilities 2 and 3 wait for a button you pick.
- Crouch on B: where a layout crouches with B, sprint goes with it: press B while running forward to sprint. In a vehicle the button is always the vehicle's, so B still drops Banshee bombs.
- Forge's monitor controls are the same in every layout.
In the menus, the D-pad and left stick move between controls on every page, A selects, B goes back, LB and RB do what Q and E do, and LT and RT move three rows at a time in long lists. A on a text field, chat's too, opens an on-screen keyboard. Push-to-talk, team and proximity push-to-talk, Lower weapon, Switch camera, the vote answers and the answers to requests and invites have no button until you choose one in Settings → Controller, which changes any button and sets look sensitivity, aim acceleration, invert look, invert flight, stick layout (Default, Southpaw, Legacy or Legacy southpaw) and vibration. In Forge, A grabs and drops, X opens the Forge menu, B clones, RT selects with empty hands, D-pad down turns magnets off and on and clicking the left stick changes the monitor's speed; see Forge controls.
Chat, voice and player votes
Text chat
Press T for everyone, Y for your team or U for players near you, type, and press Enter. Tab steps between the three while you type; Esc closes the line and clears it. A message can be up to 360 characters, a little less when it's mostly Chinese, Japanese or Korean or mostly emoji. Chat works the same in the lobby, on the loading screen while a map loads, in game and over the carnage report.
- Unsent lines wait. If the entry closes without sending, for example after a click elsewhere, your line is kept: press T, Y or U and it's still there. Only Enter and Esc clear it.
- Chat carries on between games. A line you're typing when a game ends stays open over the carnage report, and goes with you through the lobby and the next map's loading screen into the next game.
With chat open, a scroll bar lets you read back through the last 100 lines: use the mouse wheel, drag the bar, or press Page Up and Page Down. New lines don't move you while you read; scroll back to the bottom and chat follows new lines again. To copy lines, drag over them and press Ctrl+C; Ctrl+V pastes into the chat line.
Player colors: names in chat are written in the player's color: their team's in a team game, or the primary color of their armor otherwise, with dark colors lightened to stay readable. For white names on a block of the player's color, choose Settings → Communication → Chat names → Color block and APPLY CHANGES. A line keeps the color its sender had when they sent it.
Rather not see chat? Turning Settings → Communication → Game chat off closes text chat in the lobby and in games, clears its history and hides incoming lines, server messages included. It only changes your own game, even when you host. To keep chat but mask words you'd rather not read, use the content filter instead.
Voice chat
Hold V to talk to everyone, B to talk only to your teammates, or N to talk to players near you. Team voice works only in team games and never falls back to everyone. Set Settings → Communication → Talk mode to Toggle to press a voice key once to start and again to stop, and another voice key to switch who hears you. Talking pauses while another window is in front.
- Your microphone: Microphone device picks which one to use, and turning Microphone off never opens one. Without a microphone you can still listen. The default choice follows your system's sound settings.
- On a Mac, the game asks for the microphone the first time. If you said no, turn it on under System Settings → Privacy & Security → Microphone.
- To mute someone, tap Tab and click the speaker button on their row. Hosts can turn voice chat off for everyone.
- Each player's voice volume: open a player's details from their lobby card, or their side panel from the scoreboard, and drag VOICE VOLUME from 0% (silent) to 200% (boosted). It changes only what you hear, and the game remembers it.
- Who's talking: a friendly player's name tag shows a speaker icon while they talk on a channel you can hear. The voice indicator in a game shows each talking player's strip in their color, with their emblem behind the level bars.
Which voice a host allows: Host Settings has Global voice, Team voice and Proximity voice, each on to start with, and a host can switch each one in the Game Menu too. A key whose voice is off stays silent: V is always everyone, B your team and N nearby players, and none of them switches to another. To leave only proximity chat, turn off the other two. In a playlist, a game marked TEAM VOICE ONLY keeps voice to teammates while it plays: V is silent, B reaches teammates and N teammates near you, as far as the host allows those. Dedicated servers: see voice settings in the hosting guide.
Voice chat volume in Settings → Communication sets how loud you hear other players; at zero you hear nobody, and they can still hear you. When the game drowns out your team, lower Game audio volume in Settings → Audio instead. The Voice chat switch turns voice off altogether: your microphone stops and you hear nobody, in your own game only. Global voice volume, Team voice volume and Proximity voice volume set each channel from 0 to 100% of Voice chat volume, so one can be quieter or silent without the others.
Voice is compressed: each player talking sends about 24 kbit/s, which keeps busy games light on everyone's connection.
Proximity chat
Press U to type to players near you, or hold N to talk to them. Both reach living players on either team within about 30 meters of you, in vehicles too. Nearby lines show [NEARBY] before the sender's name. A nearby voice plays at full volume up to about 7.5 meters away, then fades with distance until it goes silent at the edge of that range.
- Only during a game: not in the lobby, while a map loads or while you're dead. Proximity chat never falls back to global chat, so with nobody near you, nobody gets your line or hears you.
- Host choices: with Proximity voice off, N is silent; in a playlist game marked team voice only, it reaches only teammates near you.
- Keys: Talk mode applies to N as it does to V and B. Change Proximity chat and Proximity push to talk in Settings → Keyboard & Mouse; Proximity push to talk can also have a button in Settings → Controller, where it has none to start with.
- Volume: Proximity voice volume in Settings → Communication sets how loud nearby players are.
Player votes
On servers and hosted games that allow it, players can vote to kick a player, end the round, end the game or shuffle the teams. Tap Tab and use VOTE KICK in a player's side panel, or SHUFFLE, END ROUND or END GAME under CALL A VOTE, or type /vote kick <name>, /vote shuffle, /vote endround or /vote endgame. Vote with F5 (yes) and F6 (no), or type /yes or /no, or !yes or !no. A vote passes when more than half of the players have voted yes, and lasts 30 seconds.
- Kick votes with more than 16 players need fewer: the yes votes grow more slowly with the player count, such as 9 of 17, 12 of 32 and 19 of 64, down to a quarter of the players at 120 or more. The player named doesn't vote, and it takes at least two others.
- A player who calls a kick vote waits 3 minutes before calling another, whether it passed or failed. Someone whose other vote failed waits a minute. Leaving during a kick vote against you applies the normal rejoin wait.
- Matching names: voice labels and kick votes use the same identifying suffix as chat, such as Player (A7B). Use
/vote kick Player (A7B) [reason]to pick the player you mean. - Shuffle is for lopsided team games: when it passes, every player, split-screen guests included, is dealt at random across the teams in play, so no team has more than one player more than another. Team scores stay with their teams, and it evens out player counts, not skill.
Type /help (or /?) in chat to list every command and its other spellings, with whether the server takes votes and whether you're one of its admins; scroll up in chat to read the whole list. /votekick <name>, /vote round, /vote game, /vote shuffleteams, /vote yes and /vote no work too. Start a line with // to send one that begins with /.
Friends and parties
Friends and parties go through the project's public social service. Settings → Online Services → Social service names another, and an empty address turns them off. What the service sees.
Press F (Y on a controller), or the Friends key in the footer, on the main menu, every page of a lobby, the Server Browser, the Campaign, Firefight and Theater pages, the game-over page and carnage report, and the Game Menu.
- Add a friend: ADD BY CODE (C, X on a controller) takes their friend code or Player ID, and shows your own to give. Or pick someone from RECENT PLAYERS, the players you've met in games, or open a player's details in a lobby or on the scoreboard, and choose SEND FRIEND REQUEST. Friends are mutual: a request waits until it's accepted or declined.
- Where they are: the list shows each friend's status, game, map and players, online friends first. JOIN GAME joins them on a public server, and SEND INVITE asks them to yours. Turn off Friends see where I am in Settings → Online Services to keep yours to yourself.
- Players in your game: a party member, friend or recent player who is in your lobby or game offers PLAYER DETAILS first: the card the scoreboard and the lobby open, with their Service Record, mute and the rest.
- Answer by key: while a friend request, party invite or game invite shows its notice, F5 accepts and F6 declines, and the notice names the keys. [ and ] answer too, also while a vote is using F5 and F6. Change them under COMMUNICATION & INTERFACE in Settings → Keyboard & Mouse: Accept request or invite and Decline request or invite. A join that would leave the game you're playing asks first.
- Parties: INVITE TO PARTY on a friend makes a party. When its leader joins a server, from the browser, a friend or a join link, the whole party goes along and is seated together, and a full server lines it up as one. The leader sets who can join, OPEN or FRIENDS ONLY. Your party stands at the top of FRIENDS, above your friends, and under your card on the main menu, with what each member is doing.
- Joining a friend while in a party asks first. The leader chooses BRING PARTY or JOIN ALONE; a member chooses ASK LEADER, which sends the leader an invite to that game, or LEAVE PARTY.
- Step away and stay in the party: in a party you don't lead, the Game Menu has LEAVE GAME and LEAVE PARTY in place of LEAVE SERVER. LEAVE GAME takes you back to the menus and keeps you in the party: the leader's next game takes you along again, and REJOIN PARTY LEADER, on the main menu and on the leader's row in FRIENDS, joins their game whenever you want. LEAVE PARTY leaves the party and keeps you in the game. A leader who leaves chooses LEAVE WITH PARTY or LEAVE ALONE.
- A new leader: the leader finds PROMOTE TO PARTY LEADER on a member's row in FRIENDS and on their PLAYER DETAILS, above BOOT FROM PARTY. It asks first.
- A lobby follows its host: when you host a lobby with other players in it and join another server, you're asked whether to bring them (BRING PARTY) or JOIN ALONE, and each of them can FOLLOW or STAY.
- Party and friend colors: Settings → Game Options → PLAYER TAGS AND NAMES → Party and friend colors, off to start with, draws the markers over party members in purple and over friends in bright green, or in colors you pick. It colors Halo 3's and ODST's markers.
- BLOCK ends a friendship and refuses that player's requests and invites.
Ranks and service record
Games on servers that report to the project's stats service count toward a Halo 3 rank, from Recruit up to General. Dedicated servers report unless their host turns it off, and campaign games don't count. Your record carries over from 0.9.
- Every player's rank insignia shows on their lobby card, on the Tab scoreboard and in the carnage report, after their name and service tag. Players without a record yet show Recruit.
- Click a player in the lobby to open their details: their character, their rank with the EXP toward the next one, and a skill meter that marks the officer ranks.
- Tabs below hold their SERVICE RECORD (games, win rate, K/D, time played), MEDALS, WEAPONS (kills with each) and RECENT GAMES. ← and → switch tabs, Esc closes the window.
- Your own: your card at the top right of the main menu opens Customize, and the same card there opens your Service Record. It shows your rank outside a game too.
- Achievements show on player cards, your own included: the cavemen, the Mythic skulls, Brainpan and Annual among them. They're earned in games on approved hosts, through the stats service.
- Ranks and service records come from the Stats service under Settings → Online services, the project's public one to start with. Left empty, ranks are off and a player's card reads Service records are off.
Game over
When a game ends, the scoreboard shows for three seconds, titled FINAL SCORE. Then a game-over screen names the winning team or player and tells you how you did, over a podium of the top three players or a card for each team with its score and players. After a few seconds the carnage report follows; press Enter (A on a controller) or CARNAGE REPORT to go to it sooner. While you wait to respawn and between rounds, the scoreboard is the same one Tab opens. To go straight to the game-over screen, turn off Settings → Game Options → Final scoreboard at game end.
Carnage report
The carnage report opens for everyone with the final standings, as a page with the game and the report's parts on the left:
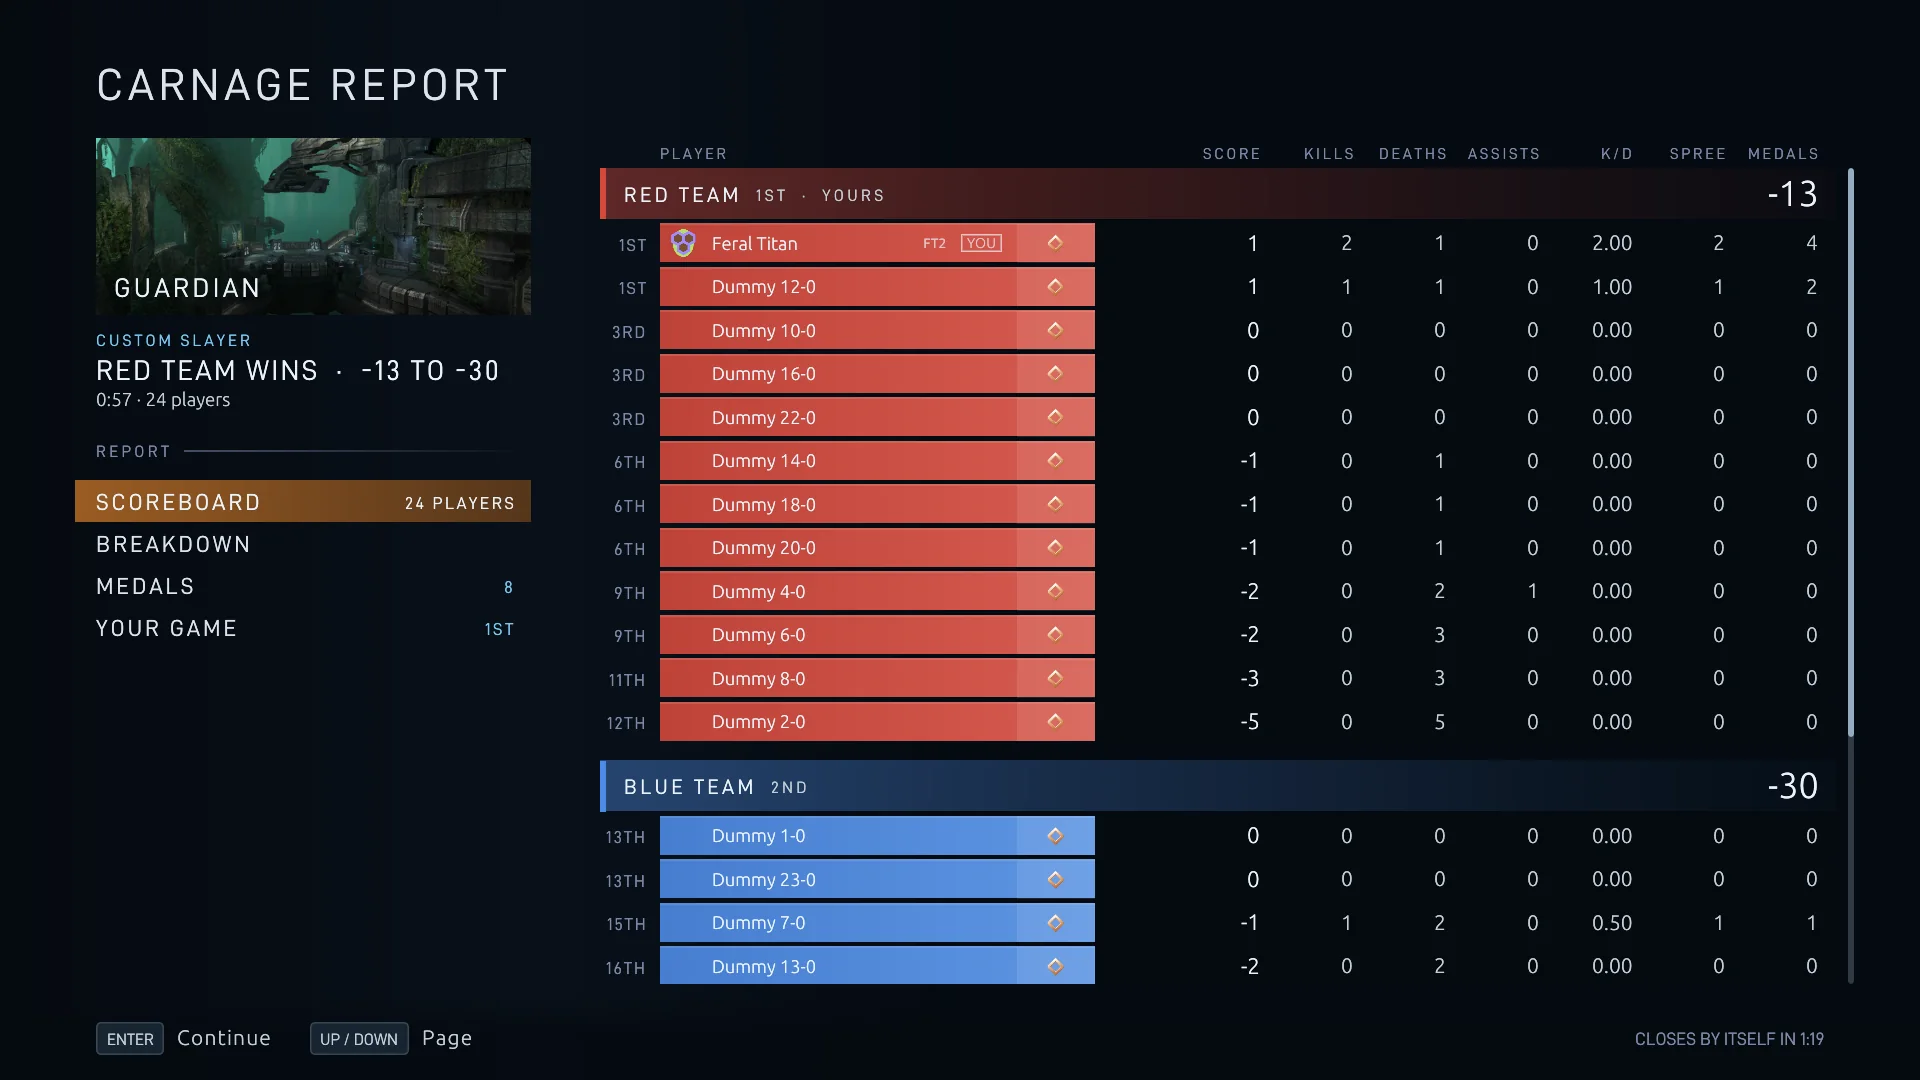
- SCOREBOARD: score, kills, deaths, assists, K/D and spree for every player.
- BREAKDOWN: betrayals, suicides, headshots and time alive too.
- MEDALS: every player's medals with their counts.
- YOUR GAME: your own numbers, your medals, your weapons, and your rivals: your nemesis and the player you killed most.
CONTINUE closes the report, and it closes by itself after a while. Closed it too soon? LAST GAME REPORT in the lobby opens it again, until the next game starts or you leave the server. To watch the whole game again, open it in the Theater.
Theater
Every game you play is recorded as a film, by your own game: multiplayer and Forge games, and campaign missions, alone or in co-op, in Halo 3 and in Halo 3: ODST. Dedicated servers record only when their host turns it on, and Arrival and the Epilogue, Halo 3's two missions that are only cinematics, aren't recorded, as in Halo 3. Games under 10 seconds aren't kept. Recording costs your game next to nothing.
Your films
Choose Theater on the main menu. Your films go down the column, newest first: your latest 25 games under RECENT GAMES, then the films you kept under SAVED FILMS. Select one to see its map's picture, the game type, how long the film runs and who played.
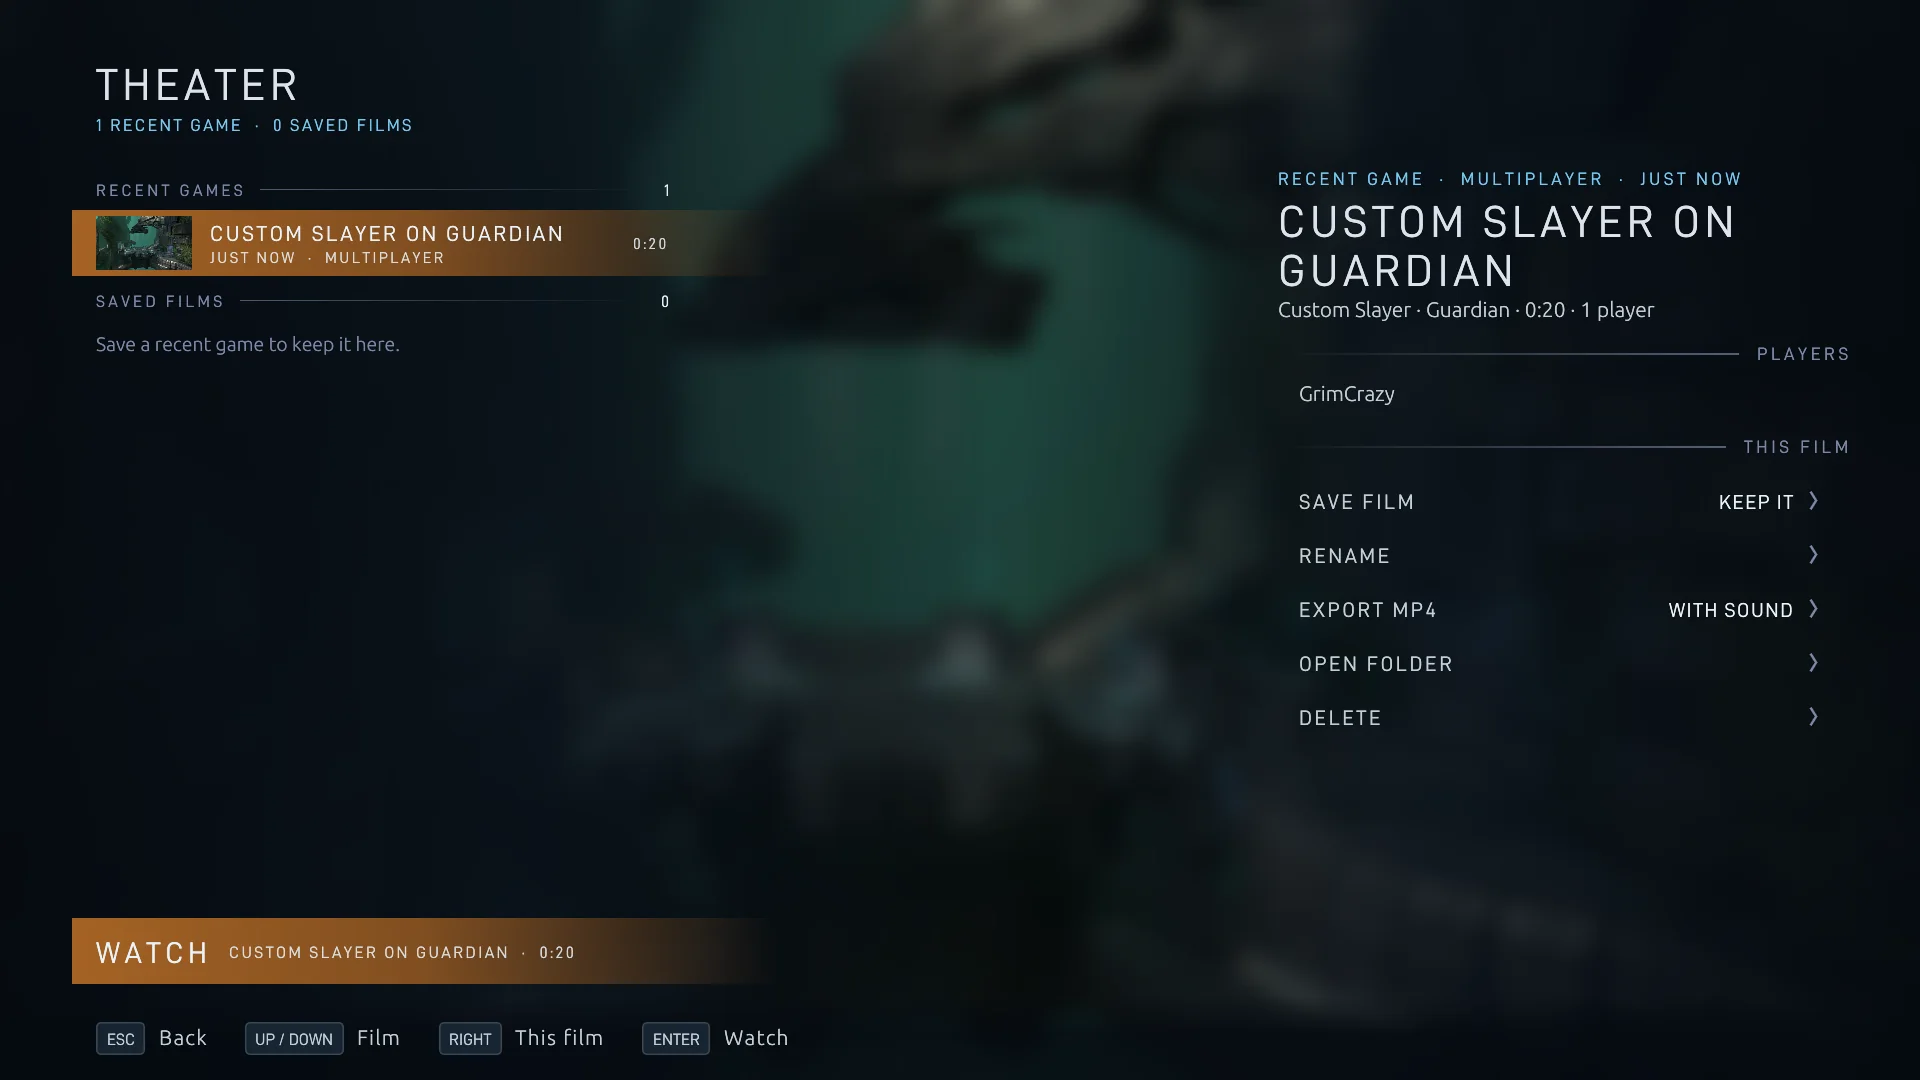
- WATCH plays the film back. Enter or a double click does too, and the arrow keys move up and down the films.
- SAVE FILM keeps a recent game under SAVED FILMS until you delete it. Recent games make way for newer ones: the latest 25 stay, as long as they fit in 8 GB together.
- RENAME gives the film another name, DELETE (or Delete) deletes it for good after asking, and OPEN FOLDER shows the film's file, to share it or keep a copy.
- Where films are: the
Filmsfolder of your player folder, with recent games in itsRecentfolder, named after the game type and map, such asTeam Slayer on Guardian.film, or the mission and difficulty. A.filmfile copied into either folder shows up too. - Maps and mods: a film brings its map along the way joining a game does, mod maps and merged objects included. A film whose map needs mods you don't have names them, with GET MODS for those on Steam's Workshop; then WATCH plays it. A film that can't play says why within seconds.
- Characters: a film keeps every player's character, armor and colors through the game, characters from customization packs and character mods included.
- The game as it was: a film replays with the world settings and the host's choices of the recorded game, and is checked before it plays.
- Big games: a film you recorded as a joining player in a game of more than 16 players plays from start to end, and saves the same work for players far from the camera as the game did, so it plays smoothly on slower PCs too.
- Other versions: a film plays in later versions of Project Reclaimer as long as they play games the same way. A film from a version that doesn't says why, and WATCH stays off. Films from 0.9 don't play in 0.10.
Watching a film
While a film plays, a bar at the bottom shows where you are in it, its speed or that it's paused, the camera and the player it follows, and the keys. It shows for a few seconds after a key and while the film is paused or has ended.
| Key | While a film plays |
|---|---|
| Esc or Start | RESUME FILM, SETTINGS, LEAVE THEATER and EXIT GAME. |
| H | The theater's controls (below). |
| Enter or A | Pause or play; at the film's end, play it again. |
| , / . | Slower / faster. |
| ← / → | Back to the last 10-second mark / on to the next one already seen. |
| ↑ / ↓ or the D-pad | Watch the player before / after. |
| Space | The free camera, or back to following a player. Move it with your movement keys and the mouse; R and F raise and lower it, and Shift moves faster. |
| Left Alt hold | Fast forward; letting go pauses the film. |
| C | First or third person. |
| Z or B | Show or hide the game's HUD. |
| F12 | Start or stop recording a video of what you see. |
| X or X | Save a screenshot. |
H opens the theater's controls:
- PLAYBACK: back to the start, back 10 seconds, play and pause, and on 10 seconds.
- The timeline: click it to jump there; pointing at it shows the time.
- SPEED: ¼×, ½×, 1×, 2× or 4×.
- CAMERA: FIRST PERSON, THIRD PERSON (following the player) or FREE CAMERA, and GAME HUD shown or hidden.
- TAKE SCREENSHOT and RECORD VIDEO.
- PLAYERS: click a player to watch them.
- Change the keys: the playback, camera and capture keys are under THEATER in Settings → Keyboard & Mouse, and the bar's hints follow your choices. Watching the player before or after stays on the arrow keys and the D-pad.
- Screenshots are PNG pictures of what the film shows, without the menus or the bar, in the
Screenshotsfolder of your videos folder. - Solo, host and lockstep campaign films only go forward, as in Halo 3: Back to the start, or Enter at the film's end, plays one again from its start. Guests in host-authoritative co-op and Firefight record their own view and can seek backward in those films, as in multiplayer. Going back lands on the last 10-second mark before the time you chose and plays on fast to it. Hosts and guests need the same version to play together.
- Turn recording off with Settings → Game options → Record my games and choose APPLY CHANGES.
Films as videos
A film can be saved as an MP4 video with the game's sound, in a Project Reclaimer folder in your videos folder: Videos on Windows, ~/Movies on macOS and $XDG_VIDEOS_DIR, usually ~/Videos, on Linux.
- The whole film: select it on the Theater page and choose EXPORT MP4. Before it starts, the Game HUD switch chooses whether the game's HUD shows in the video. The film plays from its start, and when it ends you are back on the Theater page. Leave the film to stop early and keep what was recorded.
- What you watch: while a film plays, press F12, or choose RECORD VIDEO in the theater's controls, to record what you see, with your own camera, player and speed, and press it again to stop. The theater bar, the menus and the chat never show in the video.
- Videos are 60 frames a second, at the size of the game's window.
- On Linux, videos go through GStreamer: you need an H.264 encoder (NVIDIA's NVENC, which the game prefers when it's there, VA-API or x264), and without an AAC encoder the video has no sound. When one encoder can't start, the game tries another.
- Films of Halo 3: ODST's games can't be saved as videos yet.
Forge
Build maps alone or with friends in Halo 3's Forge, with up to 9,999 objects: primitives in every size with any material and color, walls that players, vehicles or projectiles pass through, objects from every installed multiplayer map, Halo 3: ODST's and your mods', AI of Halo 3 and of the other installed games to fight, which walk on and around the objects you place, kill and garbage volumes and switchable map boundaries. You can also build on a campaign canvas: an area of a campaign mission of any installed game, with its terrain and lighting but none of its objects, AI or scripts, on the Campaign tab of the Map picker.
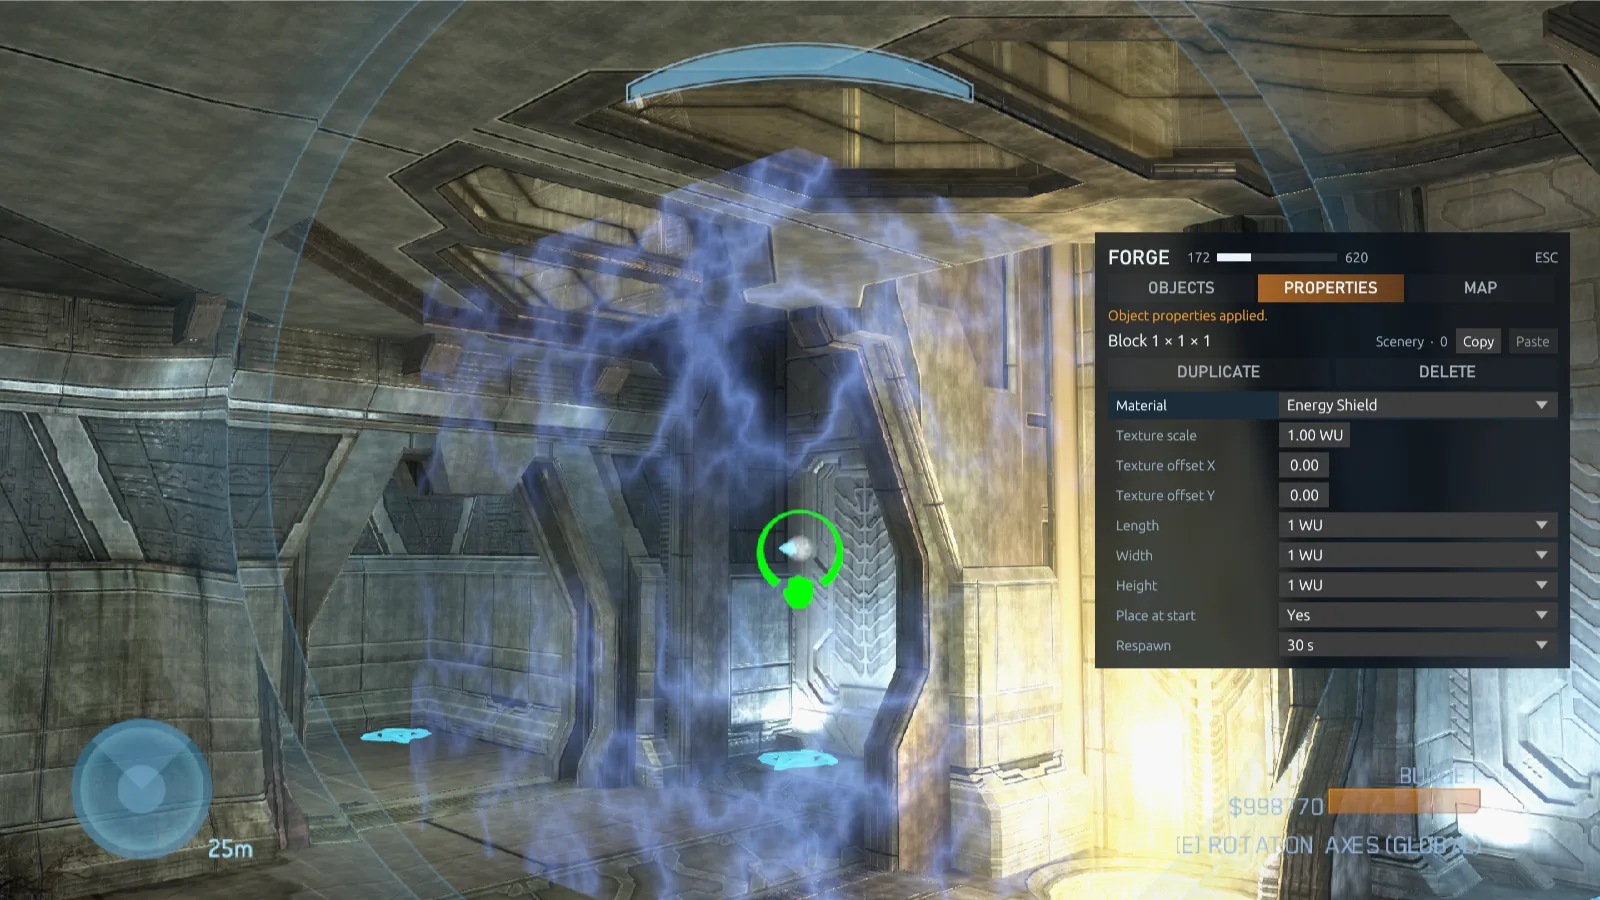
- Start an editing sessionChoose Forge in the main menu: it opens Host Game with Forge as the game type. Pick a Map, leave Network on Local to edit alone or set Online to let friends join and edit with you, and choose START GAME. Host Settings → FORGE OBJECTS picks which games and mods give the session its objects, and says what players who join will need.
- EditPress ` to switch between playing and editing, and X for the Forge menu's objects. Space picks up and drops objects. Aim at an object and press 2 to edit its properties. While you hold an object, hold the right mouse button and move the mouse to turn it, R switches between turning it on the map's axes and on its own, and the mouse wheel pushes it away or pulls it closer.
- Save your mapPress Esc and choose SAVE MAP. There is no autosave, so save before you leave.
- Play itYour saved map appears under Map in Host Game. Pick it with any game type, or add it to a playlist.
- The monitor: E and Q fly it straight up and down, F steps through its speeds, from a precision mode for fine placing to sixteen times normal, and Shift flies faster. Teleport it from the Forge menu's Map tab, where the Sky row also puts another map's sky over yours.
- Selecting: the left mouse button selects objects to carry, copy or save as prefabs (hold it from empty space and sweep to select many, or hold → with empty hands to clear). C clones the object you aim at, M turns magnets off and on, and Ctrl+Z undoes.
- Limits: the HUD and the Forge menu show how many objects the map holds against its limit. See limits.
- Round: the host or a solo editor can choose START NEW ROUND in the Game Menu to reset the world with the edits kept; save first to keep them for another session.
- More: place lights, screen effects and doors with switches, choose the game types each object appears in, set a map's gravity and atmosphere, move an object to coordinates you type, and pick from surfaces from every multiplayer map. Forge on a mod map has every map's objects too, and ElDewrito's Forge maps and game variants convert themselves when you put them in your Maps or Game Modes folder.
The Forge page covers primitives, materials, passthrough, AI, the menu, volumes, rotation, skies and every Forge key.
Reclaimer Kit
The Reclaimer Kit is the game's own editor for maps and tags, for what Forge can't reach: it edits a map's scenario, tags and scripts over the running game, and compiles the result into a map others can join. It's an app of its own, on the download page, and needs only MCC.
The Reclaimer Kit guide starts from the beginning with a first map, and the Kit reference has the details.
Settings
Open Settings from the main menu, a lobby or the Game Menu. The categories run down the column in five groups, the chosen category's settings sit beside them, and the setting you point at or move to is explained on the right.
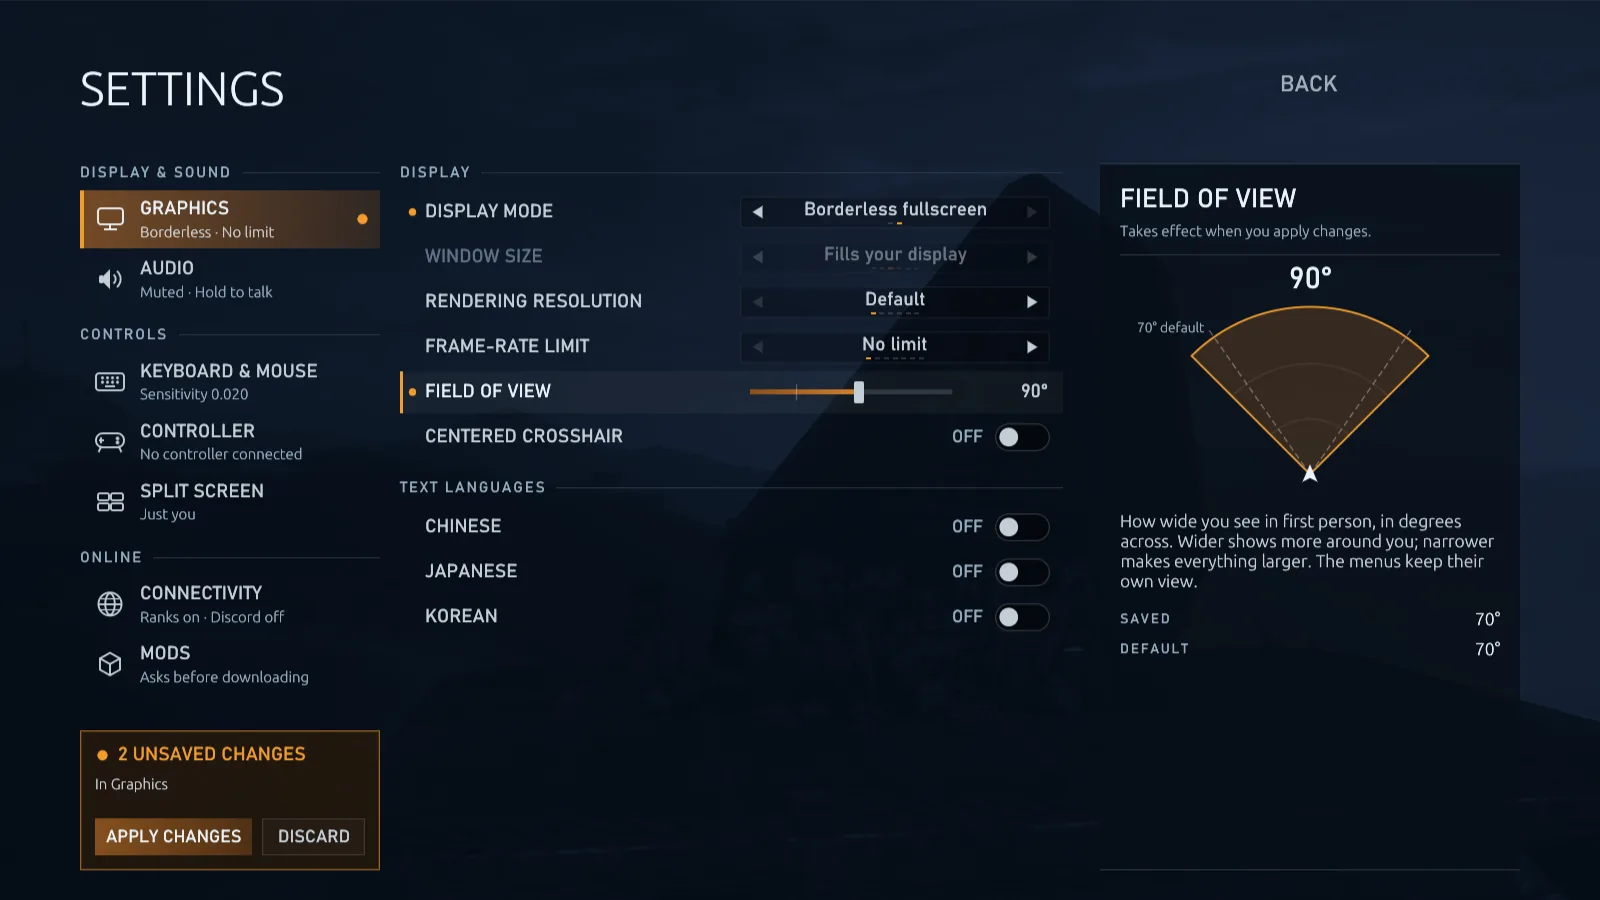
- Find a setting: press / and type: the field over the categories lists the settings whose names hold what you typed, from every category, and they change in place. Esc clears it.
- The panel on the right says what a setting does, when it takes effect, what you had saved and what the default is. Many come with a picture that follows your choice, such as your field of view drawn from above or the controller with the button lit.
- On and off settings are switches, lists are choices between two small arrows, and sliders show where their default sits.
- APPLY CHANGES keeps what you changed and DISCARD drops it; changed settings and their category are marked with a dot. RESTORE DEFAULTS is at the end of the keys along the bottom. Split Screen, Online Services and Mods change at once, and changing the MCC or cache folder restarts the game. Display changes ask you to keep or revert them.
- With the keyboard or a controller, the arrow keys (the D-pad) move through the settings, left and right change the one you're on, Q and E (LB and RB) step through the categories, and Esc or B goes back.
| Group | Categories |
|---|---|
| Display & Sound | Graphics, Advanced Graphics, Audio |
| Game | Game Options, Language, Split Screen |
| Controls | Keyboard & Mouse, Controller |
| Online | Communication, Online Services |
| System | Mods, Folders |
The categories:
- Graphics: the graphics card; Display mode: on Windows borderless fullscreen (the default) or windowed, on macOS and Linux exclusive fullscreen (the default), borderless fullscreen or windowed; Window size; Rendering resolution from 1280×720 to 3840×2160, or Default, your display's size when fullscreen; Frame-rate limit; VSync (off to start with), which stops the picture tearing in fast turns; on Windows and macOS, Frame queue; and HDR.
- Frame-rate limit: Auto, the default for a new profile, is the refresh rate of the display the game starts on; a profile from 0.9 keeps the limit it had. The others are no limit, 30, 60, 120, 144, 165 and 240 FPS, and Custom.
- Your own frame-rate limit: Custom shows a Custom limit slider for any limit from 30 to 1000 FPS, such as a few frames under your display's refresh rate for a G-SYNC or FreeSync display. A mark on its track shows the refresh rate.
- The menus and loading screens keep to your display's refresh rate whatever your settings. Games keep your frame-rate limit and VSync setting.
- Frame queue, on Windows and macOS: how many finished frames may wait in line for your graphics card, from 1 frame to 3 frames. A shorter queue makes aiming feel more immediate and can smooth out stutter when the graphics card holds the frame rate back; a longer one can draw a few more frames a second. Automatic, the default, keeps three on Windows, or two on a graphics card built into the processor, and two on macOS.
- On a Mac with VSync off and a high frame-rate limit or none, the game draws as fast as the Mac can, past twice the display's refresh rate. Frames the display has no room for aren't shown, so the picture still never tears.
- Advanced Graphics: how much detail the game draws, for one player and for split screen, with texture filtering, antialiasing, motion blur, ambient occlusion, occlusion and frustum culling, extra spot lights, lightmap filtering, the grass and foliage distance and bloom. See Advanced graphics.
- Audio: under GAME AUDIO, Master volume, Game audio volume (the game's effects, dialogue and music, apart from voice chat and the menus), Mute, Mute in the background and Output device. Under MENU MUSIC, the menus' songs and their order (see Menu music).
- Game Options: under CAMERA, Field of view and In-vehicle field of view (each 55–120°, 70 to start with, split-screen players included), Third-person field of view and Unlock viewmodel FOV; under HUD, UI width, Centered crosshair, Scale crosshair with FOV, Crosshair size, Hide helmet visor, Hide HUD, Hide hints, Show FPS and tick rate with its details, and the frame graph; under THEATER, Record my games for the Theater; under NAMEPLATES, Show players' input icons; under SCOREBOARD, Final scoreboard at game end and Extra scoreboard columns; under PLAYER TAGS AND NAMES, Fade distant player labels and Party and friend colors; and under WEAPON VIEWMODEL, Sprint sway and your weapon's placement. They apply to every player on this computer; the host still chooses the game's rules.
- Language: the language of the menus, of the game's text and of the characters' voices, subtitles, and Chinese, Japanese and Korean characters for player names. See Language.
- Split Screen: the players at this computer, how they share the screen, and your saved players. See Split screen.
- Keyboard & Mouse: Mouse sensitivity on MCC's scale, so the value you play with in MCC feels the same here (0.05 to 20, 1.5 to start with; the panel shows how far the mouse moves for a full turn at 800 and 1600 DPI), Aim acceleration (off to start with), Mouse smoothing (0% is raw input, 30% to start with), Invert look, Invert flight and Toggle crouch. Then the key bindings, under MOVEMENT, COMBAT, GAME MODE ABILITIES, VEHICLES, FORGE, COMMUNICATION & INTERFACE, THEATER and HALO 3: ODST: every action can take two keys or mouse buttons, and Delete or Backspace clears the one under the pointer. Press any key on the page to see what it's bound to, and Tab steps through the sections.
- Controller: the Button layout; under STICKS, Aim control, Horizontal sensitivity and Vertical sensitivity (each 0.25–4×), Aim acceleration, Invert look, Invert flight, Aim to climb (Hornet), Stick layout and Vibration; DEAD ZONES; then a button for every action, kept apart from the keyboard's.
- Communication: Game chat and Chat names; under VOICE CHAT, a switch to turn voice off, Voice chat volume and each channel's volume, Microphone, Microphone device and Talk mode (see Chat and voice); the CONTENT FILTER; and your DISCORD status.
- Online Services: the Social service for friends and parties (the project's public one unless you change it; empty turns them off), and Friends see where I am; under SERVER DISCOVERY, Server query batch size, Master servers and refreshing the server list; the Stats service your ranks come from (the project's public one unless you change it; empty turns ranks off); and your Player ID.
- Mods: whether to download through Steam Workshop, where downloaded mods go, the Forge asset library, every mod on your computer with a switch to turn it off, and character mods. See Mods.
- Folders: your player folder, the MCC installation the game runs from, the folder that holds its caches and the folder downloaded mods go to. See Folders.
Advanced graphics
Settings → Advanced Graphics sets how much detail the game draws. It has three parts, and changes take effect as soon as you apply them, during a game too.
Small distant objects keeps objects always drawn, or hides moving objects (players, vehicles, weapons, equipment and projectiles) smaller than 4, 8 or 16 pixels on screen (16 by default). Scenery, crates and the map's own pieces are always drawn. This reduces work in crowded views. A far object fades out over its last few pixels and fades back in, rather than popping, and its shadow goes with it. A scope brings an object back when magnification makes it large enough. Occlusion culling also measures its cost per view, including split screen, and steps aside where it does not help.
- Image: Texture filtering keeps floors and walls you see at an angle sharp. Original, the default, filters each surface the way the game made it; 4×, 8× and 16× anisotropic filter every surface at that level. Antialiasing (the game's own FXAA) is on to start with. Motion blur blurs the picture as you turn quickly, as Halo 3 always has; it's off to start with, which keeps every frame sharp. Ambient occlusion adds soft shading in corners and where objects meet the ground, on Halo 3's maps; it's off to start with, as Halo 3 shipped. Occlusion culling, on to start with, leaves what the level's walls, floors and terrain hide undrawn, which makes busy maps faster: objects, scenery, decorations and lights, on every game's maps, Halo: CE's and Halo 2's included. It works out what is hidden for every frame, so nothing shows late. Off draws everything in view, as Halo 3 did. Frustum culling, on to start with, leaves what lies outside your view undrawn, as Halo 3 does. Off draws everything your place in the level could see, wherever you look: much slower, and there to compare frame rates or to tell whether something missing at the screen's edge was culled. Bloom sets the glow around bright lights, the sky and shiny surfaces on Halo 3's maps: 100% is what each map was made with, and 0% leaves none. With ODST installed, Bloom in ODST does the same for its maps, which glow more.
- Extra spot lights: a surface is lit by at most eight simple lights at once. On draws the spot lights past those eight in passes of their own, so busy fights keep every light, which costs the graphics card more just when the most is happening. Off, the default, drops them, as Halo 3 shipped.
- Lightmap filtering: some mod maps blend their baked lighting by hand in every pixel, which can take most of the graphics card's time. Smooth, the default, draws the same soft blend at a fraction of the cost; Fast uses the plain filtering of the games' own maps, lighter still; Original draws the map's shaders exactly as they were made, which is very expensive on those maps with almost no visible difference. It changes on the map you're playing as soon as you apply it. The games' own maps aren't affected.
- Grass and foliage distance: how far from you grass, plants and ground clutter are drawn, the same on every map of every game and at every resolution: Off, 25, 50, 100, 200, 400 or 800 m, or Unlimited. It starts at 100 m, and everything inside it is drawn, fading out at its edge. Lower it for more frames in wide grassy views.
- One player: a Preset of Low, Medium, High or Ultra sets the eight settings below at once, or set each on its own. Medium, the default, is the Xbox 360's own detail and suits older PCs. High draws more shadows and lights and keeps everything in view further away, and Ultra goes past it all. The two draw distances also have Extreme, which no preset sets: you choose it by hand.
- Split screen: Halo 3 draws split screen with less detail than one player gets: no shadows or decals, the simplest water and fewer lights, and less again with three or four players. Auto, the default, keeps that. Any other level draws every view on the screen the way one player gets it at that level. More detail on four views asks more of your graphics card.
| Setting | Levels | What it changes |
|---|---|---|
| Shadows | Off, Low, Medium, High, Ultra | How many objects cast shadows and how sharp they are. Low and Off also take away your own shadow; Ultra lets every object cast one. |
| Dynamic lights | Off, Low, Medium, High, Ultra | How many lights from gunfire, explosions and effects light up the world, and how far away they still do. Ultra draws twice as many as High. Round point lights, such as Forge's, stop at 8 in view; spot lights draw past that with Extra spot lights on. |
| Effects | Low, Medium, High, Ultra | How far away explosions, sparks and smoke keep their full detail. |
| Draw distance | Low, Medium, High, Ultra, Extreme | How far away the map's own pieces stay drawn before they fade out: rocks, walls, buildings, crates and other scenery. High draws them as far as Halo 3 can. Ultra keeps them until they are about a dozen pixels across and Extreme until only a few, which very large mod maps need to stop scenery popping in and out; both cost frame rate there. Every piece of every map fades by this one rule. Grass and plants have a distance of their own. |
| Object draw distance | Low, Medium, High, Ultra, Extreme | How far away players, vehicles, weapons, equipment and everything else that moves stay drawn. High draws them as far as Halo 3 can and Ultra much further; Extreme never fades them out for their distance. Small distant objects still hides what is only a few pixels across. A profile from before this row keeps drawing objects as its Draw distance did. |
| Level of detail | Low, Medium, High, Ultra | How far away characters, vehicles and objects keep their most detailed models. |
| Decals | Off, Low, High | Bullet holes, scorch marks and blood on walls and floors. |
| Water | Low, Medium, High | Water's waves and reflections. |
A preset sets each setting to that level, or to the nearest level above it that the setting has. Change one setting and the preset reads Custom.
The defaults are light on purpose, so the game runs well on older PCs as it comes: Medium, no motion blur, no extra spot lights and grass to 100 m. A profile from before these defaults has its Advanced graphics set to them once, with a message in the menus; your display mode, resolution, frame-rate limit, field of view, controls and everything else stay as they were. For the earlier look, set Preset to High, turn Motion blur and Extra spot lights on, and raise Grass and foliage distance to 400 m.
HDR
Settings → Graphics → HDR shows the brightest parts of the picture (the sun, lights, explosions, shiny metal) brighter than white, on a display that can. Everything else looks as before, and the menus, HUD, screenshots and films stay as they are. HDR highlights sets how bright the brightest get, from the display's maximum down to 2× white.
- Windows: the display must be in HDR: turn on Use HDR in Windows' display settings.
- macOS: an HDR or XDR display, or a Mac's own display, through its extended dynamic range.
- Linux: a desktop in HDR that offers Vulkan a surface in extended linear sRGB, such as KDE Plasma's or gamescope's.
Output device
Settings → Audio → Output device picks the speakers or headset the game plays on, with the menu music and voice chat. Leave it on the system's default to follow the device chosen in your system's sound settings, also when you change that while you play: the sound moves within a second. Pick a device and the game always plays on it. The change takes effect as you apply it, also in the middle of a game. A device that is unplugged or turned off hands over to the default device, and a chosen one plays again when it's connected again.
Menu music
The menus play Halo 3's main menu music: Opening Monks, Unforgotten, Choose Wisely, Movement, Enough Dead Heroes and Monks and Effects, joined by Another Walk and Roll Call, with ODST installed its main menu's music and six of its songs, and with Halo: Reach or Halo: Combat Evolved installed each one's main menu music, as one song. The songs come from your own game's files. They play in a new random order each time you start the game, and after a game the menus go on to the next song.
- Your own order: in Settings → Audio, set Song order to Your order and move songs up or down with the arrows beside them.
- Leave songs out: switch a song off and it doesn't play.
- Add more: ADD brings in more of Halo 3's songs by their soundtrack titles, such as Black Tide, Leonidas Returns and Halo Finale.
- Play one now: while the menu music plays, the play button beside a song starts it straight away.
- Menu music itself turns the music off, and Menu music volume sets how loud it plays, the lobby's countdown included.
Folders
Your profile, settings, films, maps, game types, mods and logs are in your player folder, with the game's caches in its Cache folder:
| System | Player folder |
|---|---|
| Windows | %LOCALAPPDATA%\ProjectReclaimer |
| macOS | ~/Library/Application Support/ProjectReclaimer |
| Linux | ~/.local/share/ProjectReclaimer, or $XDG_DATA_HOME/ProjectReclaimer |
File browsers hide these folders, so Settings → Folders has OPEN on each. Up to 0.9 the player folder was Documents\My Games\Project Reclaimer; see Coming from 0.9.
- Player folder: shown with OPEN. Inside are
Maps,Game Modes,Mods,Playlists,Films,Logsand yourprofile.json. - MCC folder: CHANGE… chooses the MCC folder, its Steam library or its
halo3folder, for example when you have MCC installed in more than one place. The game restarts to run from it. - Cache folder: what the game builds from your MCC installation: the Forge library, the text fonts and the code it translates. It can always be built again. Choose a folder on another drive to free up space on this one: the game restarts and moves the cache there, and MOVE IT BACK returns it to the default folder. If that drive is missing, the game uses the default folder until it's back, and FORGET IT stops looking for it.
- Downloaded mods directory: the same choice as in Settings → Mods. See Where downloaded mods go.
- The MCC and cache folders change from the main menu, not during a game. Dedicated servers on the same computer use the cache folder you choose too.
Centered crosshair
Turn on Settings → Game Options → Centered crosshair to put the crosshair in the middle of the screen instead of Halo 3's lowered spot. Your aim moves with it. Split-screen players get it too.
Crosshair size
Settings → Game Options → Crosshair size draws the crosshair from 25% to 200% of Halo 3's own size (100% to start with), for every weapon, vehicle and the Forge monitor. Scope overlays keep their size and your aim doesn't change.
Scale crosshair with FOV: turn this on to size the crosshair from your Field of view instead of Crosshair size. A wider view makes everything on screen smaller, and the crosshair shrinks with it, so it covers as much of the world as Halo 3's does at 70°. In a vehicle's third-person view it follows In-vehicle field of view, and zooming in leaves it as it is.
UI width
On a screen wider than 16:9, Settings → Game Options → UI width keeps the menus, the HUD, the scoreboard and chat in a band in the middle instead of at the screen's far edges. 100% keeps everything in a 16:9 band, 0% uses the whole width, and it starts at 77%. On a 16:9 screen or narrower nothing changes.
Unlock viewmodel FOV
Turn on Settings → Game Options → Unlock viewmodel FOV to make your first-person weapons follow your Field of view: a wider view shows more of the weapon and makes it smaller. It's off to start with, which keeps Halo 3's original weapon view, and works alongside the weapon viewmodel offsets below. At 70° the weapon looks the same either way.
Third person
The server decides how you see your own character on foot in multiplayer games, with Host Settings → Camera or a dedicated server's camera setting:
- First person only, the default: everyone plays in first person, as in Halo 3, also as a character made for third person and in a game type whose Camera option says third person.
- Players choose: press Switch camera (P) to switch between first and third person. On a controller it has no button until you choose one, under COMBAT in Settings → Controller. Until you press it, the game type and your character decide. Your choice stays until you switch again or restart the game.
- Third person only: everyone plays in third person.
Where the server doesn't let you choose, Switch camera says so in chat. Game modes built around third person, such as UNSC vs Covenant vs Flood's classes, keep it whatever the setting, and vehicles keep their own views. Every player's game shows you in the same view and fires your shots from the same place, and films replay your camera as it was. In the campaign, the modifiers choose.
The shoulder camera: third person on foot puts the camera close behind your character's right shoulder. Your shots leave from where the camera is, so they go where the crosshair points, with a centered or a lowered crosshair, and never from behind a wall you back against.
Characters' own cameras: a character uses the camera its model was made with: Halo 3's Spartans and Elites their own, and a character pack's characters the camera their maker built in the mod tools. A pack character without a camera of its own uses the Spartan's, and game modes' characters keep the shoulder camera.
Settings → Game Options → Third-person field of view sets how wide you see on foot in third person, from 55° to 120° (70° to start with), apart from your first-person and in-vehicle views. Weapons zoom in third person too, which narrows the view as usual.
Vehicles: vehicle seats with a third-person view don't zoom, as in Halo 3.
Weapon viewmodel
WEAPON VIEWMODEL in Settings → Game Options moves your first-person weapon across, up or down, and closer or further away: three sliders from −100 to +100, all 0 to start with. Positive values move it right, up and forward; a weapon in your left hand mirrors the sideways offset. They take effect in a game when you choose APPLY CHANGES, for split-screen players too. Only the picture moves: your aim, where shots land and how others see you stay the same.
To place one weapon on its own, step the Weapon row from All weapons to that weapon, turn on Own placement and set its offsets. The list holds Halo 3's weapons, then any other weapon you've held since the game started, mods' weapons included, with the ones in your hands first, so you can adjust what you're holding from the Game Menu.
Sprint sway sets how far your arms and weapon swing with your stride while you sprint: 0% keeps them still, 50% is where it starts. Your view stays steady either way, and only you see it.
Hide helmet visor
Turn on Settings → Game Options → Hide helmet visor to leave out the frame Halo 3 draws along the top and bottom of the screen for the inside of your helmet, an Elite's visor and the Forge monitor's lens included. The rest of the HUD stays.
Hide HUD
Turn on Settings → Game Options → Hide HUD to hide the whole HUD in campaign and multiplayer games, as the Blind skull does: shields, health, ammo, grenades, the motion sensor, the crosshair, players' names and markers, the game's messages and the sprint meter. The weapon in your hands stays. It works in Halo 3: ODST's games too. Films have their own HUD switch in the Theater.
Hide hints: this turns off the training hints, as MCC's Hints option does: the prompts that show which button to press to throw a grenade, swap weapons, use equipment and so on, in Halo 3 and ODST. Prompts to pick up or use something still show.
Show FPS and tick rate: shows your frames a second in the top right corner of a game and, online, how the server keeps up: Server ticks is how many ticks it played in the last second, of the number it should, and turns red under nine tenths of that. It's off to start with. Show tick and culling details adds a second line about your own PC: Local ticks, the ticks your game played in the last second of the number it should, red when your PC can't keep up; Tick, how long one tick takes in milliseconds; Drawn, how many objects your picture draws, of all that could be drawn at all (invisible markers such as spawn points don't count; what is drawn with an object, such as a player's weapons or a vehicle's riders, does); Faded, how many objects in view were left out as too far or too small by your draw distances and Small distant objects, so what is neither drawn nor faded was culled, off screen or hidden behind the map; and Simulated, how many players and vehicles your PC simulates itself, of all there are, with those it updates less often after a plus sign (see big games).
Frame graph
Settings → Game Options → Show frame graph draws a graph of your frame times over the game, under every menu, and says what limits your frames. Frame graph view chooses the view, and Next frame graph view (F7) goes round them all, then off:
- Summary, the default: your frames a second in large type, one sentence naming what limits them (the render thread, the game thread, the graphics card, the display or a frame limit), four figures (frame time, the 1% low, the GPU's busy time, and how busy the game and render threads are) and a plot of the last seconds.
- Bars: each thread's and graphics device's share of every frame, with the limit marked. Frame lanes: the last frames as lanes, showing who works and who waits. Detailed: the frame times as lines, with every figure. Frame history: the last frames as bars.
- Switches under the row turn each part on and off: CPU threads, GPU, storage, memory and network, and the summary's figures, sentence, plot and guide lines. A part that is off isn't measured. The plot shows 5, 10, 20 or 30 seconds, and lows read as frames a second or milliseconds.
- The graph also lists the graphics cards in your PC and which one draws the game. The panel on the right in Settings explains what each label measures on your system.
Record frame times: this key, under COMMUNICATION & INTERFACE with no key until you pick one, records every frame of the next 30 seconds. It then writes a CSV in PresentMon's format, which CapFrameX and similar tools open, and a short summary (average, median, 1% and 0.1% lows and which part set the pace) to your Logs folder.
Record debug info (F9, or the switch under Show frame graph) records two minutes of every frame and your graphics devices, then stops by itself; press it again to stop sooner. DEBUG ENABLED shows in the top right with the time left. It saves a frame-times CSV, a summary and a device list, with the build, map, game type and graphics settings in force, in a dated debug folder under Logs. It stays on your PC, with no names or folder paths in it, for you to send along with a report. Add graphics device information to the log now and then, on to start with, puts a short line for each graphics device in client.log.
Fade distant player labels
Turn on Settings → Game Options → Fade distant player labels to thin out the names, tags and icons over players' heads in big games. It's off to start with.
- Fade start distance: labels closer than this keep their usual look, from 1 to 500 units (a unit is about three meters).
- Distant label opacity: how much of a label is left at twice the start distance and beyond, from 0% (hidden) to 100% (20% to start with). Between the two, labels fade gradually.
- Distance counts from your current view, in vehicles and while spectating too, and in split screen each view measures its own. Objective markers keep their usual look.
Filter chat, player and server names
Settings → Communication → Filter chat, player and server names masks words with asterisks. It's on to start with; to opt out, turn it off and choose APPLY CHANGES. You choose what it masks: Slurs filter for common English slurs, Profanity filter for swearing and sexual terms, and Custom filter for words of your own, listed under Custom words, one per line. Your words match only as whole words, and capitals, leetspeak and lookalike letters count as the same word. It changes only what you see: other players and the host still get the original text. The game's own overhead labels and kill feed keep the original text too, and a word list can't catch every offensive message.
Exclusive fullscreen
On macOS and Linux, choose Exclusive fullscreen in Settings → Graphics → Display mode to give the game control of the display while focused. Switching to another window releases it, and switching can briefly blank the display. On macOS this is the system's own full-screen Space; on Linux it takes the display's mode on X11, and is the same as borderless on Wayland. It's the default for a new installation there.
Windows has no exclusive fullscreen: Borderless fullscreen is the default and is as fast, switching to other windows is instant, and a profile set to exclusive fullscreen plays borderless.
Choose APPLY CHANGES, then KEEP CHANGES within 15 seconds. REVERT, or letting the timer run out, restores your previous settings.
Graphics card
On a computer with two graphics cards the game draws with the faster one. On a Windows laptop whose display belongs to the processor's built-in graphics, it asks Windows and the drivers for the dedicated card as it starts and draws on it directly. Settings → Graphics → Graphics card shows the card drawing the game now. Automatic, the default, leaves the choice to the game. Choose a card and apply it, and the game starts again on that card and brings you back to the same row. During a game or in a lobby you're never dropped out: the row says the card takes over once you leave, and the game starts again when you're back on the main menu. If the card can't show the game, the next start goes back to Automatic. If a card stops responding, the game closes with a message instead of a bare crash.
Aim control
Settings → Controller → Aim control picks how the look stick responds. Modern, the default, is MCC's smoother response, which keeps diagonal aim steady; Classic is Halo 3's original. It works with your look sensitivity and aim acceleration.
Aim acceleration
- Controller: Settings → Controller → Aim acceleration sets how quickly turning builds up to full speed while the look stick is near its edge, from Off to 5×. 1×, the default, keeps the build-up of the aim control you chose; higher reaches full speed sooner, and Off leaves out the build-up. Look sensitivity still sets the speed itself.
- Mouse: Settings → Keyboard & Mouse → Aim acceleration turns the camera further the faster you move the mouse, up to the most you choose, from Off (the default) to 3×. The extra turn grows with speed up to 1,000 mouse counts a second, which a higher DPI reaches sooner.
Both apply to split-screen players too, and are separate: changing one leaves the other alone.
Look sensitivity and dead zones
Settings → Controller has a Horizontal sensitivity and a Vertical sensitivity, so turning and looking up and down each get their own speed. Halo 3 already looks up and down at half its turning speed, so the same number is slower vertically.
Under DEAD ZONES, set how far a stick must lean before it counts:
- Look dead zone: the look stick, measured left-right and up-down separately (Halo 3 uses 20%). Lower it if aiming feels slow to start, raise it if your view drifts on its own.
- Look radial dead zone: a second look dead zone, the same in every direction, as MCC has (off to start with). It catches a stick that drifts a little both ways at once.
- Move dead zone: the move stick (Halo 3 uses 24%). The legacy stick layouts use the look dead zones on both sticks.
While you're on a dead zone setting, the panel draws the stick's travel with the part the game ignores shaded, and where your stick leans right now, so you can see whether it drifts out of the dead zone.
Toggle crouch
Turn on Toggle crouch in Settings → Keyboard & Mouse or Settings → Controller (each has its own) to press crouch once to stay crouched and again to stand. It's Halo 3's own crouch lock: holding crouch still works, letting go after half a second stands you up, and jumping stands you up too.
Invert look
Turn on Invert look in Settings → Keyboard & Mouse so that moving the mouse up looks down, as a controller's Invert look in Settings → Controller does. Flying vehicles follow Invert flight, so the two can be set either way.
Invert flight
Turn on Invert flight in Settings → Keyboard & Mouse or Settings → Controller (each has its own) to reverse up and down while you fly a vehicle: moving the mouse or the look stick up then points the nose down. Both are off to start with.
Language
Settings → Language sets the languages of the menus and of the game.
- Menu language: Project Reclaimer's own menus, in US or British English. Automatic follows your system's language and region. It's apart from the game's languages below.
- Text language: Halo 3's own text (the HUD, objectives, button prompts, medals and subtitles) in any of the eleven languages the game has: English, Japanese, German, French, Spanish, Latin American Spanish, Italian, Korean, Traditional and Simplified Chinese and Portuguese. It's English unless you pick another, whatever your system's language.
- Voice language: the language the characters speak. Same as text, the default, speaks the text's language when it can and English when it can't; or pick one of the six MCC can install: English, French, German, Italian and both Spanish versions, as your installation has them. A mod whose voices are only in English speaks English.
- Subtitles: on or off for cutscenes and scripted mission dialogue. Automatic shows them when the voices speak another language than the text.
Text and voice changes take effect the next time you start the game; subtitles change when you apply them.
The game's own text, such as player names in the HUD, leaves out Chinese, Japanese and Korean characters unless you ask for them, which keeps its fonts to a few MB. Those characters show as boxes until you turn on Chinese, Japanese or Korean under ALPHABETS and restart the game; choosing one of those as the text language adds them too. Chinese or Japanese adds about 160 MB (the two share it), Korean about 50 MB.
Troubleshooting
The log: Logs/client.log in your player folder, with the start before in client.previous.log. A game that crashed or was forced closed keeps its log as crash followed by the time it started, such as crash 2026-10-02 14-47-02.log; the 10 newest are kept. Send them along when you report a problem on Discord. Settings → Folders opens the folder. If the game won't start at all, look there by hand.
Starting the game
| Problem | What to do |
|---|---|
| “Windows protected your PC” | The download isn't code-signed, so Windows doesn't recognize it yet. Check its checksum, then choose More info → Run anyway. |
| Microsoft Defender or another virus scanner stops it, such as with “Trojan:Win32/Bearfoos.A!ml” | A false alarm: !ml means an automatic scanner guessed from how the program works, not that it found anything harmful. Check the file's checksum, then in Windows Security → Virus & threat protection → Protection history, select the entry and choose Allow on device. |
| macOS won't open the app, or says it can't check it or that it's damaged | Apple hasn't checked the app, so macOS needs your permission once. Check its checksum, then open System Settings → Privacy & Security and choose Open Anyway; see Install on macOS. If there's no such button, or macOS says the app is damaged, run xattr -dr com.apple.quarantine "/Applications/Project Reclaimer.app" in Terminal, with your app's own path. |
| “This build of Project Reclaimer needs a newer processor” | The Windows and Linux x86-64 builds need a processor with SSE4.2: Intel Core i3, i5 and i7 from 2008, AMD FX from 2011, or any Ryzen. The message names what your processor lacks. See Before you start. |
On Linux it stops with a “GLIBC” or libasound message | Your system is older than the game needs (glibc 2.36), or lacks ALSA's library: install libasound2 from your distribution. |
| It says Vulkan 1.3 is needed | On Linux the game draws through Vulkan 1.3. Update your graphics driver (Mesa or your card maker's). A graphics card too old for it can't run the game. |
| It says required Halo 3 content or campaign files are missing | The game needs both Halo 3 Campaign and Halo 3 Multiplayer; the checklist names the missing files. In Steam, check that both are installed (see Before you start), then verify the game's files. If you have MCC somewhere else that has everything, choose that folder. |
| The game can't find MCC | It asks you for the folder. Choose Halo The Master Chief Collection in steamapps/common in your Steam library (see First start). Once the game runs, Settings → Folders changes it. |
It says halo3.dll is another build and no copy is kept | MCC updated before your first start, so there's no copy of the build this version needs (see When MCC updates). Wait for a Project Reclaimer release made for MCC's new files, or copy your player folder from a computer that has started the game before. |
| “Halo 3 could not be made ready for this computer” | The game couldn't prepare the engine. Start it again. If it happens every time, send the log; the reason is in it. |
| OLD FILES NOT COPIED as the game starts | Your files from 0.9 couldn't be copied, for example because a file couldn't be read or the disk had no room. The game started with a new profile and doesn't try again. Close the game and copy what you want from Documents\My Games\Project Reclaimer into your player folder by hand. See Coming from 0.9. |
| On a Mac, the game started afresh after updating from 0.9 | macOS asks before a program reads Documents, and without that the game can't copy your files. It doesn't try again: close the game and copy your old folder's files from Documents/My Games/Project Reclaimer into your player folder in Finder. |
| The first start takes a while | The game is preparing the engine, then its fonts and the Forge library of every game and mod you have installed, which takes a few minutes with several games. It only happens once, and the engine again after each update. See First start. |
| The update window says the release can't be installed from here | That release has no package for your system, or no checksum for it. Choose RELEASE PAGE, download it and start it in place of the old one. |
| A saved checkpoint or film from 0.9 is gone or won't play | They don't carry over to 0.10 (see Coming from 0.9). Finished missions and your difficulty progress are kept: choose the mission again on the Campaign page. |
| The game closes with an error, or crashes | The message says why. Send the log along when you report it (see above). |
| A map's loading screen doesn't go away | Close the game and send client.log along when you report it. It says what the loading screen was waiting for. |
| The game wouldn't start after you used another version | A settings file with a setting the game doesn't know no longer stops it: the rest of the settings load. A damaged settings file is kept beside it, such as settings.json.damaged-…, before the game starts over with defaults. |
Picture, sound and controls
| Problem | What to do |
|---|---|
| You can't find a setting | Press / in Settings and type its name. Field of view, crosshair, visor and weapon placement are under Game Options; text chat, voice chat and Discord under Communication; master servers, the stats service and your player ID under Online Services. |
| Keys are in the wrong places on an AZERTY, QWERTZ or other keyboard | Keys are bound by their place on the keyboard, so every layout plays like a US keyboard: on AZERTY you move with Z Q S D. See keyboard layouts. |
| Lower weapon does nothing | It has no key or button to start with. Choose one for Lower weapon, under COMBAT in Settings → Keyboard & Mouse or Settings → Controller, and choose APPLY CHANGES. |
| The picture tears when you turn quickly | Turn on VSync in Settings → Graphics and apply it. |
| Aiming feels delayed, or frames stutter while the graphics card is busy | On Windows and macOS, set Frame queue in Settings → Graphics to 1 frame. |
| The game plays on the wrong speakers or headset | Choose them under Settings → Audio → Output device, or leave it on the system's default and pick the device in your system's sound settings. |
| Scenery pops in and out on a very large mod map | Raise Draw distance to Ultra or Extreme in Settings → Advanced Graphics; to see distant players further away, raise Object draw distance. Both cost frame rate on such maps. |
| The frame rate is low and you want to know why | Turn on Show frame graph: its summary names what limits your frames. If it's the graphics card, lower Rendering resolution or the Advanced graphics preset, and on mod maps keep Lightmap filtering off Original. In wide grassy views, lower Grass and foliage distance. To report it, record debug info and send the folder along. |
| The game looks plainer after an update, or motion blur is gone | The Advanced graphics defaults became lighter, and your settings were set to them once. Set Preset to High and turn Motion blur back on; see the defaults. |
| A Hornet no longer climbs when you aim up, on a controller | It climbs and descends with A and LB now, as in MCC. To aim instead, turn on Aim to climb (Hornet) in Settings → Controller. |
| The game runs slowly on a computer with two graphics cards | Check which card Settings → Graphics → Graphics card says is drawing the game, and choose the faster one there if it isn't: applying it starts the game again on that card. |
| The game closes with a message that the graphics card stopped responding | The system reset the card while the game drew, which happens most on graphics built into the processor in big games and on large mod maps. Choose your faster card under Graphics card, or update the graphics driver. |
| Split screen has no shadows and looks plainer than playing alone | That's how Halo 3 draws split screen. Choose a level for split screen in Settings → Advanced Graphics; High draws every view the way one player sees the game. |
| Your view drifts, or aiming feels slow to start, on a controller | Raise or lower the dead zones in Settings → Controller; the panel shows where your stick rests against them. |
| Names show as boxes | They use Chinese, Japanese or Korean characters. Turn that alphabet on under Settings → Language → ALPHABETS and restart. |
| The game's text or voices are in another language than you want | Choose the languages under Settings → Language. Text is English unless you pick another, and voices follow the text unless you pick one. Both change the next time you start the game. |
| Nobody hears you on a Mac | Allow the game under System Settings → Privacy & Security → Microphone. Without it the game listens only. |
| Nobody gets your nearby lines or hears you on N | Proximity chat reaches only living players within about 30 meters, and only during a game. With the host's team voice only on, N reaches only nearby teammates. |
| The scoreboard shows a dash for ping | There's no recent reading for that player. |
Halo 3: ODST
| Problem | What to do |
|---|---|
| A game shows NEEDS ODST in the Server Browser, or joining says Halo 3: ODST isn't installed | It's a game of Halo 3: ODST, or a server whose games use its objects. Enable Halo 3: ODST in Steam under Halo: The Master Chief Collection → Properties → DLC, let its download finish, and join again. |
| The main menu has no Firefight, or the Campaign page has no Halo 3: ODST | Both show only with Halo 3: ODST installed in MCC. Enable it as above. See Halo 3: ODST. |
| A game shows NEEDS REACH, NEEDS HALO: CE or NEEDS HALO 2, or the Campaign page or map picker has no Halo: Reach, Combat Evolved or Halo 2 | Each shows, and can be joined, only with that game installed in MCC. Enable it in Steam the same way, let its download finish, and join again. See Halo: Reach, Combat Evolved and Halo 2. |
Finding and joining games
| Problem | What to do |
|---|---|
| The Server Browser is empty, or few masters responded | No master answered in time. Refresh, or add a master under Settings → Online Services. Favorites are asked directly either way. When the masters answer but no server does, the list shows an example of the error, and client.log lists each server's. See When the server browser stays empty and master servers. |
| You can't join a server | The server may be offline or its ports closed. Ask the host for the address and try Direct Connect. |
| A server behind a router doesn't show up or can't be joined | Your game asks the master servers to introduce it to a listed server that doesn't answer directly, but some routers, firewalls and shared mobile or ISP connections still block that: ask the host to turn on UPnP or forward the game port. |
| A join fails and says the server or your game needs an update | Everyone in a game needs exactly the same version, and the message names both. If yours is older, update from the main menu; if the server's is, ask its host to update. 0.9 and 0.10 can't play together. |
| A server asks for a password | It's private. Ask its host for the password; a wrong one can be tried again. |
| Refused because your ping is too high | The host set a Max ping and your ping to the game is higher; the message gives both. The Server Browser marks such servers PING LIMIT. Pick a closer server, or try again when your connection is steadier. |
| Refused for using a VPN | Dedicated servers turn away players who connect through a VPN, proxy or hosting provider, so banned players can't come back from another address. Turn the VPN off and join again. On a cloud gaming PC, ask the server's admins to let your player ID through. |
| A join stops with a message that nothing was happening | A join is given up when nothing has moved for 30 seconds; a map still getting ready counts as progress. Check your connection and join again. If it keeps happening, client.log says what the join was waiting for. |
| A game on your network doesn't show in the Server Browser | Its host needs Network on LAN or Online, and a firewall on their computer has to let through the game port and UDP 44329. See LAN. |
| The server is full | The server has reached its player limit. Star it to find it again, or pick another server. |
| Your group doesn't fit (ROOM FOR 2) | Split-screen players count toward the server's limit and join together. Pick a server with room for everyone, or remove a player in Settings → Split Screen. |
| Co-op with character mods: you leave the host's game before the mission plays, with a message saying why | The game checks that your mission is the host's before it plays. It happens, for example, when your Halo 3 multiplayer maps are another version than the host's. See character mods. |
| Kicked from a server | A first kick keeps you out for 10 minutes; more kicks within a day, for 30, 60 and then 120 minutes. A ban lasts until the server's admins lift it, or for the time they gave. Both cover your player ID and IP address, and on Windows your PC, not just your profile. |
| Kicked by the anti-cheat | If you believe the kick was a mistake, make sure your game is up to date and tell the host when it happened. Ask them to report it with the server log on Discord. |
Hosting
| Problem | What to do |
|---|---|
| Friends can't join the game you host Online | Games hosted Online use UDP 11774 and only that port. If you forward ports by hand, forward it, or set your own port under Advanced connection in Host Settings. A firewall on your computer has to let the game through too. |
| Hosting Online says “Manual setup may be needed” | Your router didn't answer the game's request to open its port. Check that UPnP is on in your router and choose RETRY ONLINE SETUP, or forward UDP 11774 by hand. |
| A map “Damaged compressed variant data” message | The file itself is damaged, and MCC can't read it either. |
| An ElDewrito map or game variant stays in Maps or Game Modes | It couldn't be converted: its base map isn't installed, it needs an ElDewrito mod, or it has more objects that move than its base map has room for. client.log says which. See ElDewrito maps. |
| Some scenery is missing from a Forge or converted map after joining | The game tries again for frozen scenery it couldn't find at first. If pieces are still missing, client.log says why; send it along when you report it. |
Mods
| Problem | What to do |
|---|---|
| Refused for missing maps or mods | The message names what the game needs. Install those maps from your game, or get the mods (see Mods), and join again. |
| My campaign mod doesn't show | Check that it's a campaign mod made with MCC's mod tools, with a CampaignInfo.json in its folder, and that its folder is in your Mods folder or Steam has finished downloading it. Check that it isn't turned off in Settings → Mods, then open the Campaign page again. See Campaign mods. |
| A map clashes with a mod on this computer | You have another version of that mod. For Steam Workshop mods, the window offers UPDATE & JOIN or REPLACE & JOIN (see Mods). For other mods, delete it in Settings → Mods and join again. |
| A server's Workshop mod is older than yours | Steam only installs a mod's newest version, so the server has to update it. Dedicated servers look for new versions of their Workshop mods by themselves; ask the host if one doesn't update. |
| A download says Steam is offline | Steam is in offline mode, or signed you out because your account signed in elsewhere. Put Steam online, or sign in again, and join again. |
| A Workshop download stops for lack of space | Steam downloads the whole Workshop item into your Steam library. Free up room there, or ask the host to share its mod files, which sends only what the server uses. |
| A mod says No download source | It isn't a Steam Workshop item the server knows, and the host doesn't share it. Ask them to turn on Share mod files, or to give you the mod for your Mods folder. |
| A download says “Start Steam and sign in…” | The mod comes through Steam Workshop, which needs Steam running and signed in with an account that owns MCC. Start Steam and join again. If the host shares its mods, the game downloads from the server meanwhile. |
| “This mod requires Steam Workshop” | The server doesn't send mods itself, so they only come through Steam. Turn on Settings → Mods → Prefer Steam Workshop and join again. |
| A mod says Disabled on this PC | You turned it off in Settings → Mods. ENABLE & JOIN turns it on and joins. |
| “Too long a path for the game” | The folder downloads go to is too deep for the engine. Choose a shorter Downloaded mods directory. |