
What it is
The Reclaimer Kit is the editing kit for the Reclaimer Engine. Halo 3's Editing Kit is three programs: Sapien edits a level, Guerilla edits tags, and Tool imports files and builds maps. The Kit is one program that does all three, with the keys, panels and look of Blender.
It's also the game. The map you edit is running under the Kit's window, so a change shows as you make it. There's no separate test build: press F5 and you're playing what you just edited, and F5 again puts you back where you were.
The biggest difference from the Editing Kit is what it works on. The Editing Kit starts from loose tag files and builds a map from them. The Kit starts from the maps you already own, keeps a list of your changes, and writes those changes into a new map. You don't need any tags to make a real map, and the originals are never touched. If you do have the Editing Kit's tags, the Kit can use them too: see what you need.
Who it's for
- Map makers who want more than a saved Forge variant: real placements on the map itself, scenario lights, decals, painted foliage, and Forge's objects and materials on top.
- Forge builders who already think in blocks. The Kit has Forge's whole palette, its properties, magnets and prefabs, with the precision of an editor: typed coordinates, snapping, box selection and full undo.
- Tag modders who want to change how a weapon, vehicle or effect behaves, and see the change in the running game.
- Scripters who want to read and change a map's HaloScript, compile it with errors at the line, and try things in a live console.
- Editing Kit users who want to bring tags, models, animations and sounds into a map without a Windows-only tool chain. The Kit runs on Windows, macOS and Linux.
Forge or the Kit?
Forge is the fastest way to build: you fly around the map in the game, with friends if you like, and save a map variant that anyone can load. Use the Kit when you want to change something Forge can't reach.
| Forge | Reclaimer Kit | |
|---|---|---|
| Where you work | In the game, as the monitor | In an editor window, over the running game |
| What you make | A saved map variant on an existing map | A new map in a mod package |
| Objects | Forge's palette, its properties, materials and volumes | The same palette and properties, plus the map's own placements, which you can move, delete or change |
| Beyond objects | The map's sky, look, fog, gravity and boundaries | All of that, plus scenario lights, decals, decorators, the atmosphere, tags, textures, sounds, strings and scripts |
| Building with friends | Yes, live | No: one editor. Friends join once you host the map |
They work together. A map you compile in the Kit can be played in Forge like any mod map, prefabs saved in either one show up in the other, and Megalo game modes run on it.
What you need
- Project Reclaimer 0.10 or later, set up and started once, so it has found your game. See install.
- Your own copy of Halo 3 from The Master Chief Collection. The Kit opens and edits the maps you have installed. With Halo 3: ODST installed as well, its objects join the object browser. ODST's own maps don't open in the Kit.
- A mouse with a middle button helps, but it isn't required. On a Mac trackpad, the Kit works the way Blender does.
Optional: the Editing Kit's tags folder
Nothing from the Halo 3 Editing Kit ships with the game. If you have it installed, you can point the Kit at its tags folder in Edit → Preferences. The folder is only ever read, and the Kit reads tag definitions from your files as it runs. Everything in this tutorial works without it.
| Without the tags folder | With it |
|---|---|
| Level, Forge's properties, saving, compiling, hosting, Scripts, the console and debug drawing all work. | All of that too. |
| The Tags workspace shows most fields by their position, as numbers you can still edit. | Every field has its real name and type: menus for options, checkboxes for flags, angles in degrees, color pickers. |
| Assets exports textures, sounds, models and animations, and replaces existing textures and sounds. | Also: File → Import Tags for tags, new bitmaps, new sounds and JMS models; JMA animations; Re-bake Lighting; and Editing Kit scenarios in File → Open Scenario. |
Open the Kit
The Kit is an app of its own: get the download for your system from the download page. It needs only MCC, with no game beside it, and asks where MCC is if it can't find it. It uses the same player folder as the game.
| Platform | Download | Keep in mind |
|---|---|---|
| Windows | reclaimer-kit-version.exe | Keep reclaimer-kit in the file name: under another name, the program is the game. |
| macOS | reclaimer-kit-version-macos-aarch64.zip, with Reclaimer Kit.app in it | Move it to Applications or any folder. macOS blocks its first start as it does the game's: see Install on macOS. |
| Linux | reclaimer-kit-version-linux-arch.tar.gz | Run ./project-reclaimer-kit. Add its desktop entry to your menu if you want an icon for it. |
With the game installed, RECLAIMER KIT in its main menu opens the same editor, with nothing more to download, and File → Close Kit brings you back to the menus.
The Kit updates itself. Like the game, it looks for a newer release when it starts and every six hours, and shows one as a button at the top bar's right. Update & Restart downloads it while you keep working, then puts it in place and starts it. Unsaved changes hold the restart back until you choose Restart Without Saving or Later.
Started on its own, or with --kit, the Kit opens in a normal window that you can move and resize, and closing it ends the program. The reference has the command-line forms.
The workspaces
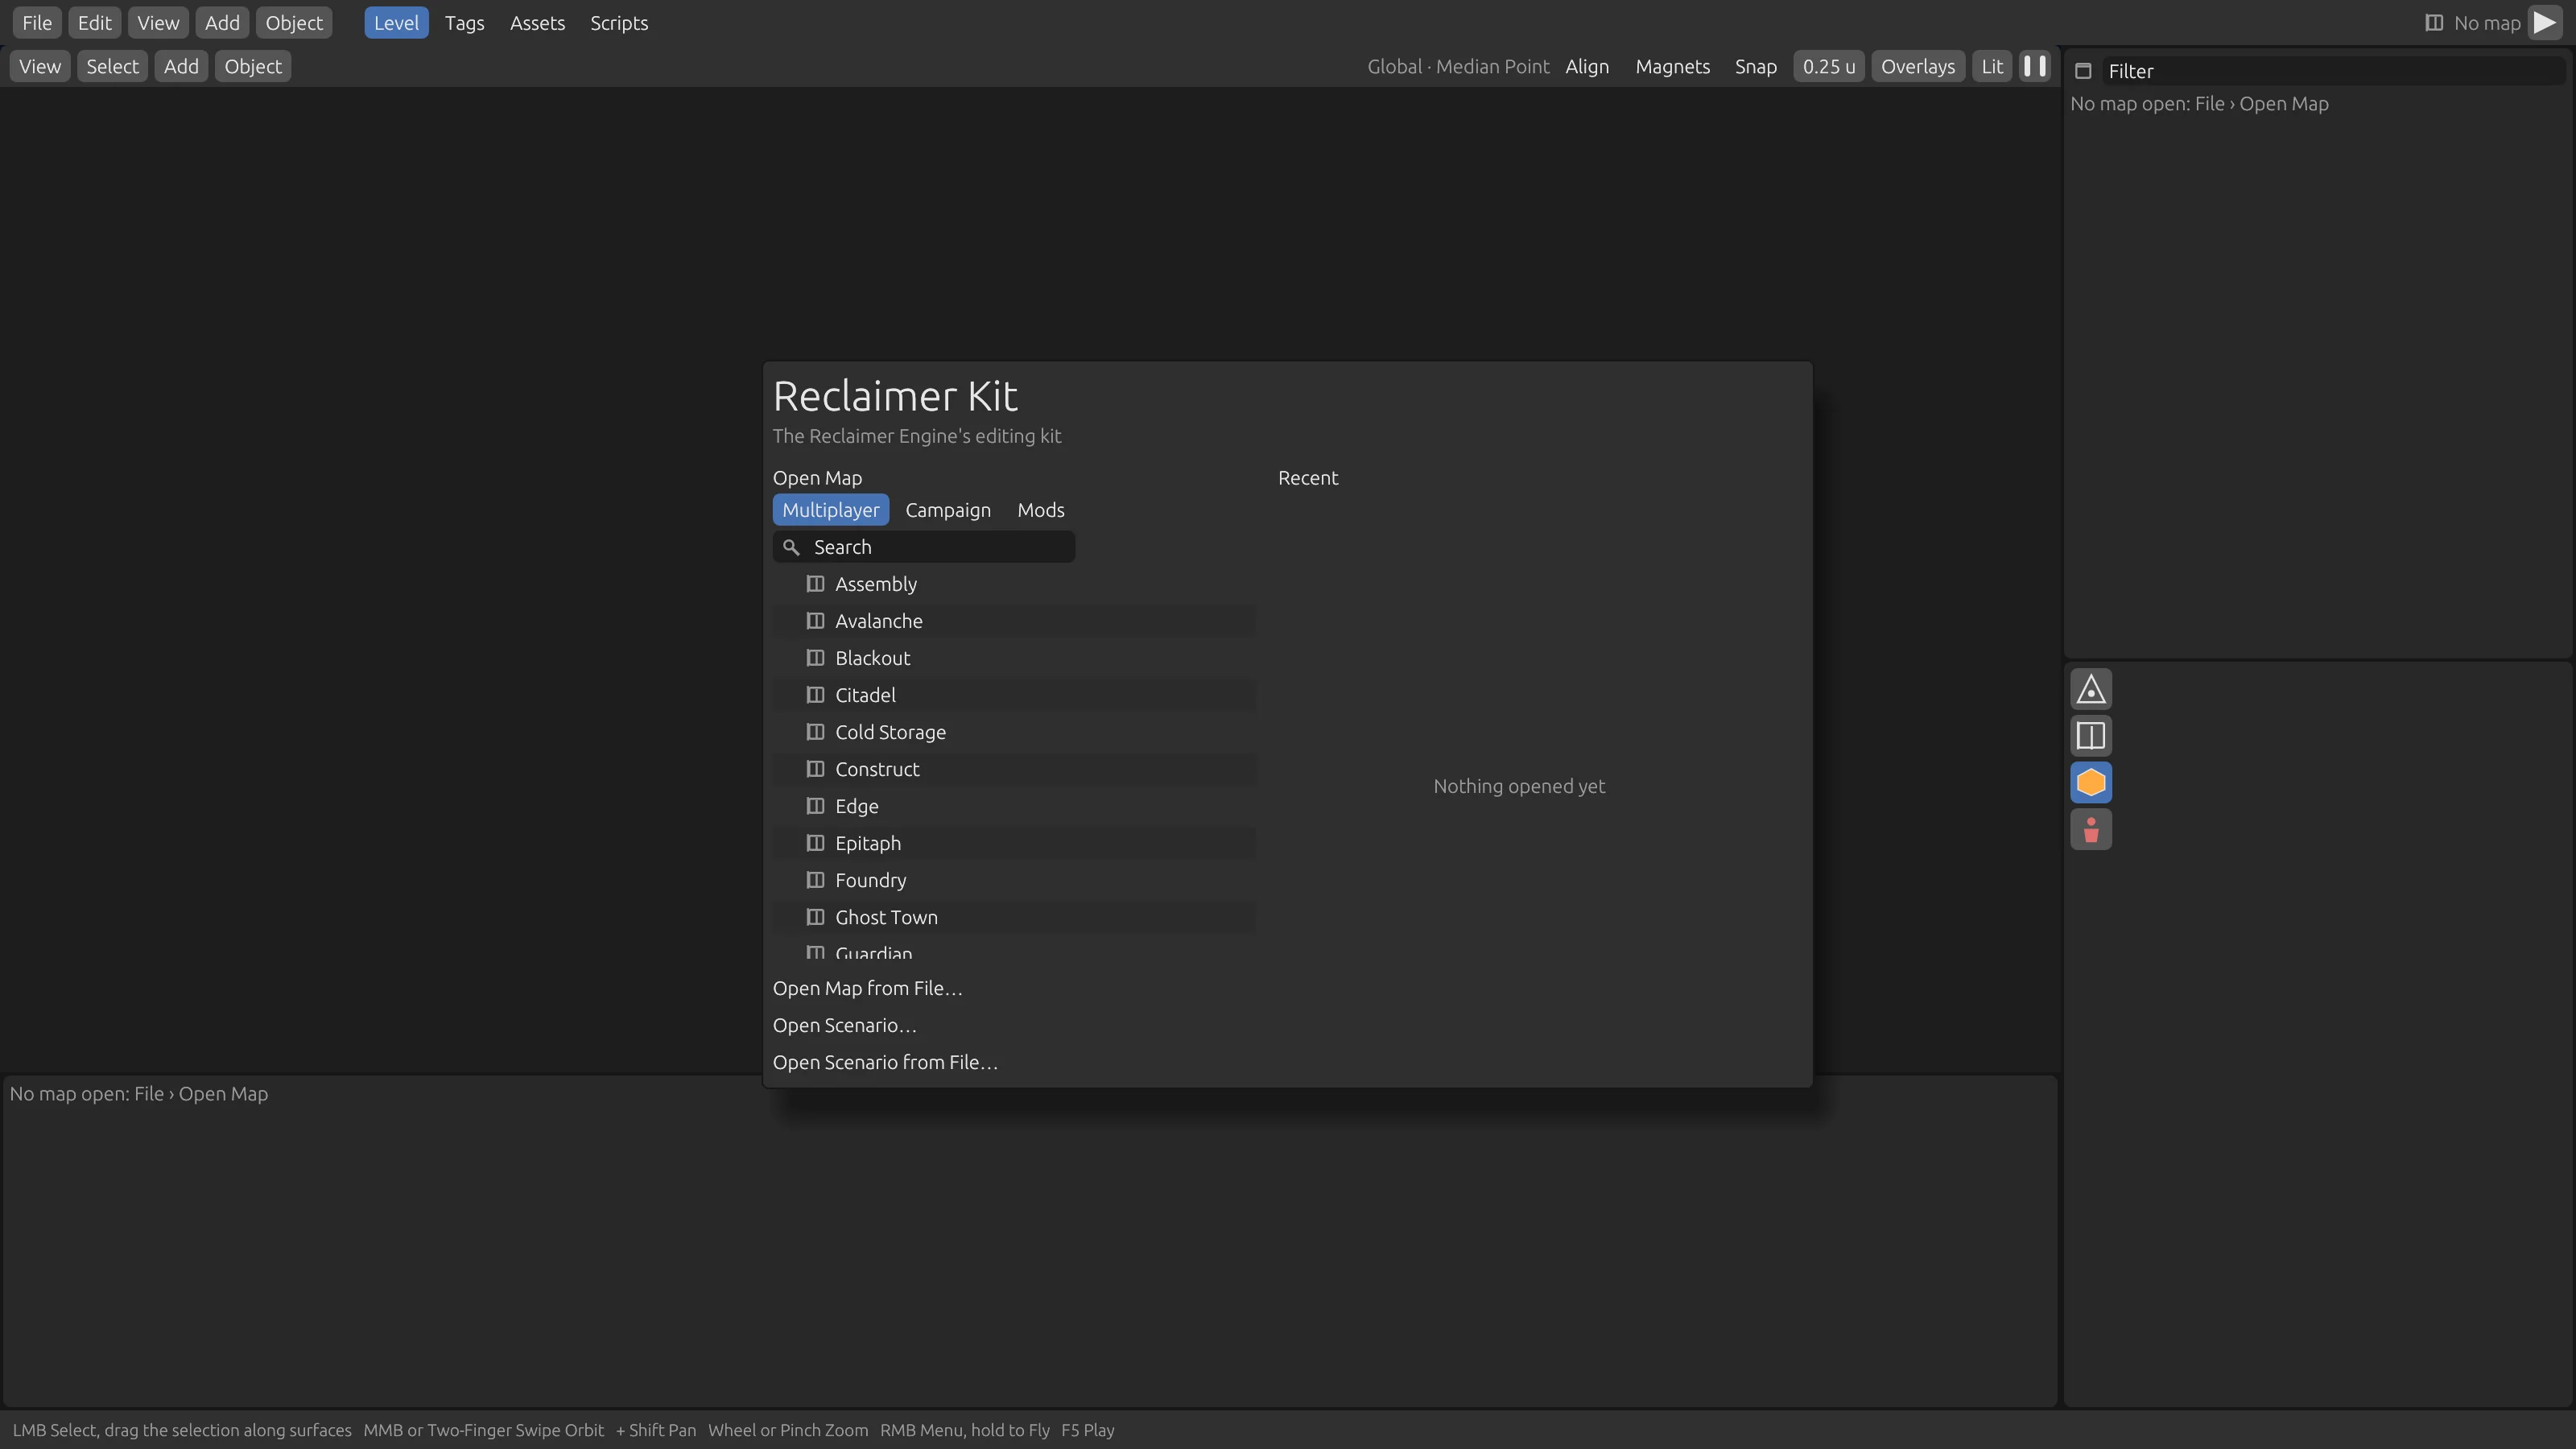
Without a map open, you get the start screen: the maps you can open on the left and your recent work on the right. Once a map is open, the bar along the top holds the menus, four workspaces, the map's name with a dot when it has unsaved changes, and the ▶ button that plays it. The bar along the bottom says what the mouse does right now, and reports what just happened.
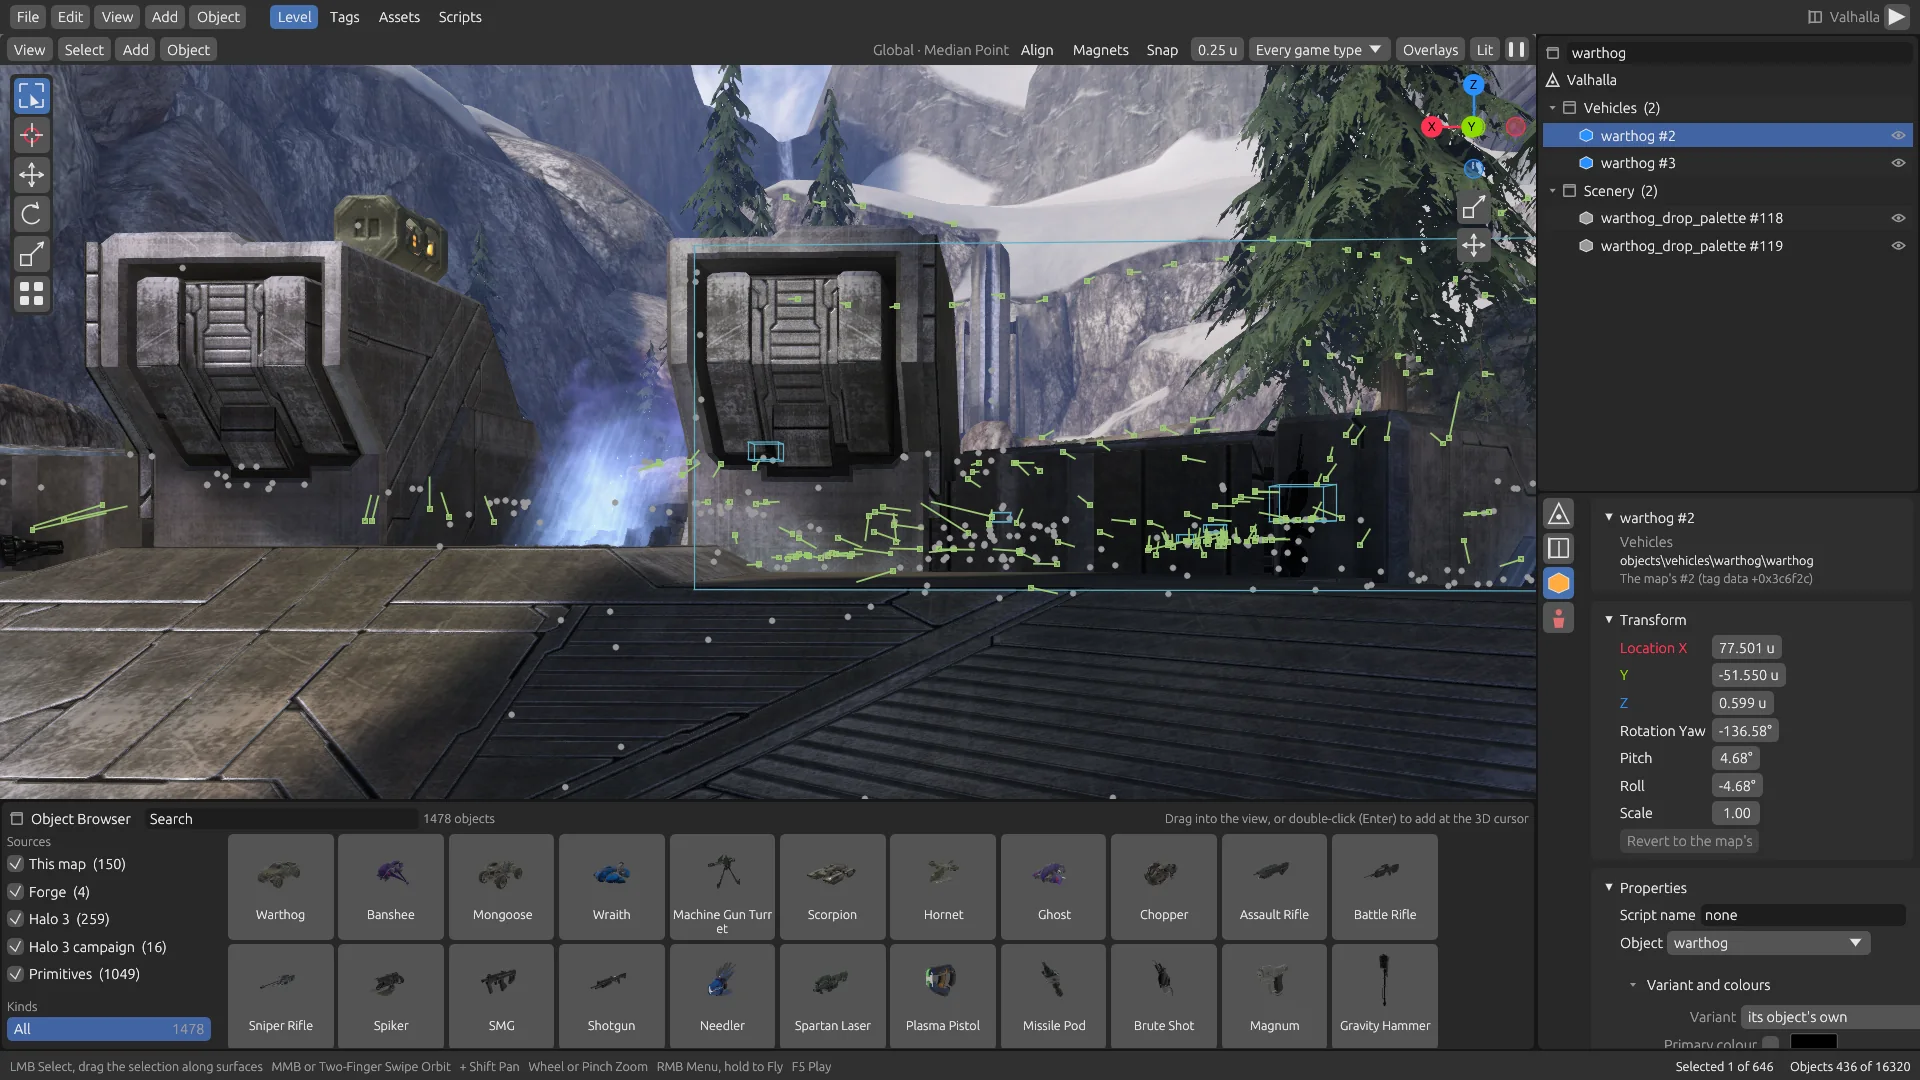
Level
The scenario, edited over the live game. This is Sapien's job, and where you'll spend most of your time: the 3D viewport with its toolbar and gizmos, the object browser under it, the outliner listing everything in the map, and the properties editor with its Scene, World, Object and AI tabs.
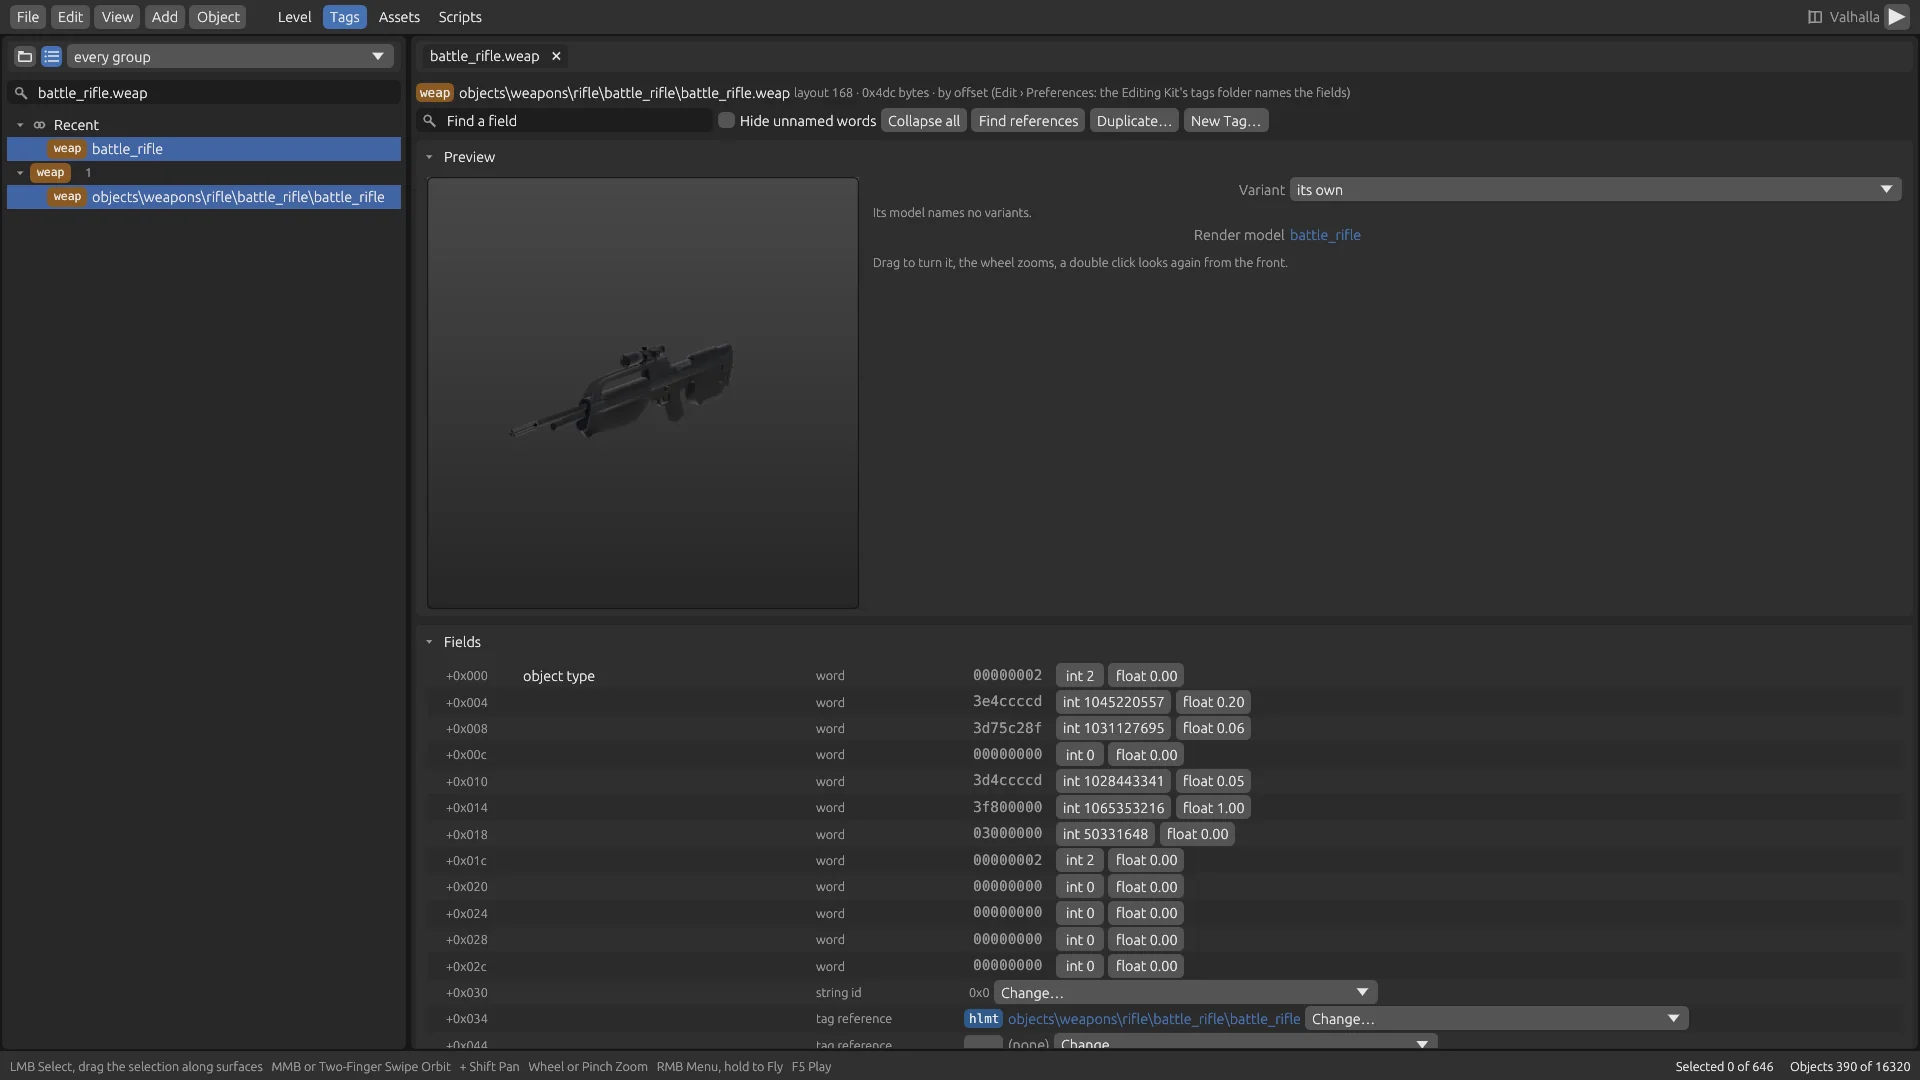
Tags
Guerilla's job: every tag in the open map, in tabs, with a preview, its fields, and its blocks opening in place. Change a magazine's size and the next rifle has it. Functions and shader parameters have their own editors.
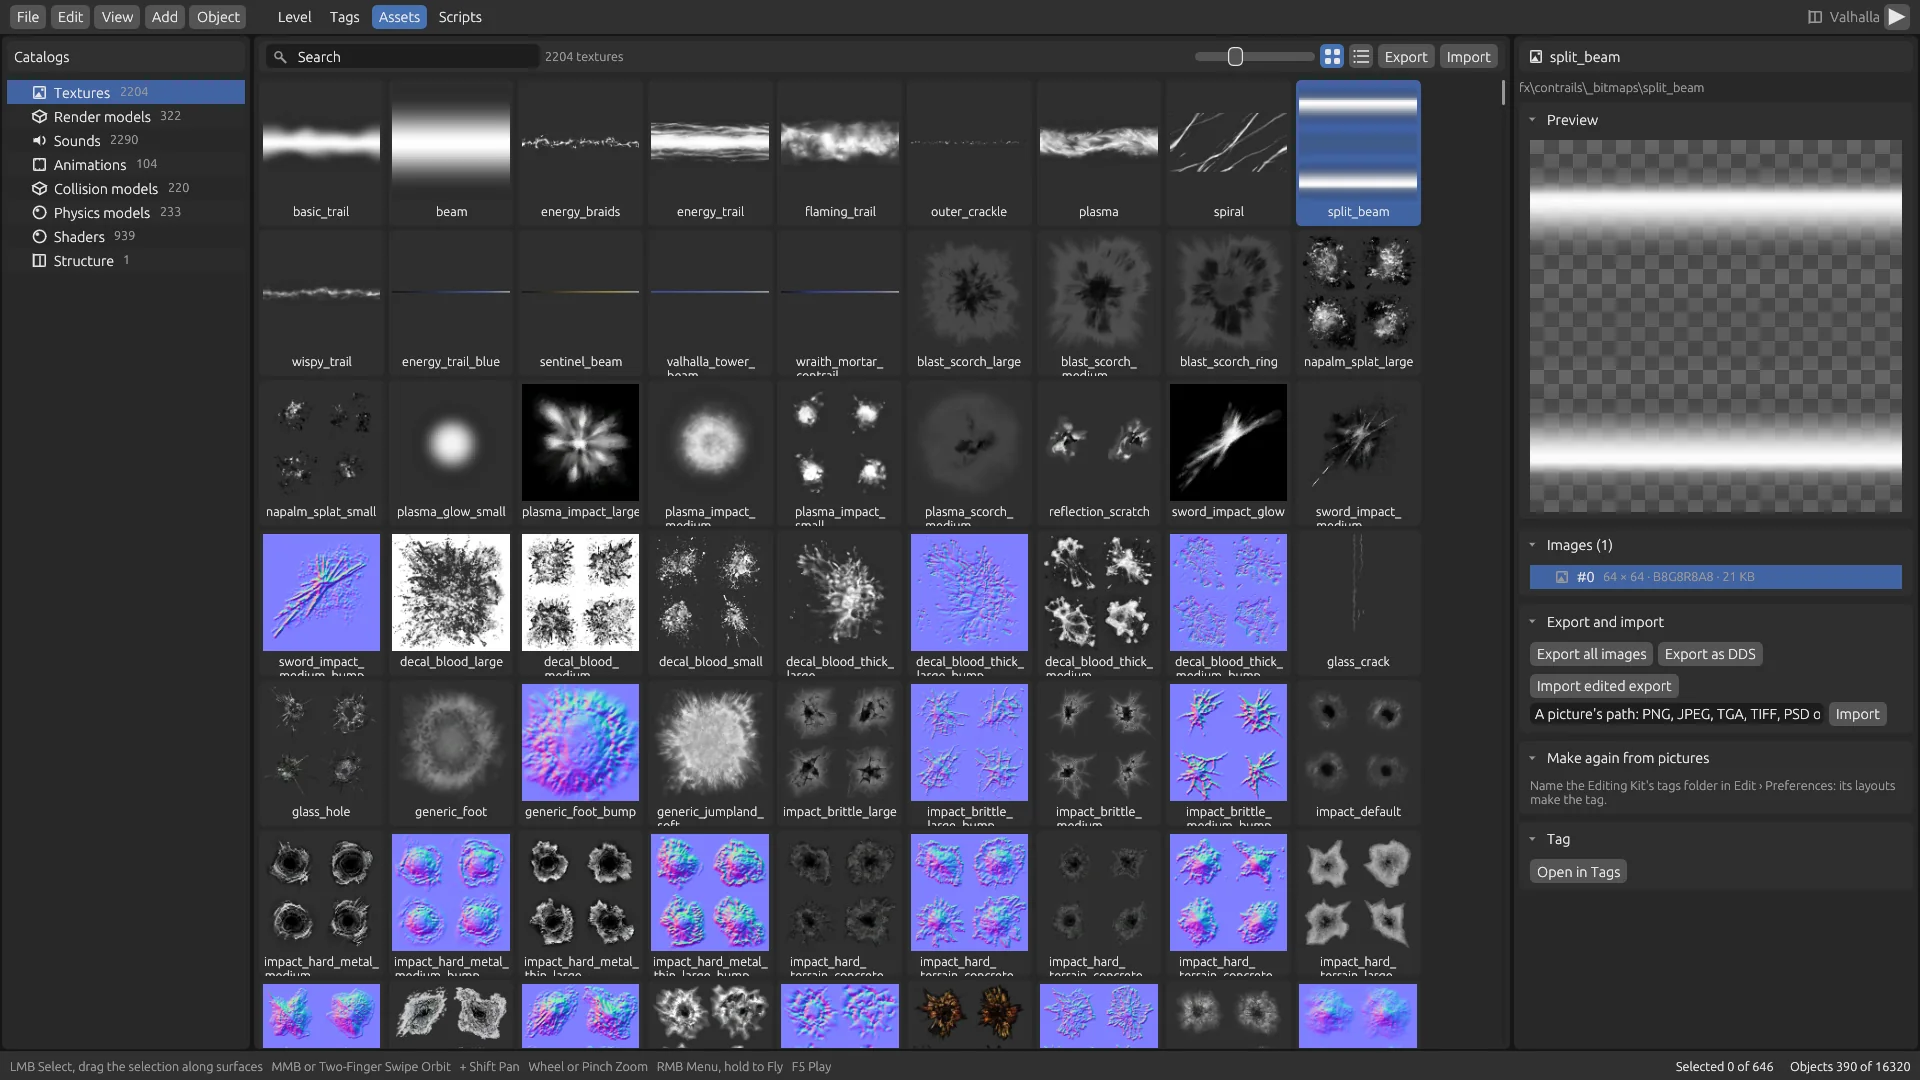
Assets
Tool's job, laid out like an asset browser: the map's textures, models, sounds, animations and more as a searchable grid. Export them, change them in your own programs and bring them back.
Scripts
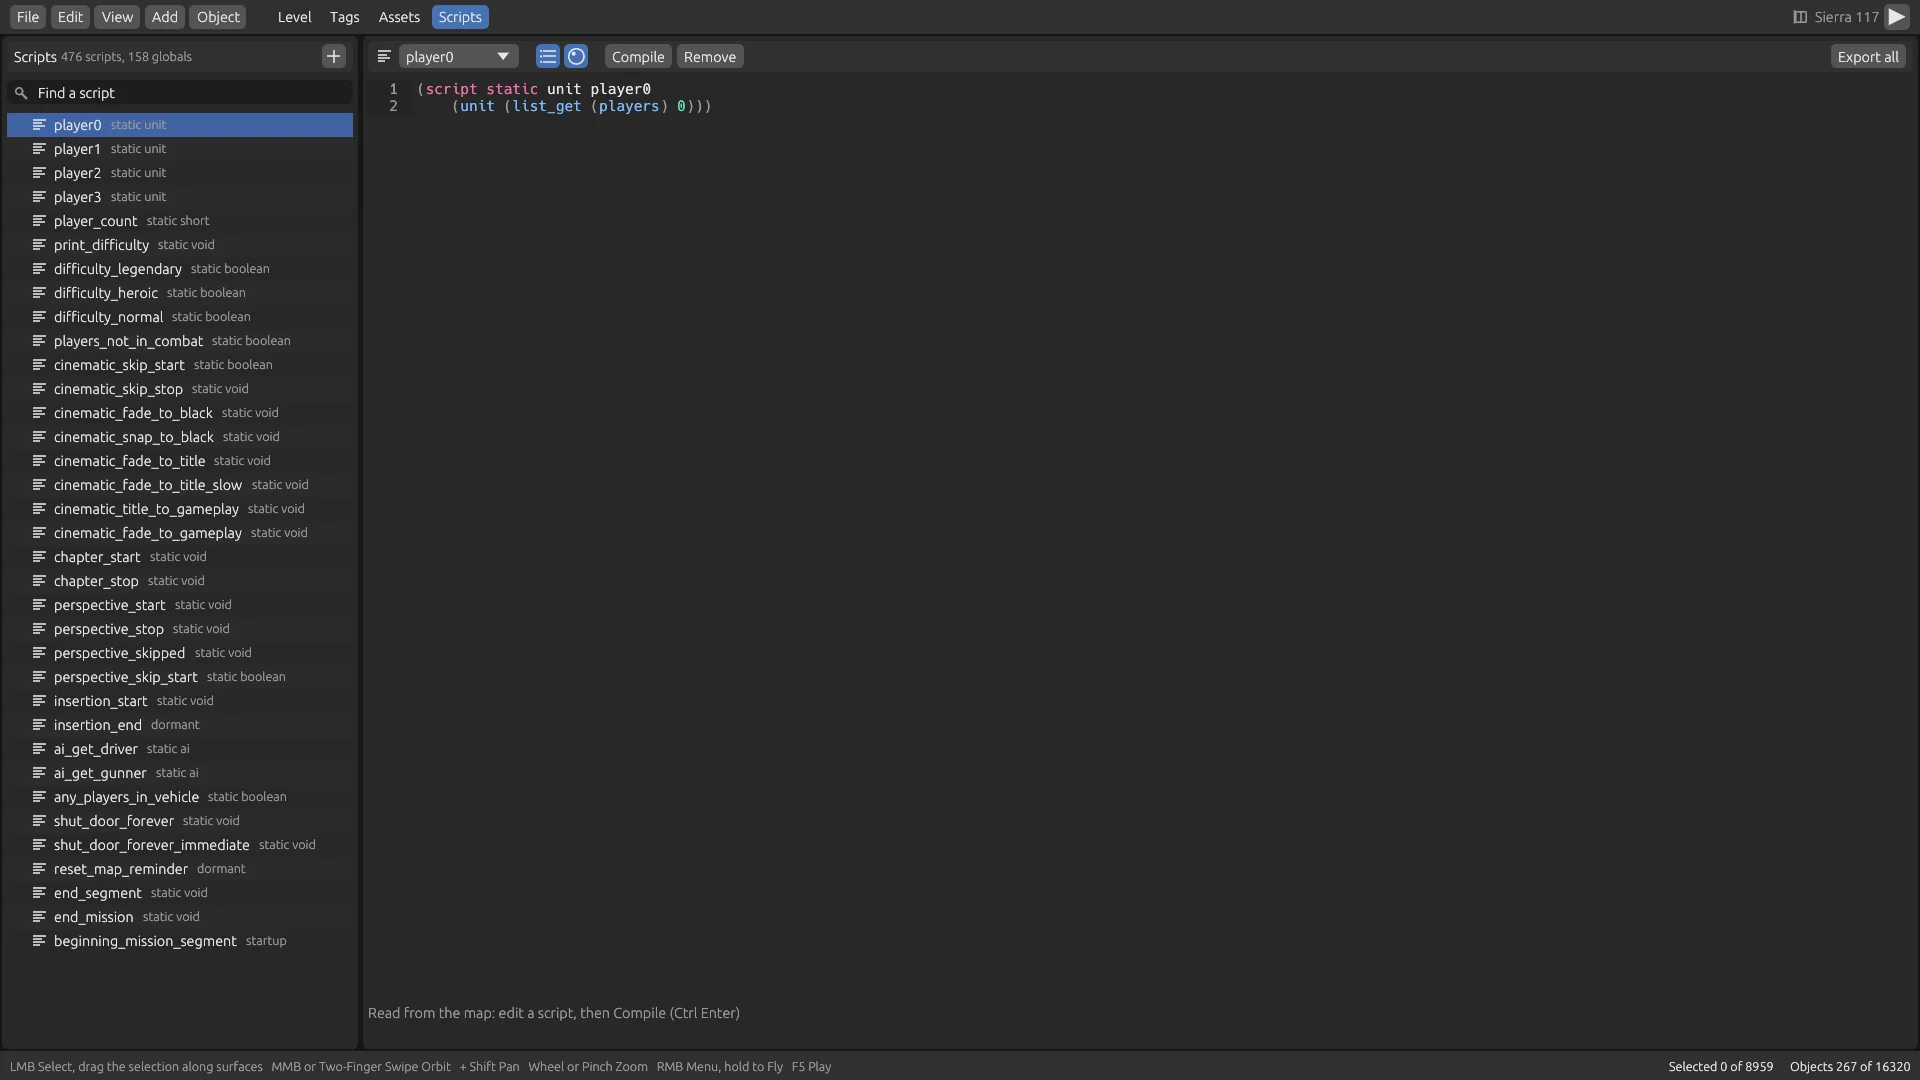
The map's compiled scripts, read back as HaloScript in a text editor with line numbers and syntax colors. Edit them, add your own, and compile with Ctrl+Enter: errors show at their line, and a clean compile loads into the game.
Console and debug drawing
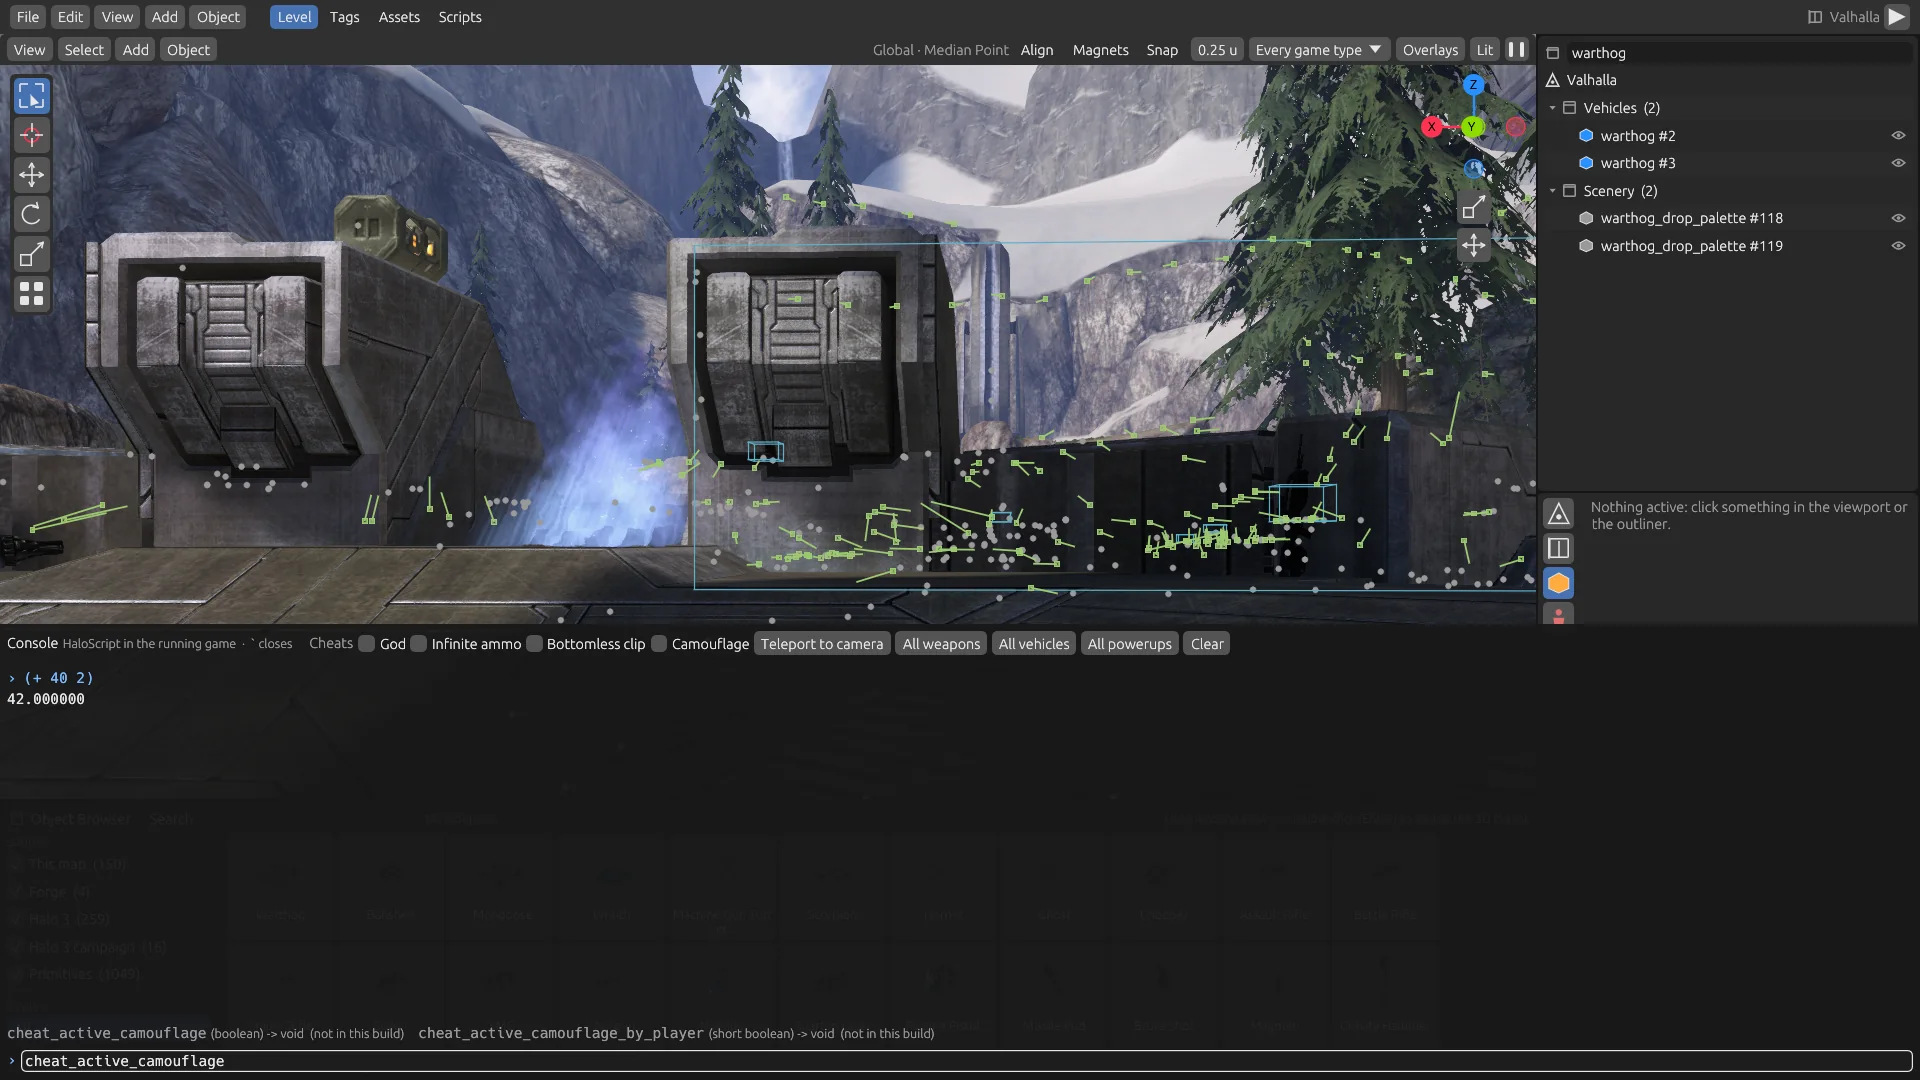
Press ` and a console opens over the game, in the Kit and while you playtest. It evaluates HaloScript in the running game, completes names with Tab, and has one-click cheats. The viewport's Overlays draw collision, pathfinding, AI and spawns over the view.
Your first map
This walkthrough takes you from nothing to a map a friend can join. You'll put a few vehicles and a wall on Guardian, change a rule or two, and host it. It needs no Editing Kit files. Every step is covered in more depth in the reference.
Shortcuts here say Ctrl. On a Mac, Cmd works too, and Alt is Option. Keys go to the area under the mouse pointer, so keep the pointer over the 3D view when you use them.
1. Open a map
- Open the KitChoose RECLAIMER KIT in the main menu. The start screen appears.
- Find the mapClick the Search box above the list, type
guardian, and click Guardian. - Wait for it to loadThe viewport says what's loading. The first time you open a multiplayer map, the game may also build its Forge library, which collects the objects of every installed map. That takes a minute or so, once.
The camera opens at eye height over the map's first spawn point, facing the way a player would. The small target on the ground there is the 3D cursor: new things go there unless you drag them somewhere else.
2. Look around
Hold the right mouse button and you're flying: the mouse looks, W A S D move, Q and E go down and up, and Shift goes faster. Let go and the view stays where it is.
| Do this | To |
|---|---|
| Hold right mouse | Fly, as in Sapien. The wheel sets the speed |
| Drag with the middle mouse button, or Alt + left drag | Orbit. Add Shift to pan, Ctrl to zoom |
| Mouse wheel | Zoom |
| 7, 1, 3 | Top, front and right views |
| . or F | Frame what's selected |
| Home | Frame the whole map |
| Two-finger swipe, pinch | On a Mac trackpad: orbit and zoom. Add Shift to pan |
The game keeps running while you look around. Press Space to hold the world still, and again to let it run.
3. Move something
Click a weapon on the ground. It gets an orange outline, and the Object tab of the properties editor shows what it is. The toolbar is at the left of the viewport (T shows or hides it). Try each of these:
- Drag it. Drag the selected object: it follows the surfaces under the pointer. Hold Ctrl to snap to the grid.
- Use the gizmo. Choose Move in the toolbar, then drag an arrow to move along that axis. Rotate and Scale work the same way.
- Use the keyboard. Press G, Z, type
3and press Enter: the object goes up exactly three units. The same goes for R (rotate) and S (scale). - Put it down again. Press Page Down and it drops to the ground under it.
Press Ctrl+Z to undo. Every edit in the Kit has undo, including tag edits. The change happened in the running game, and the map on disk hasn't been touched.
4. Add objects
The object browser sits under the viewport. Its left side has Sources, with a box each (This map, Halo 3, Primitives and more), and Kinds: All, Primitives, Forge, Prefabs, then vehicles, weapons, scenery and the rest.
- Find a vehicleClick in the browser's Search box and type
warthog. - Drag it inDrag a Warthog tile into the viewport. The object appears at once and follows the pointer. Let go on open ground and it stays there, selected. Drag it back out of the view before letting go to cancel.
- Copy itWith the Warthog selected, press Shift+D, move the mouse and click. Now there are two.
- Add a wallSearch for
block, or choose Primitives under Kinds, and drag a block in. Primitives are the same building shapes as in Forge.
A double-click on a tile adds the object at the 3D cursor instead. Hold Shift and right-click on the level to put the cursor somewhere else.
5. Edit their properties
Click your block and open the Object tab, the cube icon at the left edge of the properties editor. On a multiplayer map you get the rows of Forge's Properties menu, and each change shows at once.
- Under Material, pick a surface from the pictures. Search finds other maps' surfaces too. Under Size, make the block longer.
- Under Forge, set Physics to Fixed so the wall can't be pushed around.
- Click a Warthog. Under Forge, set Respawn, and try Variant and colours to choose its turret.
Now change the map itself. Open the Scene tab, then the World panel. Pick another map's Sky, or set Gravity. These are the settings of Forge's Map tab, kept with your map.
6. Playtest
Press F5 (Fn+F5 on a Mac keyboard) or click ▶ at the top right. The Kit steps aside and you're playing the map with every edit in place: a Slayer game with no time limit. Drive the Warthog. Check that the wall is where you want it.
Press F5 again, or choose RETURN TO RECLAIMER KIT in the pause menu, and you're back with your camera where it was. The level goes back to how it was before you played, so anything you broke or dropped is gone.
7. Save your work
The Kit keeps two things apart, the same way Sapien and Tool do. A scenario is your work file: a small list of your edits that opens again for more work. A compiled map is what people play. You'll want both.
- Press Ctrl+SA Save As window explains that Guardian is an original map and stays as it is.
- Name itType
guardian_hogs. Names use letters, digits,_and-, with no spaces. - Press EnterThe blue Save Scenario button saves it, as
Kit Projects/guardian_hogs/guardian_hogs.rkscenarioin your player folder. It's a few kilobytes.
From now on, Ctrl+S saves straight away. Next time, your scenario is under Recent on the start screen: it opens the map and brings back every edit, still live and still editable.
8. Compile the map
- Check the boxOpen the Scene tab and find the Compile panel. Leave Compile for Reclaimer on. It keeps a recipe with the map, which is what makes the download so small. The panel also counts what you've moved, deleted and added.
- Press Ctrl+BSave As opens again, with Compile Map as the blue button. Type
guardian_hogsand press Enter. An installed map's name, such asguardian, is refused, so no package can stand in for an original. - Wait for the reportThe status bar says it's saving, then Saved… with the path. Your package is
Mods/guardian_hogs/in your player folder, and the game lists it as Guardian Hogs. - Check itChoose File → Verify Map…, then Verify the compiled map. Every reference and resource in the map is walked and any problem is listed. You want No problems.
Keep working from the scenario, not from the compiled package: open the scenario, make your changes, and compile again under the same name. A package opened directly and compiled again has no recipe, so it carries the whole map.
9. Host it
- Leave the KitChoose File → Close Kit, and HOST GAME in the main menu.
- Choose the mapOpen the MAP row and the MULTIPLAYER tab, search for
guardian hogs, select its card, which has a mod's mark, and choose USE GUARDIAN HOGS. Pick a GAME TYPE. - Share itOpen HOST SETTINGS and turn on Share mod files under MODS. If you forget, the game warns you that players can't get the map, and offers to turn it on.
- Go onlineStep the NETWORK row from Local to Online. The lobby's line under the title shows your address, with COPY beside it, and PLAYERS NEED names your map.
- StartChoose START GAME.
How to play covers hosting in full, and Host a server has mod maps on a dedicated server.
10. A friend joins
Your friend needs Project Reclaimer and their own copy of the game. They don't need your map.
- Find your gameIn SERVER BROWSER, your game has a mods mark after its name. Or they can use DIRECT CONNECT with the address you copied.
- Download and joinThe join button reads DOWNLOAD & JOIN and lists your map. The download is the recipe, a few kilobytes. See mods for how downloads work.
- PlayTheir game makes the map from their own installed maps, checks that it matches yours exactly, and joins. If you used other maps' objects and their Forge library isn't built yet, that's built first.
None of the original map's data travels between you. If the check fails, one of you has different game files: see troubleshooting.
Where to go next
Build it out
Spawns, goals, teleporters, kill volumes, lights and AI spawners are all in the object browser. See Forge's items and rows of copies, magnets and prefabs, or play your map in Forge.
Set the mood
Add scenario lights and decals, paint decorators, and change the atmosphere and weather.
Change the rules
Open a weapon or vehicle in Tags and change its numbers. Duplicate a tag to make a new object you can place. Write a game mode for your map with Megalo, or see all game modes.
Bring your own art
Replace textures and sounds in Assets. With a tags folder, import new bitmaps, sounds, JMS models and JMA animations.
Script it
Read and edit the map's HaloScript, then try ideas in the console first.
Share it for good
Host it on a dedicated server, put it in a playlist, or send the package folder to friends: sharing a mod covers each way.
What works today
Multiplayer is the Kit's finished workflow. Each of Halo 3's 27 multiplayer maps went through the same run: open it, move and add objects, set properties, place Forge's items, change the world, edit a tag, save and reopen, compile, make the map again from its recipe and compare it byte for byte, play Slayer and Forge on it, then host it for a joiner who started with nothing.
Campaign editing got a long way, but it's on hold and hasn't had that run. Treat it as an experiment you can try, not a workflow you can rely on.
Other games' maps open as Halo 3's do, with Halo: Reach, Halo: Combat Evolved or Halo 2 installed: the game makes each one from your own files as you open it. Reach's 20 multiplayer maps open, edit and compile, and its missions and Firefight maps open and edit; Re-Bake Lighting and imported levels are refused on its maps. None of them has had the 27-map run yet.
| Area | Multiplayer maps | Campaign missions |
|---|---|---|
| Objects: place, move, delete, variants, colors | Checked on all 27 | Works |
| Forge's properties, volumes, spawners, world | Checked on all 27 | Multiplayer only |
| Tag edits, duplicated tags | Checked on all 27 | Works |
| Save, reopen, compile, recipe | Checked on all 27 | Saves and compiles to a campaign package with the whole mission map. No recipe |
| Host and join | Checked on all 27 | Not checked from start to finish |
| Lights, decals, decorators, atmosphere | Works | Works: lights, decals and atmosphere checked in compiled missions |
| Trigger volumes, flags, camera points | Works | Works |
| Textures, sounds, strings, scripts, console | Works | Works |
| Zone sets, BSPs, designer zones | One zone set: nothing to switch | Works |
| AI: squads, areas, objectives, tasks | Use Forge's AI spawners | Edits save and compile, with the crash warned about below |
| Cinematics: the Timeline | None to edit | Works, checked on Sierra 117 and The Storm |
Compiled missions can crash when AI squads are placed. On Tsavo Highway, the game crashed every time once a squad was placed in a compiled mission. It does the same with an unmodified copy of the mission played as a campaign mod, so the cause isn't your edits, and it isn't fixed yet. The installed mission is fine.
Not yet
- New levels from scratch. Reading a level from an ASS file is unfinished: in the test room, only the floor is drawn, and the player stops short of the walls. For now, build on an existing map.
- Zones. A mission's AI zones can be renamed and given new areas, but not added or removed.
- Jump, climb and well hints. They can be placed and saved, but the AI only uses them once a level's pathfinding data is built again, and the Kit doesn't do that for a level a map already has. Flight hints work.
- Lighting a whole level. Added or changed lights can be baked into an installed map's lighting. A complete bake of a new level is close to the real thing but not a match for it.
- Sounds from tags alone. The tags folder keeps sound samples in a format the Kit can't read. A sound imported from tags plays from its source files in the Editing Kit's
datafolder, or stays silent, and the report says which. - Importing OBJ or glTF. Those are exports only. Models come in as JMS files.
- Publishing. There's no upload button: you share a map by hosting it or by sending its folder. See sharing a mod.
The reference has the full list of limits. Found something that doesn't work? Tell us on Discord.